

Rough Puff Two Ways

Hello and thank you for being here! This week we’re chatting about puff pastry, or rather, the lazy person’s version of puff pastry. If you’ve never made puff or any kind of laminated dough before rough puff is where to start! It follows the same principals of layering butter and dough to get a deliciously flakey pastry but it’s much faster, less precise and easier. To be honest I can’t think of a single occasion where I’d make traditional puff rather than rough puff, it’s so much faster and the results are so good I can’t see a reason to faff about making butter blocks and separate doughs.

What Is Rough Puff
Traditional puff pastry is made by making a dough (détrempe), enclosing a butter block in the dough and then doing a series of folds to create layers upon layers of butter and dough which then puffs up as it bakes. Rather than making a separate dough and butter block, when making rough puff the two are mixed together giving us a dough full of big chunks of butter, we then do a series of folds on this dough which distributes the butter throughout, forming lots of lovely layers! Now, of course the layers aren’t as even as with a regular puff pastry but I don’t find that this makes too much of a difference.


The Folds
One of the many good things about rough puff is that it requires less folds, regular puff usually calls for 6 single folds/3 double folds or a combination of the two whereas rough puff only needs 4 single folds or 2 double. If you’re just starting out I’d recommend doing single folds (letter folds), these are done by dividing the pastry into 3 and folding each third over each other, as you can see here!

Cocoa Puff
Nicola Lamb has a wonderfully informative post on cocoa puff pastry, I’ve made her recipe and it works great however, I’m too lazy to make full puff so I wanted to make a quicker, easier rough puff version. The substitutions for this recipe were fairly straight forward, I just took a bit of flour out and added cocoa powder, I also upped the liquid slightly as cocoa absorbs up to 100% of its own weight in water whilst flour only absorbs up to 40%. The main problems that I found with cocoa puff compared to regular was shrinkage so I substituted some of the strong flour for plain. The other challenge that I find with cocoa puff is that it can be quite bitter, usually when we add cocoa to pastry we also add in some sugar but puff doesn’t contain sugar and we can’t add a significant amount without making the dough into a sticky mess, my solution for this is to dust it with a light layer of icing sugar between each fold and paring with a sweeter filling.
After you’ve made your puff you can use it however you like but I’ve included a recipe for some palmiers in case you need some inspiration, these can be made with the cocoa puff or regular and you can alter the fillings to suit your preferences, I often make savoury ones filled with Prosciutto and parmesan. For paid subscribers I’m sharing a recipe for chocolate custard slice which is possibly one of the most indulgent things I’ve ever made.
Rough Puff
Ingredients - makes one block
125g strong/bread flour
125g plain flour
5g salt
250g cold butter, cut into 1cm cubes
110g cold water
1/2 tsp white vinegar
Cocoa Rough Puff
Ingredients - makes one block
50g strong/bread flour
150g plain flour
50g cocoa powder
5g salt
250g butter
140g cold water
1/2 tsp white vinegar
Method
Weigh all of the dry ingredients and give them a quick mix to combine.
Add the cold butter, it should be diced into approximately 1cm cubes but there’s no need to be super precise.
Mix the butter and dry ingredients until the butter just starts to break up, this can either be done by hand or in a stand mixer, we still want nice big chunks of butter so don’t mix it too much at this point.
Add the cold water and vinegar and mix briefly, if you’re using a stand mixer the dough will still look quite dry, and you’ll have a lot of flour at the bottom of the bowl, this is easier to incorporate by hand so be careful not to over-mix.
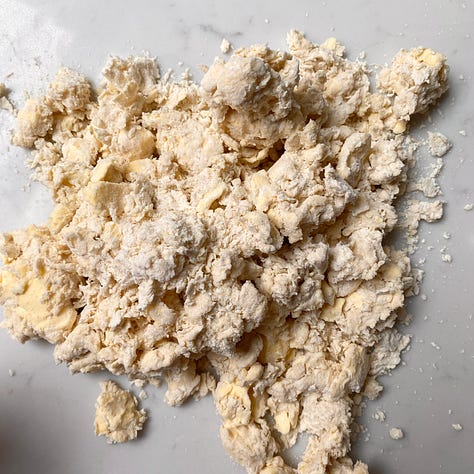
Tip everything out onto the worktop and lightly knead until it comes together into a shaggy dough, it will be lumpy and have some dry bits, this isn’t an attractive dough (not yet anyway!).
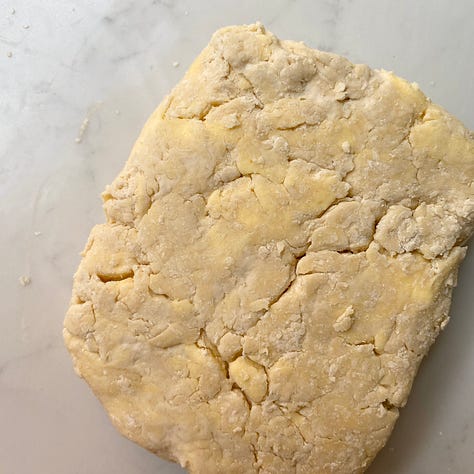
Form into a square or rectangle, the better your starting shape is, the easier it’ll be to roll and fold later so try to get it relatively even.
Wrap in clingfilm or in a sandwich bag and rest in the fridge for at least an hour.

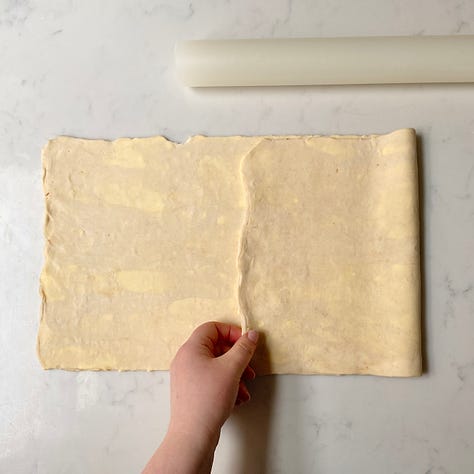
Once rested, roll the dough out, you want to keep it as rectangular as possible, I do this by nudging the sides in with the rolling pin every so often (see gif below). You need to use just enough flour to prevent it sticking, but don’t go overboard, if you have added too much you can brush the excess off with a clean pastry brush. Rotating the pastry often and flipping from time to time will top it from sticking and help you get a nice even rectangle.
Roll out until you have a nice long rectangle, mine was approximately 20cm x 60cm but it doesn’t need to be precise.
Do one single fold, by folding the bottom third of pastry over the the middle third, fold the top third over so that you have 3 even layers of pastry, you might need to make some adjustments so that they’re evenly layered (if making the cocoa puff dust with a light layer of icing sugar before folding, do this at every fold).
Rotate the pastry by 90°, roll out again and perform another single fold, if you’re working in a very hot kitchen you might need to chill the pastry before doing the second fold but I find I can usually do it straight away.


Once you’ve done 2 single folds, wrap and rest in the fridge for at least an hour.
When the pastry has been resting for at least an hour repeat steps 10 and 11. In total you will have done 4 single folds at which point it’s done!
Chill for an hour before using or at this point you can freeze it! Or use to make some palmier biscuits.


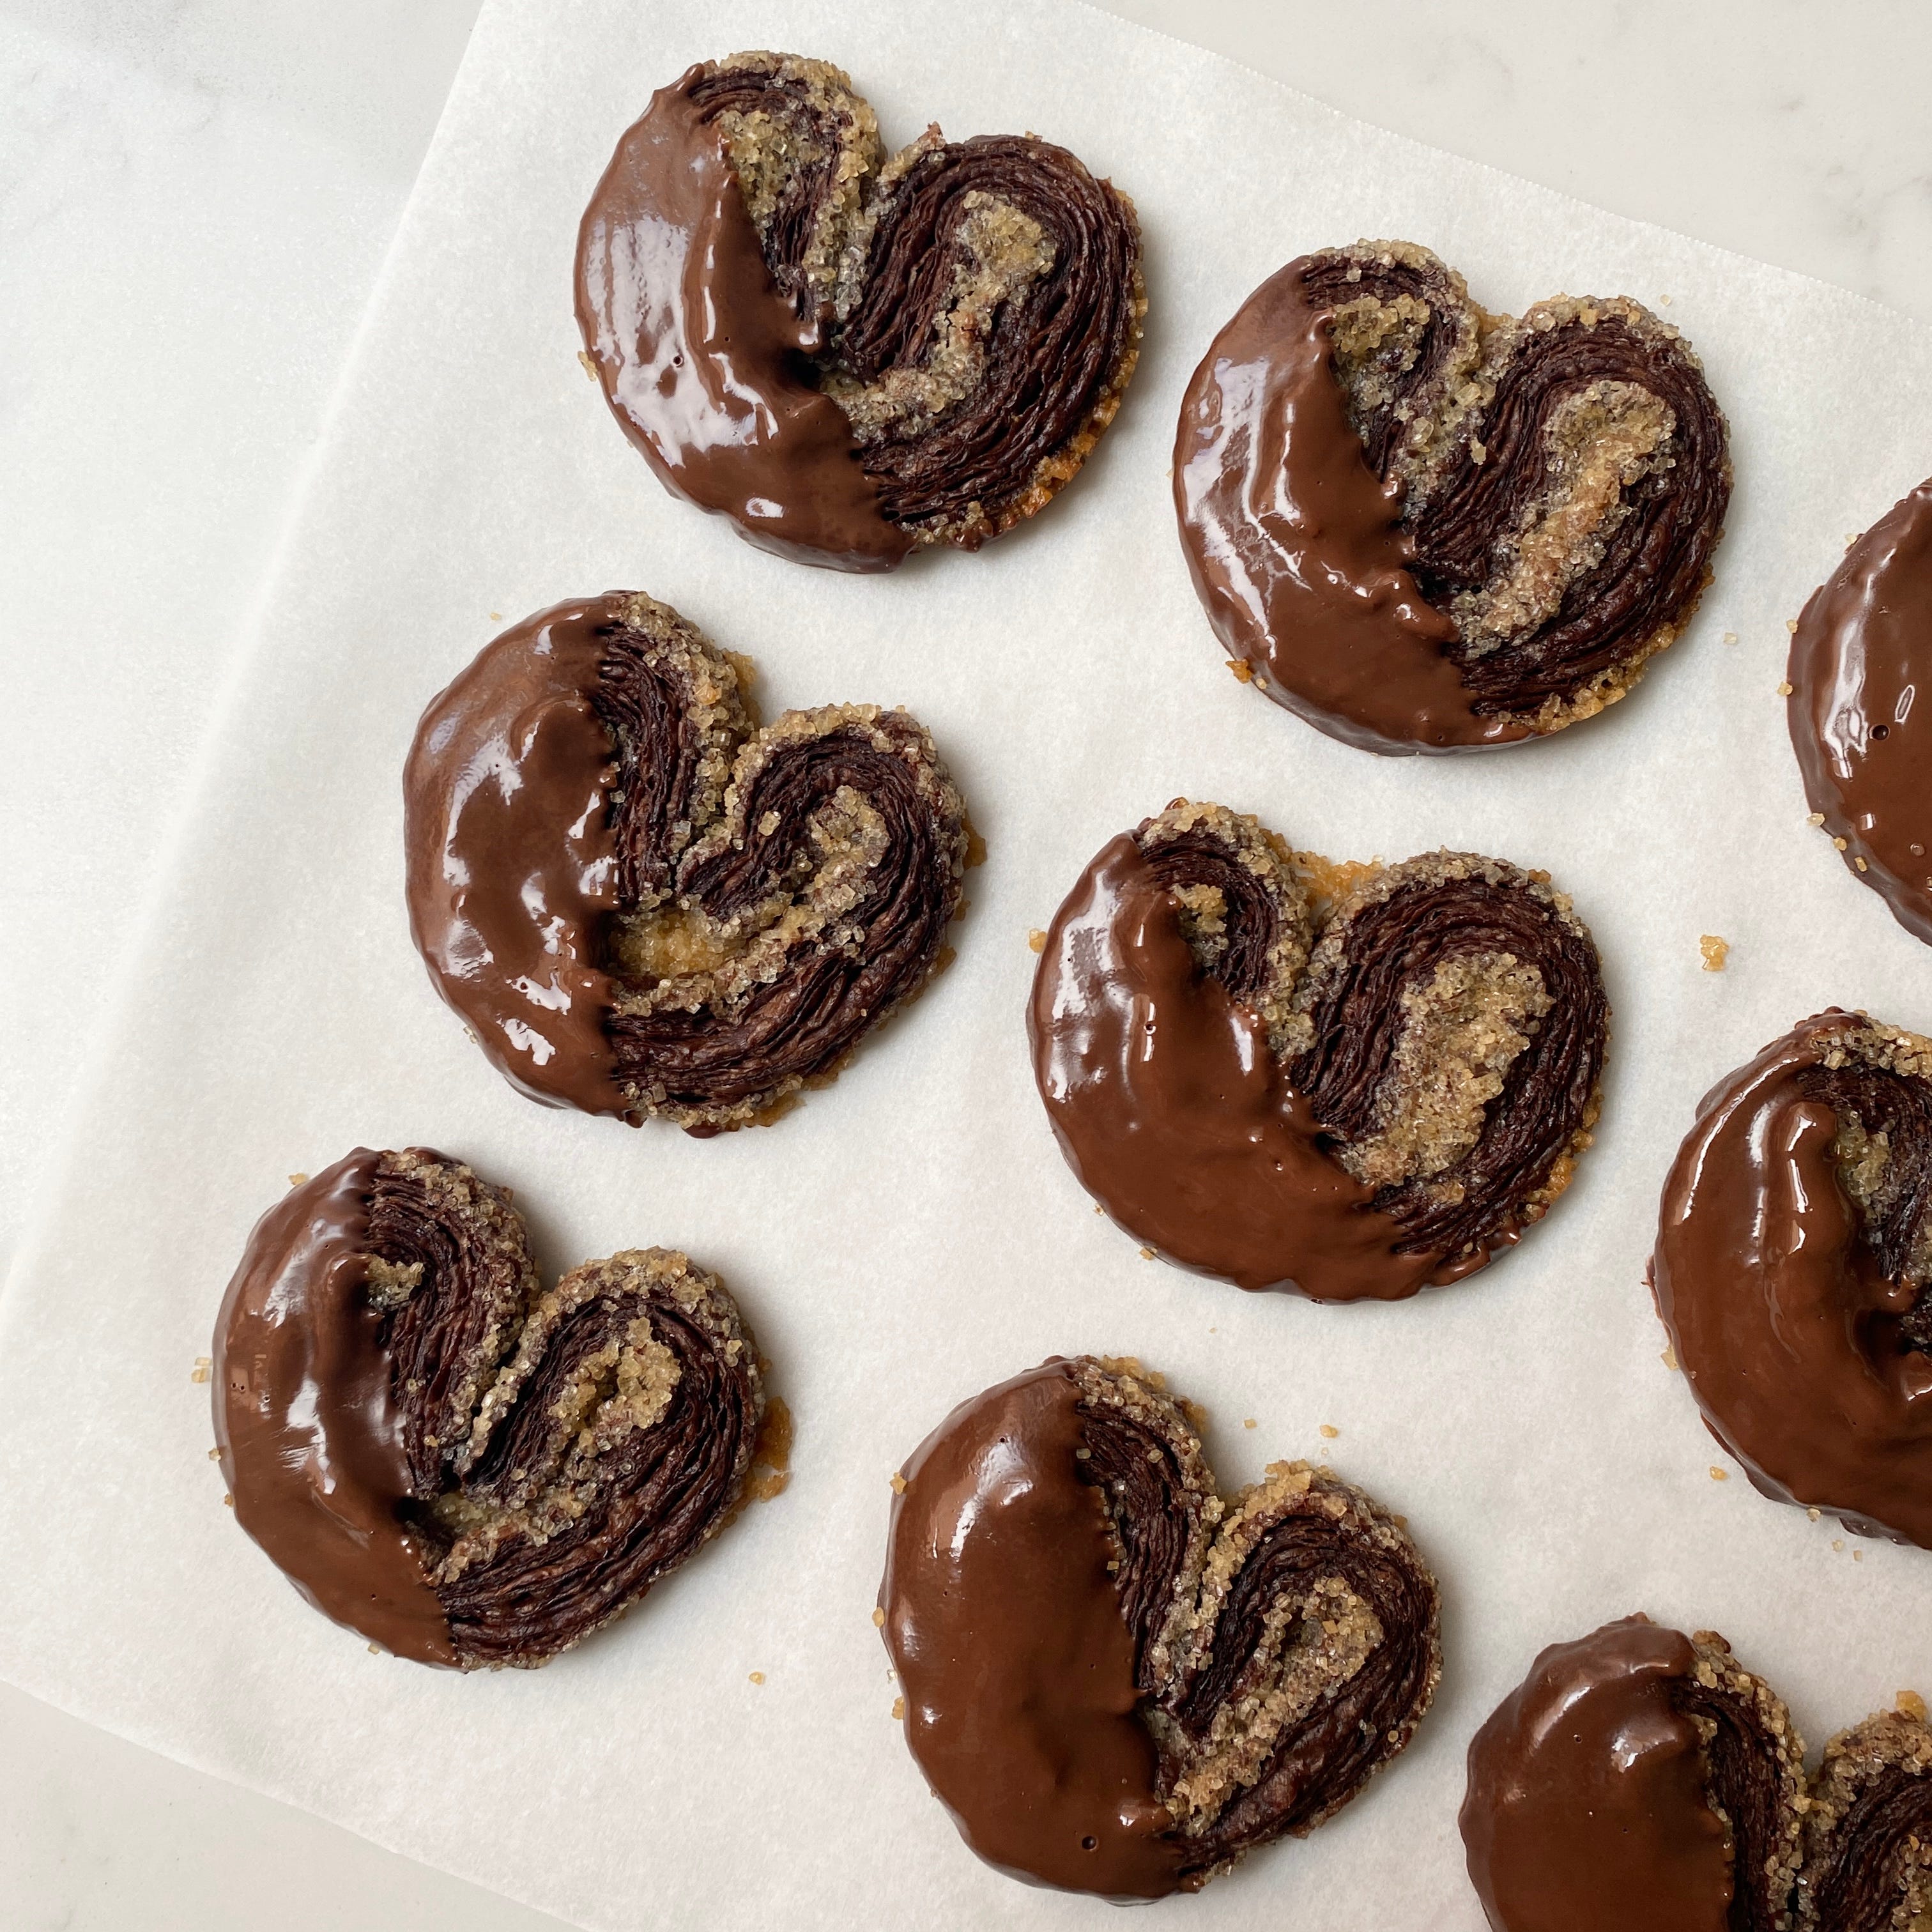
Palmiers
I’ve used the cocoa puff for these palmiers but they work well with plain rough puff too! Change the fillings up however you like, I’ve used demerara sugar here because I like the additional crunch it offers. You can also change the shaping up, I experimented with loads of fun shapes, including some little flowers.
Ingredients - makes 24
1/2 a block of cocoa puff
Demerara sugar
Cold water
About 200g of chocolate to dip (optional)
Method
Divide the 1/2 block of puff into 2 even squares, we’ll be rolling one at a time, as it’s easier to handle in smaller quantities.
Roll one of these small blocks into a 20cm x 25cm rectangle, it should be longer than it is wide, trim off any excess so that you have a nice neat rectangle. It’s important that your rectangle is at least 25cm long otherwise the palmiers will unfurl in the oven and you’ll end up with some weird shapes.
Using a pastry brush, brush a very thin layer of water all over the pastry, we want just enough to make the sugar stick.
Sprinkle the demerara sugar over evenly so that it’s totally covered.
Mark out the centre and fold each end into the middle leaving a small gap.
Brush water onto the parts that are folded in and sprinkle with sugar.
Fold in half, wrap and chill in the fridge or freezer, it’s best to use straight out of the fridge or semi frozen so I like to freeze mine for 5-10 minutes before this step, but we don’t want it frozen solid!

(If you don’t want to bake them straight away you can leave them like this in the freezer for up to 3 months.)
While the first batch is chilling, repeat with the other block of puff.
Pre-heat the oven to 180°C/356°F.
Remove the palmier log from the fridge or freezer, brush the whole thing lightly with water and completely cover in demerara sugar.
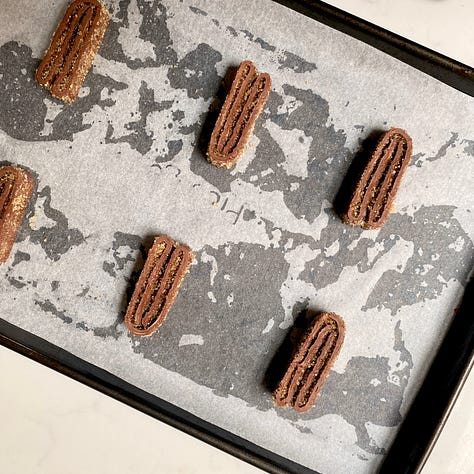
Cut into 1.5cm slices.
Lay out on a baking tray leaving plenty of space between each as they expand a lot.
Bake for 25-30 minutes.
Once cooled dip in melted chocolate, leave to set and enjoy!


*pro tip* if you want to get chocolate involved but you can’t be bothered to dip them, when they come out of the oven and the tray is still hot (but not hot enough to burn) you can arrange a few chocolate chips on the tray and put a hot palmier on top, the residual heat from the tray and biscuit will melt the chocolate and once it sets you’ll end up with a chocolate covered palmier with minimal effort. I did this with my flower shapes and it worked great! The main thing is to catch the tray at the right time, i’d say about 3-5 minutes after coming out of the oven is the perfect time.


I made a vegan version of the chocolate palmiers and they came out perfect and delicious! Thank you for sharing the recipe. My laminated doughs have always taken me 3 days to make so I’m def sold on rough puff! 😎