


The Hunt For The Perfect Sponge
The Hunt For The Perfect Sponge
And a general sponge cake deep dive

For many years I’ve been on the hunt for the perfect sponge cake, something with more substance than a Genoese or chiffon cake but lighter than a pound cake. I’ve found a lot of sponges that I like and have used often but never “the one”. I’ve had a lot of instances where I think I’ve found the perfect sponge only for it to fail on me a couple of weeks later, so I kept testing different recipes but as I tested, I realised that I just didn’t have a clear enough understanding of exactly what was going on so I decided to scrap everything and start completely from scratch. To be honest I don’t think this search will ever truly end but I wanted to share my findings so far and my current favourite sponge recipe.
The Criteria
Let’s start off with the criteria for my perfect sponge;
Texture: This is the most important thing for me in this search, I want the sponge to be fluffy, soft and not dry, it doesn’t need to be really moist, that’s not the kind of sponge I’m after. And I want it to stay not dry for at least 4 days after baking. I also didn’t want this sponge to taste too fatty, I found that with a few of my tests I could really feel the butter on my pallet, now, I’m a butter lover but in this instance it’s just not what I’m looking for, I want a melt in the mouth sponge that’s soft and tender, rather than a rich buttery sponge.
Flavour: Of course flavour is important but really what I want this sponge to be is a base recipe that I can add other flavours to and adjust as needed, ideally I wanted a light buttery flavour with a hint of milkiness and not too sweet.
Shape: Perhaps this isn’t quite the right word but what I’m trying to say is that it needs to be flat-ish, I don’t mind if there’s a little bit of doming that needs to be trimmed but really I want something that is going to create minimal wastage, the flatter the better.
Ingredients: I want this to be a sponge that I can bash out at a moments notice, or make millions of, it can’t be something full of specialist ingredients or loads of egg yolks/whites, I already have a huge surplus of egg whites in my freezer.
Ease: This sponge needs to be relatively simple, with minimal washing up, I don’t mind a slightly more complicated method but overall it needs to be something that can come together fairly quickly.
If I could get all of these elements nailed I knew I’d be onto a winner so the hunt began.
The Method
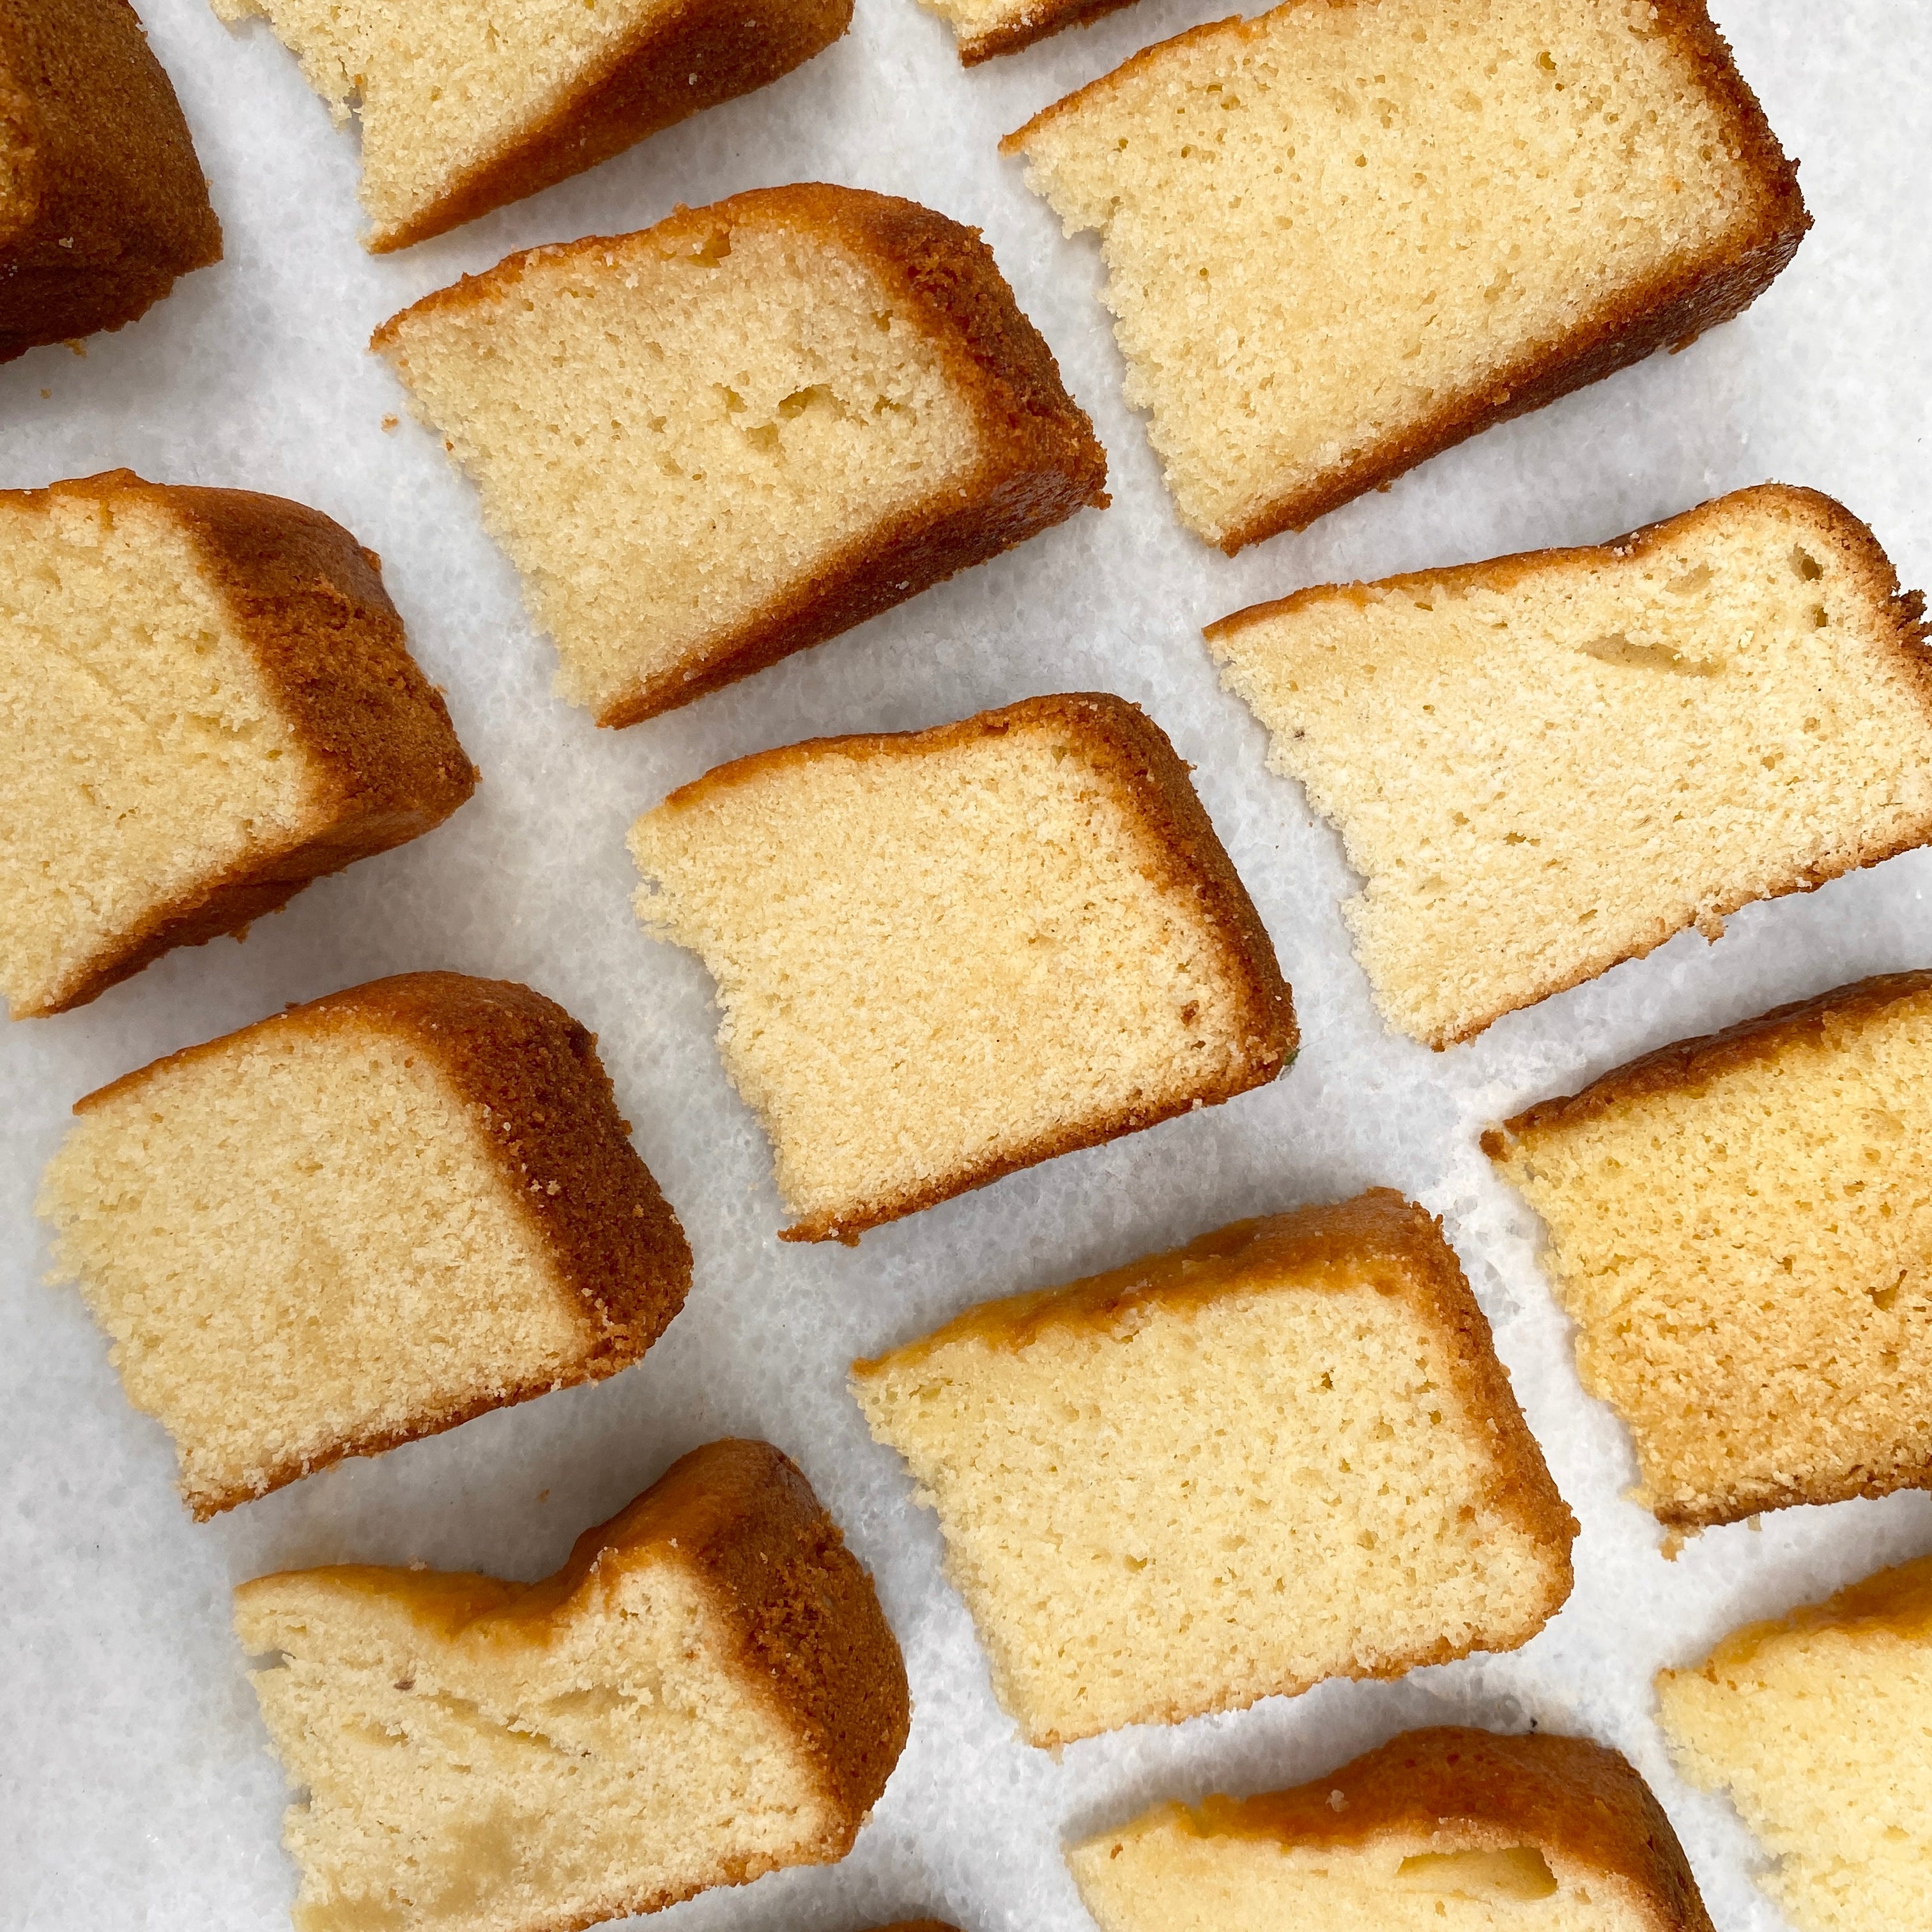
It’s all very well shouting about what I want to sponge to be like but how do I actually get there? Over the years I’ve tested pretty much every method under the sun but they all used different ratios so the recipes weren’t really comparable. I decided to strip it right back to basics and use the same base ratios to test out as many different methods as I could find. This way I could get a better understanding of the different methods and do a side by side comparison.
For all of these tests I used this basic Victoria sponge recipe, it’s as simple as it gets and therefore the perfect place to start.
100g butter
100g caster sugar
100g eggs
100g plain flour
5g baking powder
Pinch of salt
All of my tests were baked in a 6 inch tin at 170°C/338°F for 35 minutes.
Classic creaming: By far the most popular and pretty straight forward, this method of creaming the butter and sugar before adding the eggs followed by the dry ingredients works well and produces a nice light sponge with relatively large air bubbles and a domed top, this method is popular for a reason, it’s reliable and has nice results. The only problem I’ve encountered is when it comes to recipes that contain a higher percentage of milk, trying to incorporate all of the liquid at the end without getting any lumps can overdevelop the gluten which results in a dense bouncy layer of sponge a the bottom.
Wet + dry: This is by far the easiest of all the methods I tested, you just mix the dry ingredients, add the wet ingredients (including melted butter), give ‘em a stir and that’s it. The good thing about this method is that we’re only relying on the baking powder to incorporate air which means it’s incredibly reliable and the results are 100% consistent, unlike the creaming methods which rely on whipping air into the batter, it’s impossible to measure how much air we’re adding when creaming which means that results can vary. This had the largest dome out of all of my tests and an almost bouncy, muffin-like texture. I found that this sponge had a more fatty feel in the mouth and a slightly drier texture, I think sponges using this method tend to work better with a mixture of oil and melted butter.
Reverse creaming: For this method soft butter is mixed with the dry ingredients until there are no lumps left, before adding the wet ingredients and beating until pale and fluffy. Coating the flour in fat limits gluten development meaning that we can beat the batter without the fear of overdeveloping the gluten, because we’re free to beat the mixture we don’t have to worry about lumps or the mixture splitting. The result is a much flatter cake with an even and slightly denser crumb. This sponge has a lovely velvety and tender texture which feels slightly less dry than some of the others. As with all creamed sponges it can have slightly inconsistent results but overall I really like this method.
Creaming + whipped egg white: I’d never used this method before but I was curious so i added it to my tests, recipes that use this method usually use just egg whites rather than whole eggs but I wanted to give it a go using my basic ratios. For this method butter and half of the sugar is creamed, the yolks are added followed by the milk and flour. The egg whites are then whipped with the remaining sugar before being folded into the base batter. Because the batter is so firm it feels like you’re losing all of the air when folding in the whites but I was pleasantly surprised by the results. This sponge was the lightest of all of my tests and rose perfectly evenly, it had a texture somewhere between genoise and a Victoria sponge. Even though I really liked the results from this method I feel it’s not quite what I’m looking for here, I’m looking for a basic, every day sponge recipe and this method creates too much washing up and is a bit too time consuming. However I will definitely be re-visiting this method for other bakes!
Emulsion: This is a method that I use for my loaf cakes that consists of making an emulsion of the butter, sugar and eggs before adding the dry ingredients and milk, it’s similar to the wet + dry method but rather than melting the butter we’re blending it with the other ingredients to create a perfectly smooth emulsion, it’s essentially a sweet mayonnaise. As you can see from the picture below I didn’t have great success with this method on this particular day but I think this might have been due to my errors rather than the method itself. Usually this produces a cake with a very high dome, a spongey texture and a less fatty mouth feel than the simple wet + dry. Again, not quite what I was looking for in this instance but it is a method that I find works well consistently for loaf cakes.
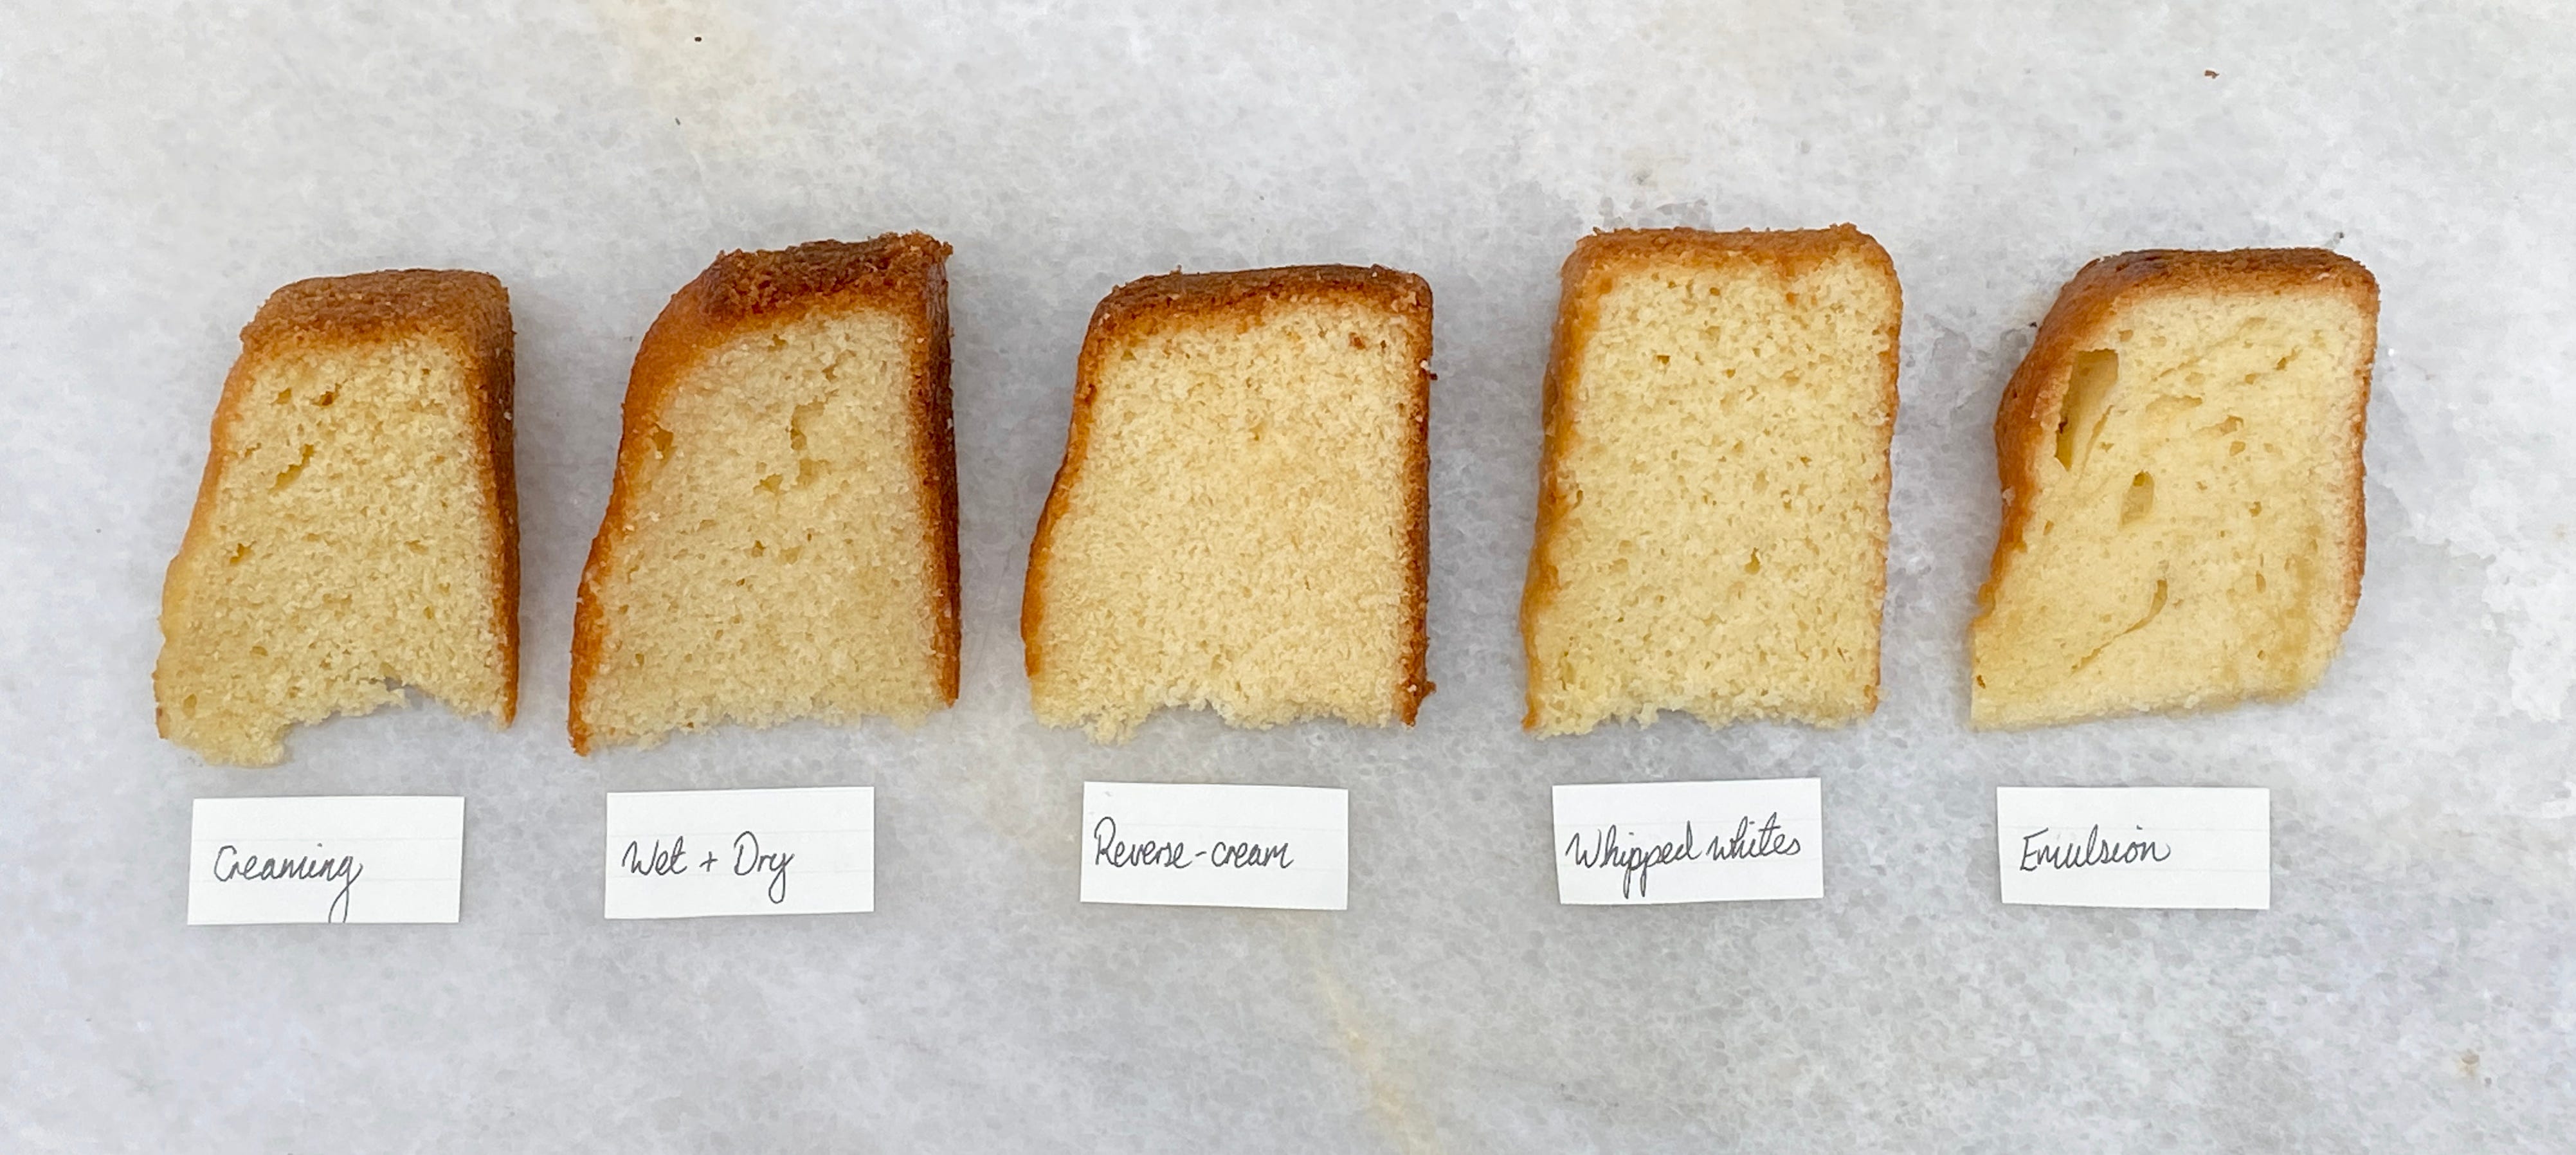
I don’t think there is one good or bad method, each of these methods work well for different recipes and I have recipes that use pretty much all of these methods but having compared all of them side by side I decided that for my purposes reverse creaming is the winner, however the recipe needed some adjustments to make truly fit my criteria.
The Failures/Trouble Shooting
I wanted to touch on these before we get really into the recipe development process because my many many cake failures were what spurred me onto developing my own recipe. I had been using a really nice buttermilk cake recipe for a while, when it was nice it was so soft and fluffy and delicious but then seemingly randomly it would get a dense rubbery layer at the bottom, I couldn’t figure out what was going on. For these sponge tests I decided to ditch the buttermilk all together as I found that it was confusing my results and it’s not easy to get hold of here in the UK but I’ll have to revisit it at some point and develop my ideal buttermilk sponge.
Until then let’s have a look at the main problems I’ve encountered with my sponges, what’s caused them and how to avoid them:
Sinking: A sponge usually sinks when it can’t hold it’s own weight, this can happen for a number of reasons:
There’s too much batter in the tin; the weight of the batter on top of the rising sponge is too heavy and it can’t hold itself up. This shouldn’t be a problem in well formulated recipes, I find that with my final vanilla sponge recipe I could fill a deep tin 2/3 of the way and still get well risen cake with a nice flat top.
There’s too much air in the cake mix; of course we want our sponges to be fluffy but if there’s too much air or raising agent in the batter the sponge won’t be able to hold itself up. This is why chiffon cakes need to be turned upside down as soon as they’re out of the oven, the reason this technique doesn’t work with regular butter sponges is that the mixture is so heavy that sinking will usually occur in the oven before the sponge is fully baked; there’s no point turning an already sunken sponge upside down.
The gluten is overworked. In the past I have been fairly blasé about overworking the gluten in sponge cakes, I always thought that you had to really overwork the mixture to mess it up. I was wrong. Over mixing usually results in a cake that rises beautifully in the oven only for it to collapse in on itself when it comes out, leaving a fluffy layer of cake at the top and a dense gummy layer at the bottom.
The cake is underbaked; if the cake is under baked the centre won’t be set causing it to collapse when it comes out of the oven, it should spring back when you press it and if in doubt you can always test it by sticking a skewer and if it comes out clean, it’s baked.
All of the other sinking problems are usually caused by too much or not enough of one or other of the ingredients, so a badly formulated recipe rather than technique which we’ll come onto later.
Dense layer: This combined with sinking is the main problem I’ve encountered, it usually happens with sponges that contain a lot of liquid, I found it difficult to find solid answers online as to what the hell was going on here but I think this is generally caused by a combination of:
Overworking the batter leading to gluten development which makes an unstable sponge that often collapses.
Too much milk which isn’t properly emulsified with the rest of the ingredients causing it to sink down to the bottom.
Dry sponge: This is almost always a problem with the recipe, it can also be caused by over-baking but generally there should be a little bit of leeway when it comes to the baking, you should be able to bake it for an extra 5 minutes without making a disastrously dry sponge.
One of the reasons that I favour the reverse creaming method is that it almost eliminates the possibility of overworking the batter and allows for the addition of a good amount of milk which really helps with the overall texture of the sponge.
The Ingredients
In a standard sponge cake recipe we have equal parts of butter, sugar, eggs and flour however these can be tweaked and changed in order to give us the exact texture that we’re looking for but in order to successfully develop a recipe we need to know what each ingredient is doing so that you can make informed decisions when making your adjustments so let’s have a look at what we’ve got:
Butter: This is adding fat, flavour and some moisture, the problem with butter is that it sets firm at room temperature which can lead to the illusion of dryness when eating, it doesn’t actually make a sponge dry but it feels slightly dry on the pallet, this is why any cake that contains butter feels/tastes drier when eaten directly from the fridge, the butter is set solid and therefore the sponge is harder and drier. Butter also provides a good opportunity for incorporating air via creaming/reverse creaming.
Oil: Similarly to butter oil is there to add fat but unlike butter it’s not bringing much when it comes to flavour, the good thing about oil is that it’s totally liquid at room temperature giving the illusion of a softer, more moist sponge. My preference is a combination of butter and oil, so that you get the flavour from the butter with the texture of the oil, this is also why a lot of bakers use margarine but I prefer to use them separately to have more control over my ingredients.
Sugar: Of course sugar is adding sweetness but it’s also hugely helpful when it comes to the texture of a sponge as it is hygroscopic, meaning it attracts and holds onto water molecules keeping the sponge moist. It also interferes with gluten development making for a soft tender crumb, you can’t simply remove or drastically reduce the sugar in a sponge or you’ll end up with a dry scone-like cake which isn’t what anybody wants. Sugar is also working with the butter to help us incorporate air to give us a lovely light sponge.
Eggs: Eggs act as both a binding and a setting agent in our sponge, the proteins in the eggs and starch in the flour coagulate as the sponge bakes to give the sponge structure. I almost always weigh my eggs for more accurate measurements, this is especially necessary when scaling recipes up or down. We’re not getting into yolks vs whites here as I really wanted to use whole eggs in this particular sponge but baking sense has a really good article which you can read here.
Flour: As with eggs, flour is giving our sponge structure, the proteins and starch are able to encapsulate and keep air bubbles in the sponge to give us a lovely spongey texture. Flour is also absorbing moisture, of course we don’t want it to absorb too much moisture or we’ll be left with a dry sponge so striking a balance is key, especially if we’re adding extra liquid like milk.
Baking powder: Of course baking powder is adding air into our sponge to make it lovely and fluffy! Too much baking powder will cause the sponge to sink, not enough will make it dense.
Milk: Milk is adding moisture and tenderising the sponge, I love a cake with a high milk ratio, it gives the sponge a lovely melt in the mouth texture and a shorter crumb. We just have to be wary of adding too much or the structure won’t be able to support the additional liquid and we’ll end up with the dreaded dense & gloopy layer at the bottom of our sponge.
Cornflour: When adding a lot of liquid cornflour can be helpful to absorb some of it without adding any additional gluten.
Salt & Vanilla: Purely there for flavouring, add as much or as little as you like!
With all of this information I started to test out different ratios, I don’t have a particularly scientific way of working, I just tested out loads of different variations until I had a sponge that I was happy with. My favourite way of recipe testing is just to try it and see what works, if it’s not good i can. always make a batch of cake praline with any wastage. And after months of trial and error the following recipe was my favourite.
Vanilla Sponge
Ingredients - makes 2 x 6” tins
150g very soft butter
360g caster sugar
380g plain flour
30g cornflour
20g baking powder
1/4tsp salt
1tbsp vanilla extract or paste
240g eggs (4-5 eggs)
44g neutral oil
210g whole milk
Pre-heat the oven to 170°C/338°F and grease and line two 6” tins.
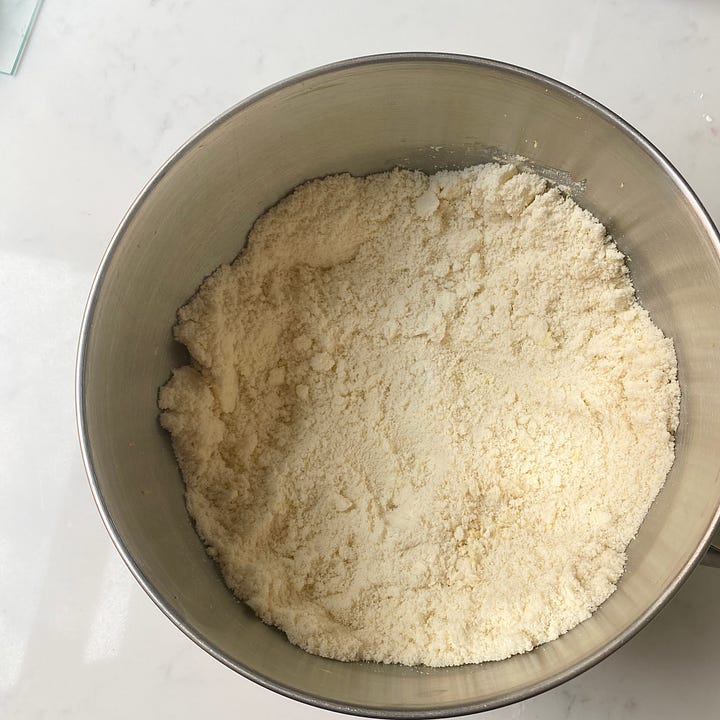
Combine all of the dry ingredients with the soft butter (it’s important that the butter is very soft!) and mix until the butter is fully incorporated and there are no lumps, the mixture should have the texture of breadcrumbs.
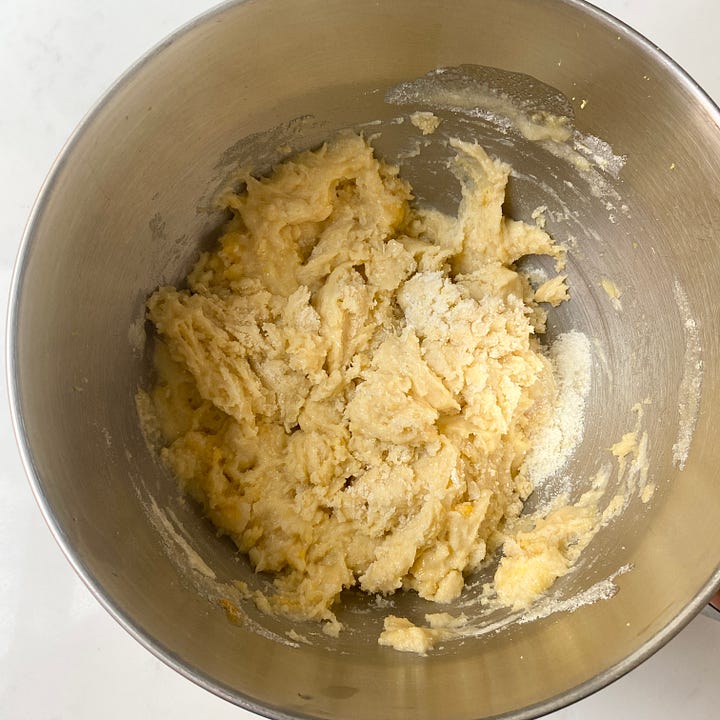
Add the eggs, oil and vanilla and mix very briefly until just coming together.
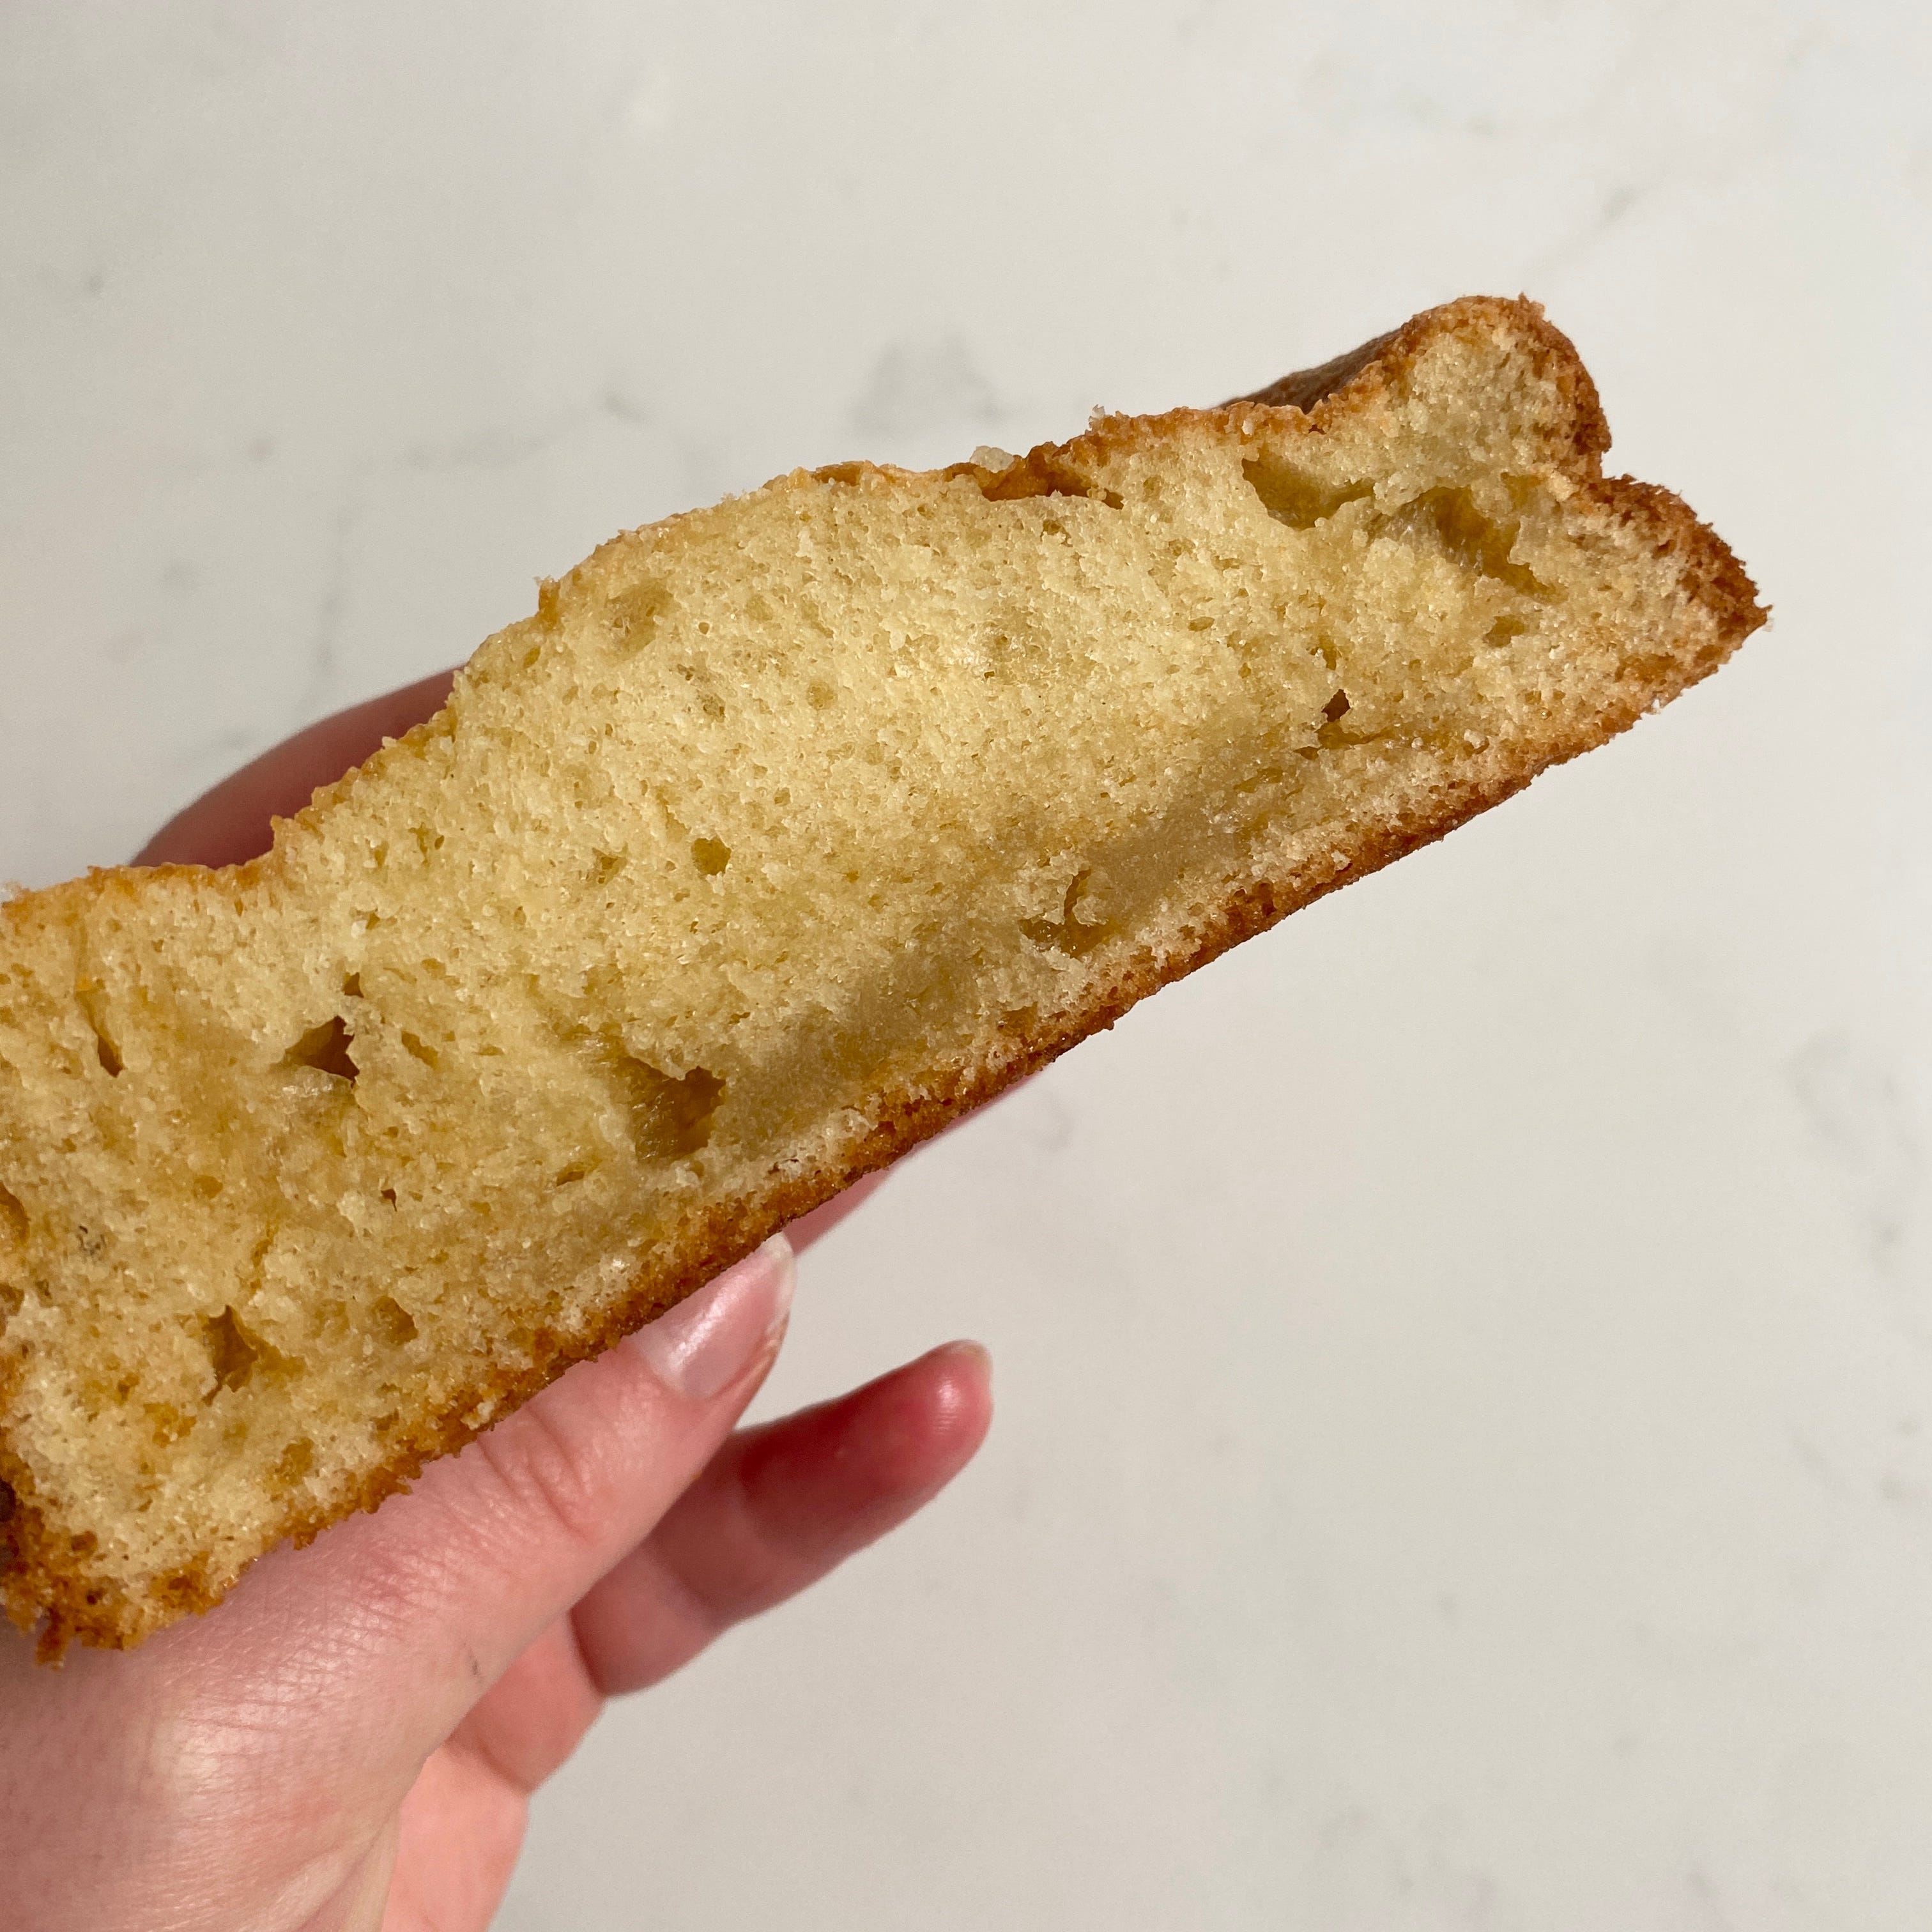
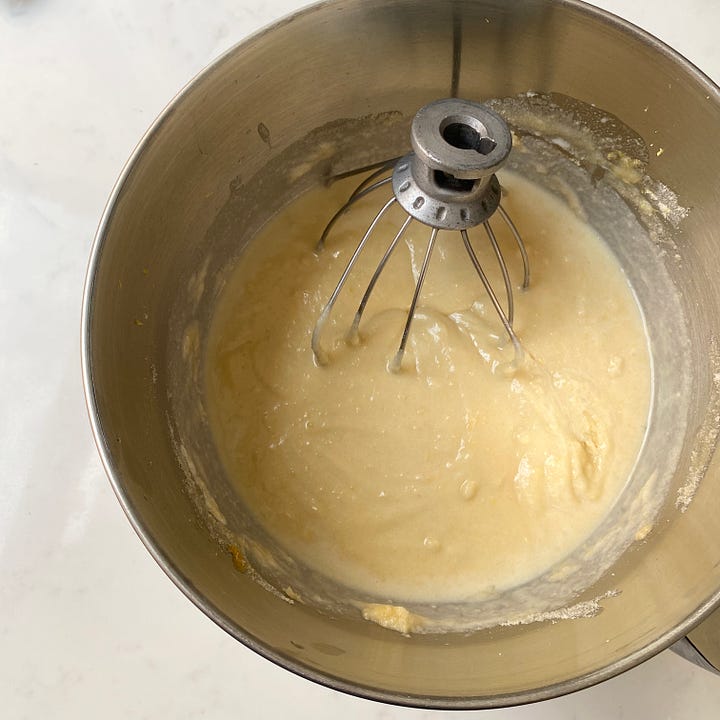
Breadcrumb stage --> After adding the eggs & oil Add around 3/4 of the milk, if using a stand mixer, switch to the whisk attachment and mix on slow until the milk is incorporated then turn the speed up to medium-high and whisk for 3-5 minutes until it becomes pale, fluffy and thick.
Add the remaining milk and mix until combined. Pour into the 2 tins and bake for 35-40 minutes until the sponge bounces back when pressed and a skewer comes out clean.
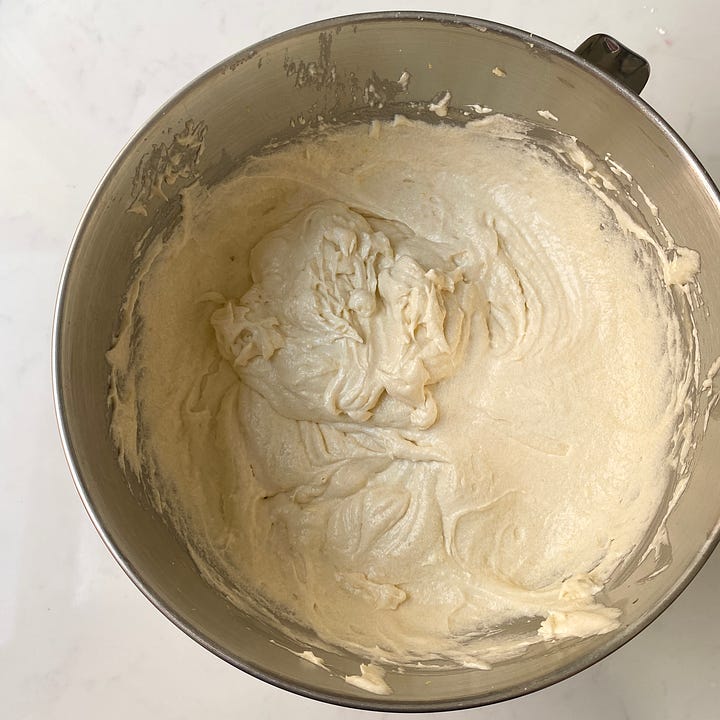
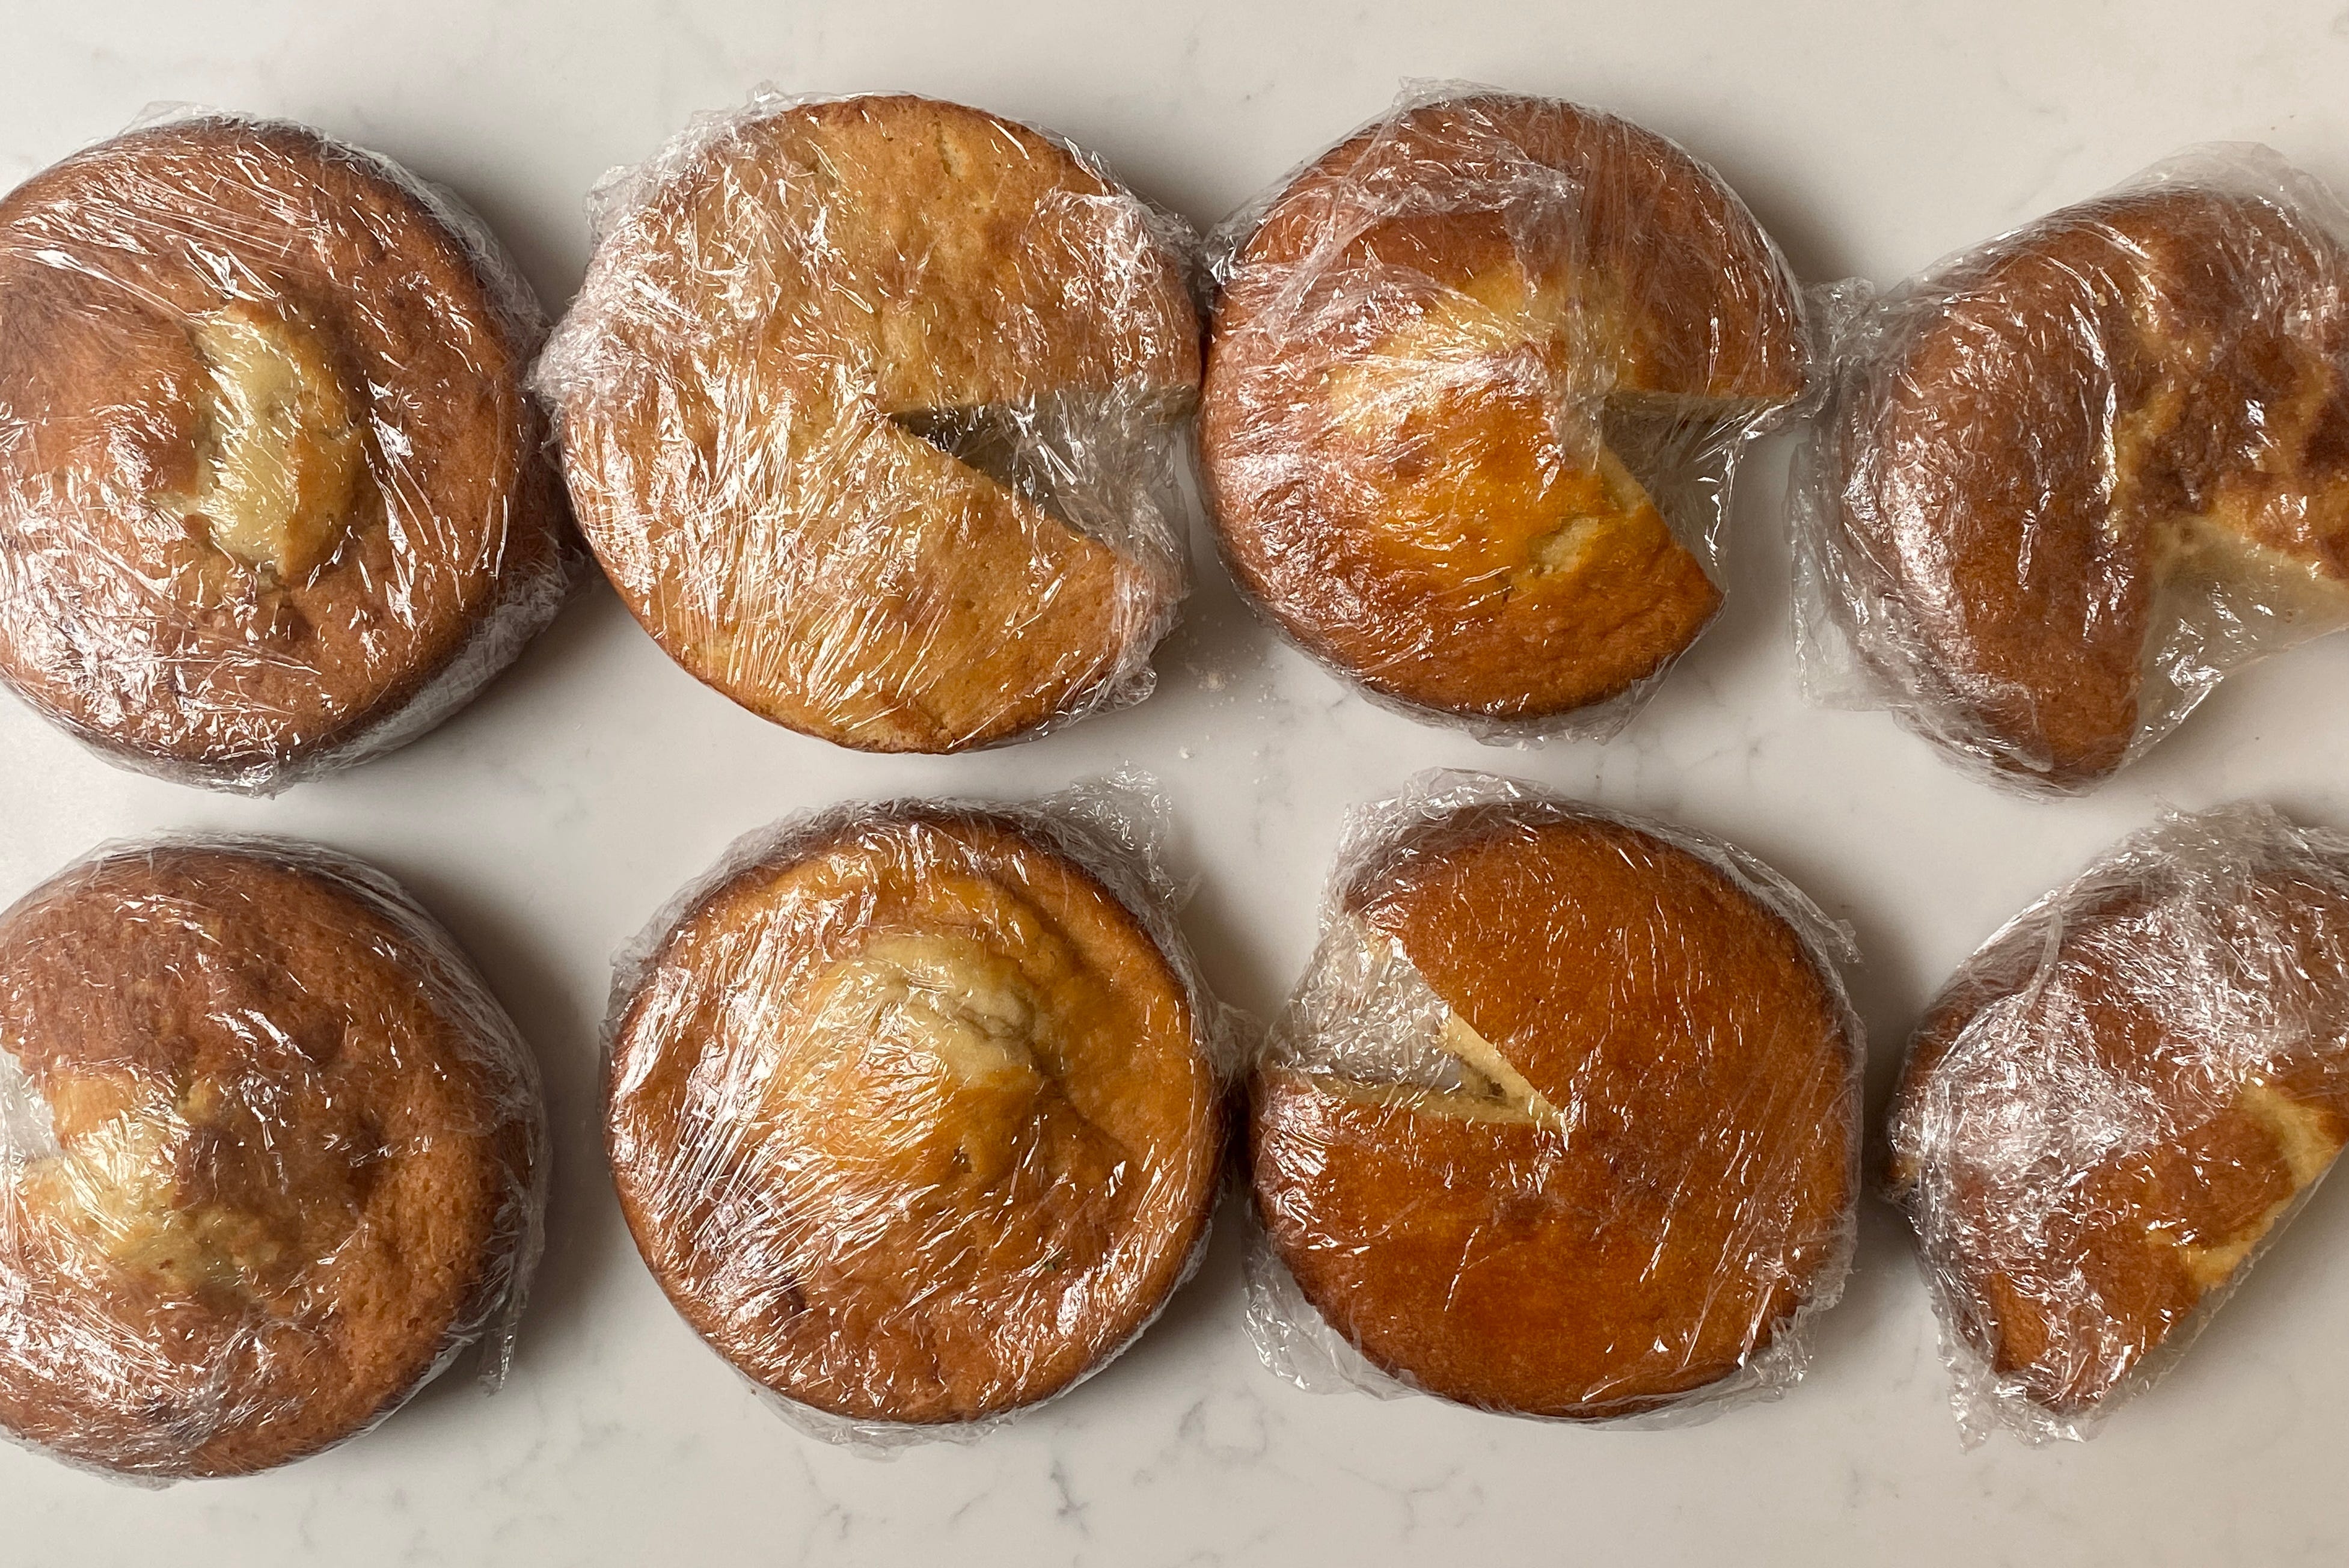
Before whisking --> After whisking, you can see the change in colour and texture While the sponge is still warm, remove it from the tin and wrap it in clingfilm, this helps to trap in the moisture giving us a lovely soft and moist sponge.
Use as desired!


I’ve used this base recipe in a few of my recent bakes including my Raspberry & Tarragon Battenberg! And will be continuing to use it for many future bakes, I hope you like it!

raspberry & tarragon Battenberg
Extra Reading & Recipes
If this post hasn’t fully satisfied your spongey conundrums Bake Sense has a wonderful series on the function of all of the different ingredients in a pound cake which you can read here.
Of course Nicola Lamb’s wonderful new book Sift has a whole section dedicated to different ingredients which is hugely helpful!
I also referred to Lily Vanilli’s vanilla cake recipe from her book Sweet Tooth, Nicola Lamb’s Victoria sponge Sift and Phil Khoury’s butter cake recipe which can be found in his Instagram highlights.
Thanks a lot for your hard work and for a great writeup. I have a quick question, if this recipe was to be mixed in a stand mixer. For the first step, and in order to reach the "Breadcrumb stage" would it be mixed with a flat beater? Very soft butter would still be added to the dry ingredients, or somewhat colder / harder butter? Thanks a million for everything you're doing.