


Caramel is one of those things that seems simple at first but the more recipes you come across, the more confusing it seems to get, everyone has different techniques, ratios, and views on what caramel even is. I wanted to get to the bottom of what makes a good caramel, how to achieve different textures and consistencies whilst avoiding the dreaded crystallisation.
We’ll be diving into what makes caramel caramel, the roles of all for the different ingredients, which methods I prefer and why and finally I’ll be sharing my favourite salted caramel for cake fillings and my favourite chewy caramel toffees.
What Is Caramel?
Figuring out what caramel actually is seems to be the most obvious place to start. This can be confusing because a lot of the time when recipes talk about the process of caramelisation what they’re actually referring to is the Maillard reaction or a combination of the Maillard reaction and caramelisation, this is the browning of food caused by a reaction between amino acids and sugars, this happens at between 140°C-165°C. Caramelisation on the other hand takes place at 165°C or higher, once sugars reach this temperature they undergo a chemical reaction which causes the sugars to brown and chemicals to be released which give caramel its distinctive flavour.
I don’t know about you but that’s enough science for me. The point of this little chemistry lesson is to help us differentiate true caramelisation and regular browning so that we can decide what we’re including under the pretty broad banner of caramel. For this post I’m only going to be counting things that start with caramelising sugar, so let’s have a look at some things that I’m not counting;
Butterscotch sauce; When researching for this post I googled caramel sauce and the first thing that came up was this BBC Good Food recipe and there are loads out there that are similar. This recipe involves bringing cream, brown sugar and butter to the boil, that’s it. It’s a delicious sauce recipe but there’s no caramelisation so I would count this more as a butterscotch, the flavour is predominantly of brown sugar and butter.
Dulce de leche; made by boiling either milk and sugar together or condensed until it becomes a golden brown colour with a sweet milky and slightly caramely flavour. Despite the flavour and colour, it’s not the sugars that are caramelising but rather the milk solids are browning due to the Maillard reaction. This results in a much more subtle flavour than a classic caramel. If you’re after dulce de leche I’d just recommend buying the Carnation caramel in a tin to save you the effort of boiling condensed milk for hours on end.
Chewy caramels; Almost all of the recipes that I came across for chewy caramels didn’t involve caramelising the sugar first, and instead relied on the flavour of brown sugar or browned milk solids like in dulce de leche. I found this really interesting, they still had a lovely buttery taste but since this post is all about caramel I want to really focus on recipes that involve caramelised sugar!


Really you can call whatever you like caramel, after all I’m not the caramel police.
The Ingredients
The main ingredients that you’ll find in most caramel recipes are sugar (of course), cream, butter, salt and sometimes glucose, corn syrup or golden syrup depending on which part of the world you’re from. Each of these ingredients plays a roll in the texture and flavour of the final caramel and they can all be altered depending what you want from your caramel.
Sugar: Sugar is the main ingredient in most caramels, it’s where most of the flavour is coming from so we really want to make sure that when we’re making caramel the sugar had reached a deep, dark amber colour, however if it gets too dark the caramel will taste bitter and burnt. How dark you take your caramel depends on your own personal preferences but also what you’re using it for, if i’m making caramel for the inside of a cake I want quite a dark caramel as the flavour will be diluted by the other elements but if i’m making it for chewy caramels or as a filling for chocolates I might make it a bit lighter so that the flavour isn’t overpowering. We can, of course, swap some of the sugar out for different sugars to introduce other flavour profiles, I’m a brown sugar girl through and through so will use it at any given opportunity but because it’s already a dark brown colour it can be difficult to gauge how dark it is. For this reason when making caramels with alternative sugars it’s a good idea to caramelise the caster sugar first, get it to the correct level and then add the alternative sugars and cook until just dissolve. This is what I do in my brown butter muscovado caramel recipe.
Cream: Cream is what’s turning our caramel from a solid lump into a lovely liquid, the amount of cream we add will directly affect the texture, more cream will give us a pouring consistency and less will give us a chewy caramel, it’s all about finding the ratios that work for you. Of course cream is also giving us that rich dairy flavour and with that the opportunity to experiment. Cream the perfect vehicle for infusing different flavours and can easily be infused with tea, orange, herbs etc. before using for caramel. I would also encourage some experimentation with other forms of dairy like sour cream or buttermilk to add some acidity to your caramel.
Butter: The purpose of butter in a caramel is mainly to add viscosity and mellow the flavour out. Adding butter to your caramel can make it easier to work with, rather than having a stringy consistency, it has a smoother, more spoonable texture, and a richer, less bitter flavour.
Salt: Although this isn’t in every caramel recipe I would certainly recommend adding it, caramel can be sickeningly sweet and just a little bit of salt can help balance the flavour, I like to dissolve my salt in the cream to avoid getting any lumps.
Glucose: You’ll sometimes find glucose, corn syrup or golden syrup will make an appearance, the purpose of these are to stop the caramel from crystallising, sugar wants to return to it’s natural crystal form, the addition of glucose means that this is less likely to happen which is especially relevant if you’re using the syrup method to make caramel or if caramel is going to be sitting around for a long time it will start to get gritty. If you’re using your caramel within a month of making it this isn’t usually a problem.
Lemon juice: Similarly to glucose the addition of acidity can help prevent crystallisation, it also helps counteract sweetness but my preference is for salt when it comes to that.
Methods
Let’s talk methods, this is the thing that I am most passionate about. The two main methods of caramelising sugar are:
Syrup method: This involves making a sugar syrup and boiling it until all of the water is evaporated and the sugar that is left starts to caramelise, cream and butter are then added. The pros of this method are that because all of the sugar caramelises at the same time it can be easier to tell when it’s done and there are no lumps of sugar, the cons are that it’s prone to crystallising whilst making AND after.

Direct: This involves putting a small amount of sugar directly into a hot pan until it starts to dissolve and adding more sugar bit by bit until all of the sugar is caramelised, cream and butter are then added. The pros of this are that there is no chance of any crystallising and I find it to be slightly faster, the cons are that if you don’t add your sugar slowly enough you can end up with big lumps of sugar.

I’ve said it a million times and I’ll never stop saying it 🗣 I do not like the syrup method, the chances of it crystallising are just too high and although it’s totally possible to make it this way and have no issues, for me the risk is too high, none of the professional kitchens I’ve worked in have used this method. I totally get why people use it, I think it’s much easier to achieve a lighter caramel with this method but I never want a pale caramel so it’s not for me.
Onto stirring the caramel, if you’re making a syrup caramel then you absolutely shouldn’t stir it, agitating the syrup will make it much more likely to crystallise, however when making a direct caramel you don’t need to be scared of the spatula, you just need to make sure that at least 1/3 of the sugar has started to melt before stirring, this will help avoid any lumps, we’ll get into more detail on this in the actual recipe.
Now we’ve addressed the actual caramelisation let’s get onto the cream and butter. Most recipes will advise heating the cream before adding it, this is essential to avoid the sugar shocking the molten caramel and forcing it to set hard leaving you with a lumpy caramel with huge chunks of sugar in. But are we adding the cream before or after the butter? After! I talked about this in my lemon curd post, adding the butter at the perfect temperature makes a difference, before adding the butter let the caramel cool to 30°C-40°C (warm to the touch but not hot!) doing this means that when you add the butter it doesn’t completely melt. Ever melted butter and let it re-set? You’ll notice that it doesn’t set to the same creamy consistency, the fat separates from the liquids during the melting process and when it cools they remain separated, the same happens when you add butter to hot caramel, the finished result just isn’t quite as smooth.
Let’s get onto the recipes!!
Salted Caramel
I’m going to call this cake caramel, it isn’t a sauce but it also doesn’t set solid, it just holds it’s shape which is perfect for layer cakes, I want it to be soft enough to pipe but firm enough that it doesn’t leak out and cause a mess! I actually change this recipe up depending on the season, adding about 10% more cream in the colder months so that I can pipe it without giving myself a wrist injury! It’s also worth noting that if you’re making big batches you might need to reduce the amount of cream slightly, I find that when making smaller batches more liquid is lost to evaporation meaning that a higher percentage of cream is needed so bare this in mind and adjust accordingly!
Ingredients
170g double cream
5g salt
1/2 vanilla pod
250g caster sugar
70g butter
Method
Weigh all of your ingredients.
Combine the cream, salt and vanilla in a pan and bring to the boil, set aside.
Add a small amount of sugar to a heavy bottomed pan and set on a medium - high heat.
Allow at least 1/3 of the sugar to melt before stirring, once all of the sugar is melted, add another few spoonfuls, its important that you don’t add too much or the caramel will seize and you’ll be left with lumps.
Continue to add a little sugar at a time, making sure that the last batch is fully dissolved before adding more, DO NOT WALK AWAY.
Once all of the sugar is in, continue to heat the caramel until it’s your desired colour, don’t be afraid of taking it to a nice dark amber colour! Again DO NOT WALK AWAY!
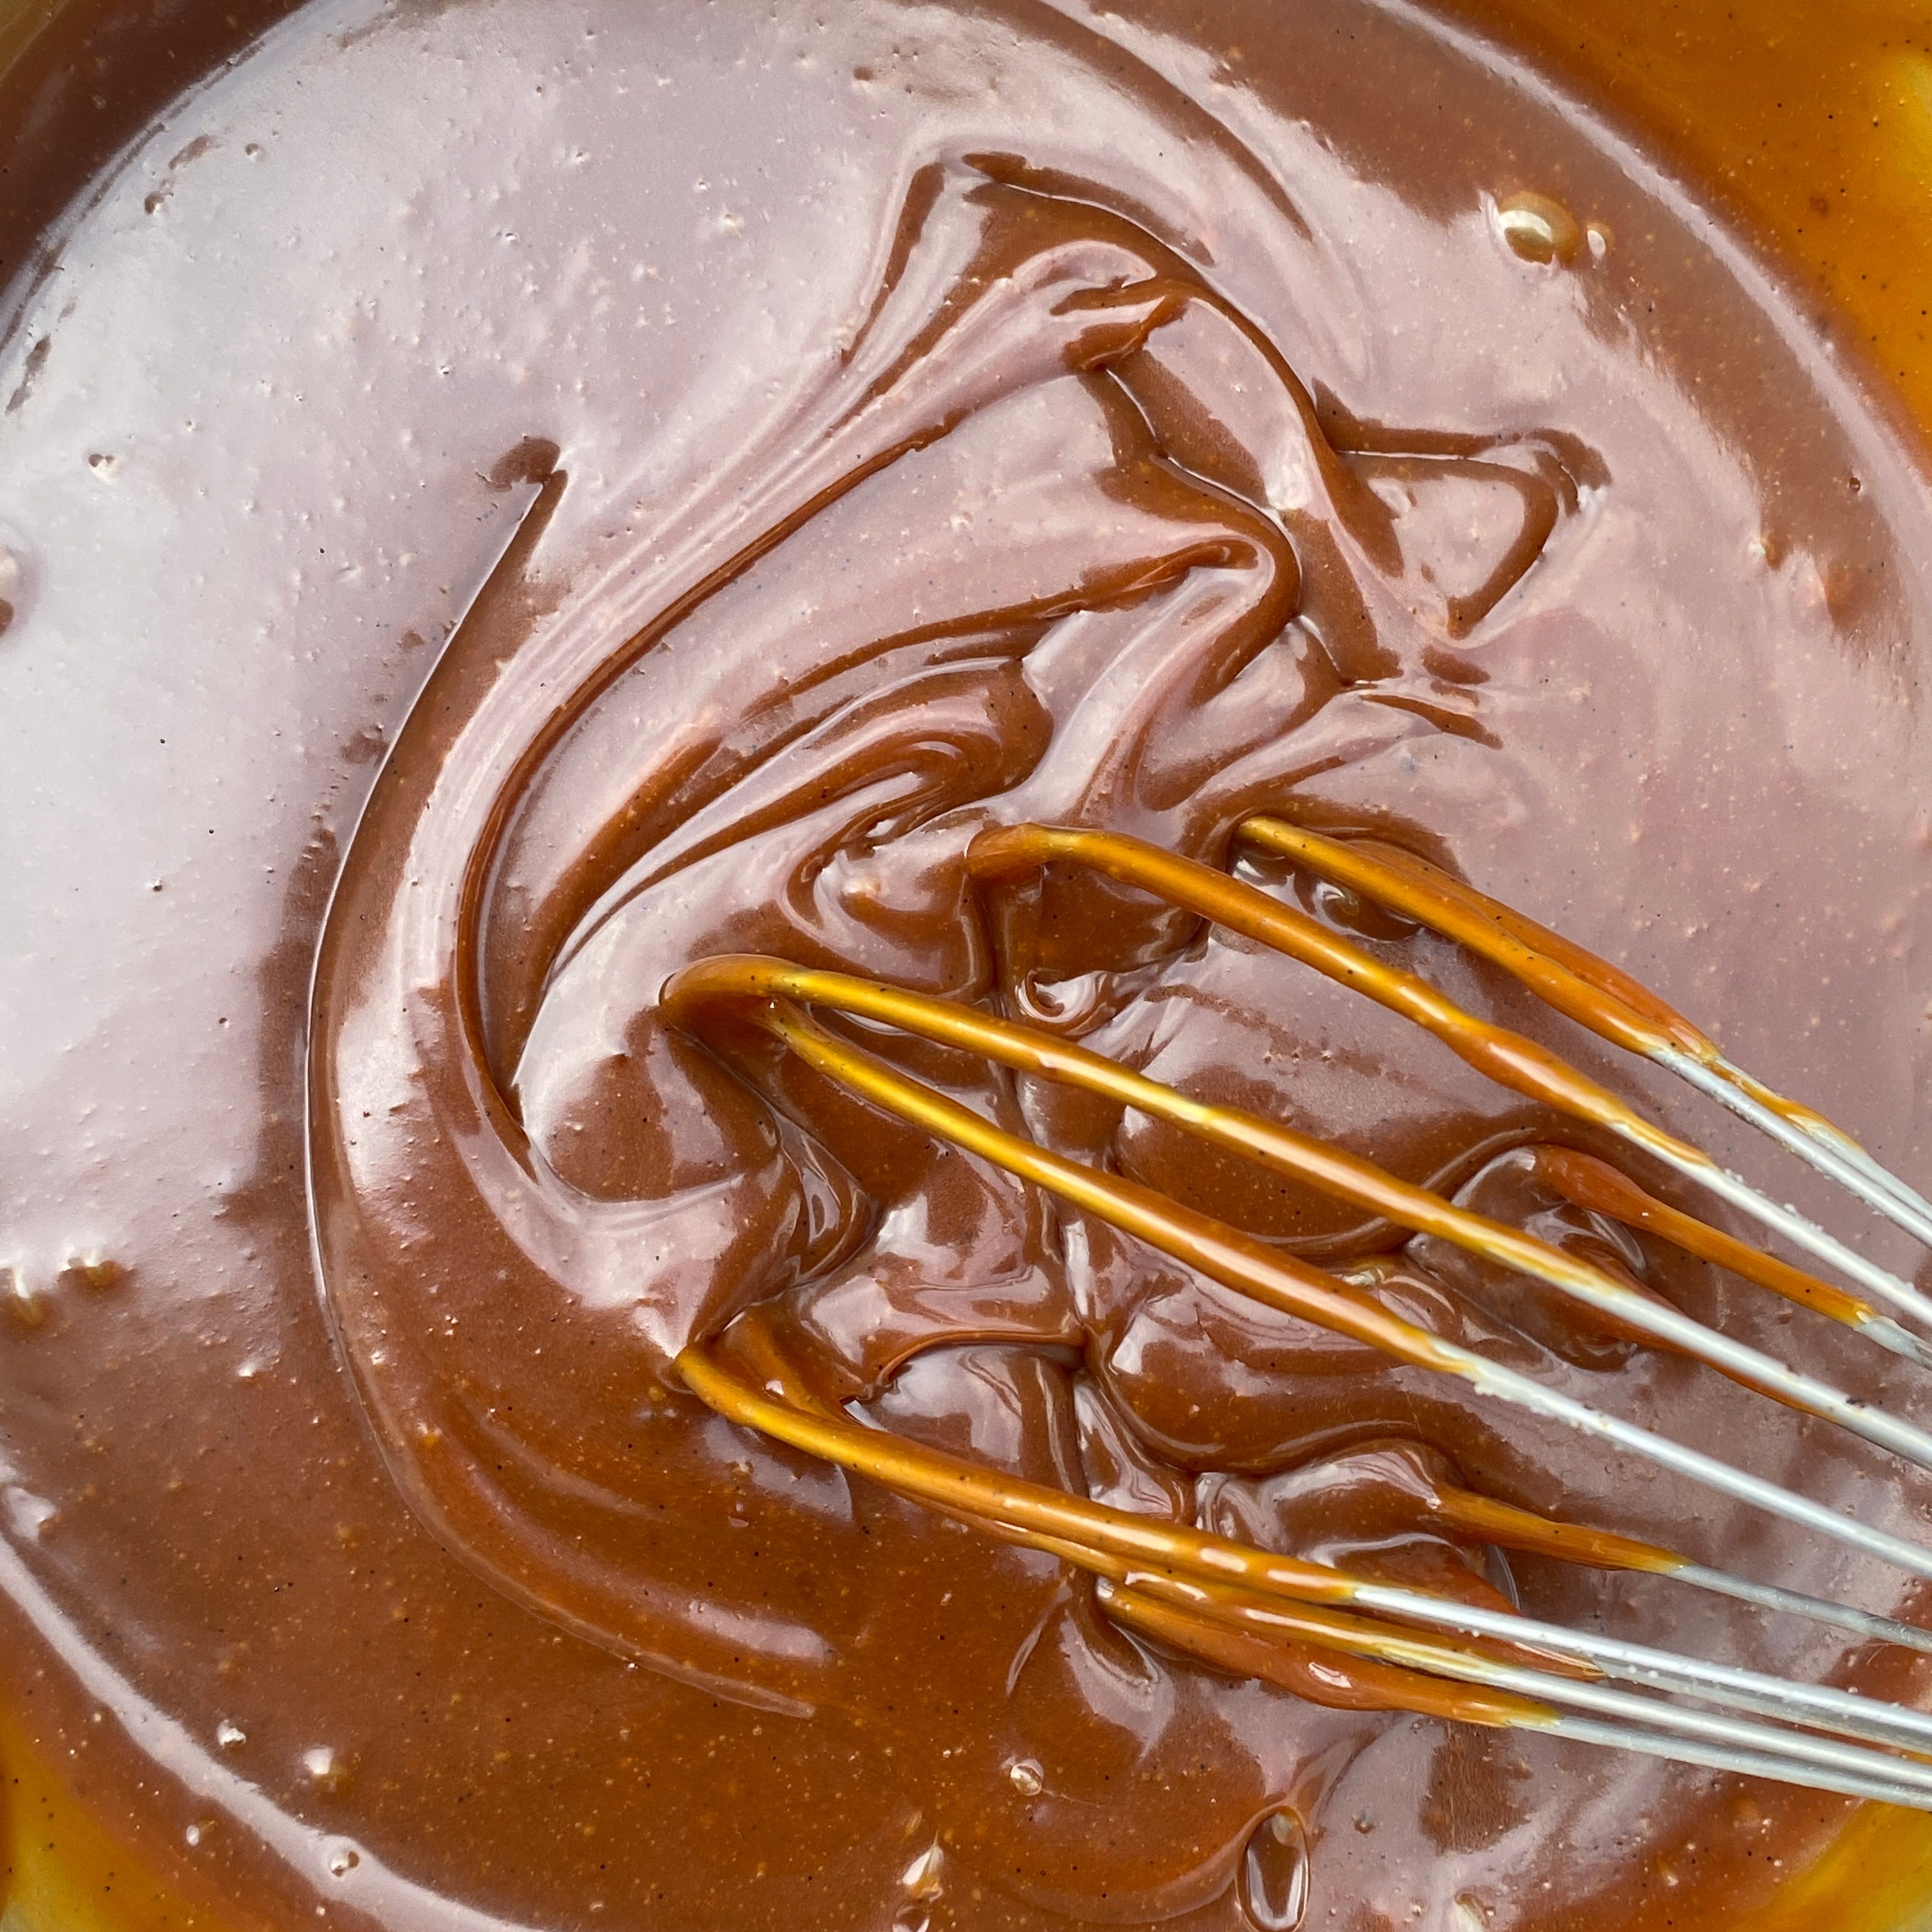
Once it’s ready remove from the heat and whisk in about 1/3 of the cream, BE CAREFUL! This will produce a lot of steam so wear oven gloves if you need to. Add the rest of the cream1/3 at a time, whisking each time.
Set aside until the caramel has cooled to 30°C-40°C then add your butter, if it needs a little help you can use a hand blender to incorporate it.
Store until ready to use!


Trouble Shooting
Even when following instructions meticulously you can still run into bother with caramel so let’s have a look at what we can do to fix any mistakes.
Lumpy caramel: This can happen if too much sugar is added at once of if the cream is too cold, luckily this isn’t too much trouble to fix, just warm the caramel slightly before passing it through a sieve! If it’s really lumpy you might need to bring it to the boil before you do this!
Burnt caramel: Sometimes the sugar can go from a lovely dark amber to smoking and slightly acrid while we’re not looking, if this has happened there are still some things that might be able to save it. Dark caramel works perfectly added to buttercream, it doesn’t add too much sweetness and it has a really strong flavour, or you can make a batch of paler caramel and mix the two together however if it’s unpalatably bitter it might be bin time.
Pale caramel: I find that beginners are often a bit worried about burning caramel and because of this don’t take the caramel dark enough which leaves you with a pale caramel with little flavour, of course you can make another, darker batch and mix them together but if you want a quick fix you can add a spoonful of treacle or molasses, this adds a bit more flavour and darkens the caramel up instantly!
Firm caramel: Sometimes during the cooking process a lot of liquid is lost to evaporation, if this had happened and the caramel is firmer than you’d like just heat it up and add slightly more cream.
Chewy Caramel Toffees
When I first started writing this post I didn’t intend on including a chewy caramel recipe but I got a bit overenthusiastic and ended up making 4 batches of chewy caramels as well as reading a tonne of recipes. Before I even get going I need to say do not attempt these unless you have a sugar thermometer that you trust! Temperature is key here and during the testing process I was fooled by a dodgy thermometer. Most caramel toffee recipes that I found online didn’t actually involve caramelising any sugar, so I turned to some recipes for caramel mou (this is just a slightly fancier way of saying chewy caramel) but these recipes didn’t quite have the toasty, buttery flavour that you get from cooking down the cream and butter so I combined a few recipes to give me my perfect caramel toffees.
Ingredients - Makes around 30 toffees
100g glucose
150g caster sugar
50g dark brown sugar
175g double cream
50g butter
1/2tsp flakey salt
1/2tsp vanilla paste
Method
Line an 8” x 8” square pan with parchment paper.
Boil the cream, salt and vanilla and set aside.
Make a direct caramel with the glucose and caster sugar.
When it reaches a dark amber colour add the dark brown sugar followed by the cream, whisking it in 1/3 at a time.
Heat this mixture, stirring occasionally until is reaches 110-115°C, then add the butter.
Continue to cook until the temperature reaches 123°C.
Remove from the heat and transfer to your lined tin.
Leave to cool for at least 2 hours before cutting.
Cut to required size, I just did mine the width of my ruler, wrap in parchment and enjoy!


That concludes my caramel conundrums but if you have any other questions please don’t hesitate to ask!
Hallo! love your deep dives, thanks for sharing - currently attempting the salted caramel...first try the sugar caught too much/too dark so resulting caramel is bitter (will see if it's any good still mixed into smbc), every other aspect went perfect though! second try, got some lumps after I added the cream - definitely because it had cooled too much as i took longer with the sugar to make sure it didn't go too far this time. Did the suggested of warming and then passing through a sieve, perfect. Waited for it to cool to around 35°C and added butter - BUT my butter had been sat out and it's verrry warm today. So it's done the weird greasy sort of splitty thing 🥲 anything I can do to fix at this point? 🙏🏼
Question! When making a direct caramel with the glucose and caster sugar, can you layer all the sugar over the glucose and let it melt together that way or should you add the glucose and then add sugar gradually? 🤔