

Praline Party
Everything you want to know about pralines and nut pastes 🌰

Hello! As a nut lover and a praline fiend it was only a matter of time before I found an excuse to write about praline, it’s something that I use all of the time but I’m yet to share a recipe including praline on here, I was absolutely horrified to discover this and it’s something that I will be rectifying immediately! But before getting down to praline based recipes I thought we should get into what praline actually is, when and where to use it, different variations and how to make it at home without destroying your blender.
What Is Praline?
In it’s simplest form praline is a mixture of nuts and sugar, in the patisserie and chocolate worlds praline usually refers to a sweetened nut paste, so that’s what I’m going to focus on this week but the word praline actually originated from a confection of whole almonds dipped in caramelised sugar. These were created in the 1600s by chef Clement Lassagne and he named the tasty treats after his employer,the French Duke of Praslin, over the years praslin became praline and variations popped up around the world with pecans and cream replacing almonds in Louisiana and chocolate being added in Belgium.
On average Belgians eat 6 kilos of chocolate per person each year (rookie numbers if you ask me) so it’s only natural they they got chocolate involved in some way. We have Belgians to thank for the whole praline vs praliné confusion, according to some chocolatiers praline is a chocolate filled with a nutty substance whilst praliné refers to the paste itself. I think the safest to say that we can just use the word praline for anything involving nuts (or nutty things) and sugar.
The Nuts
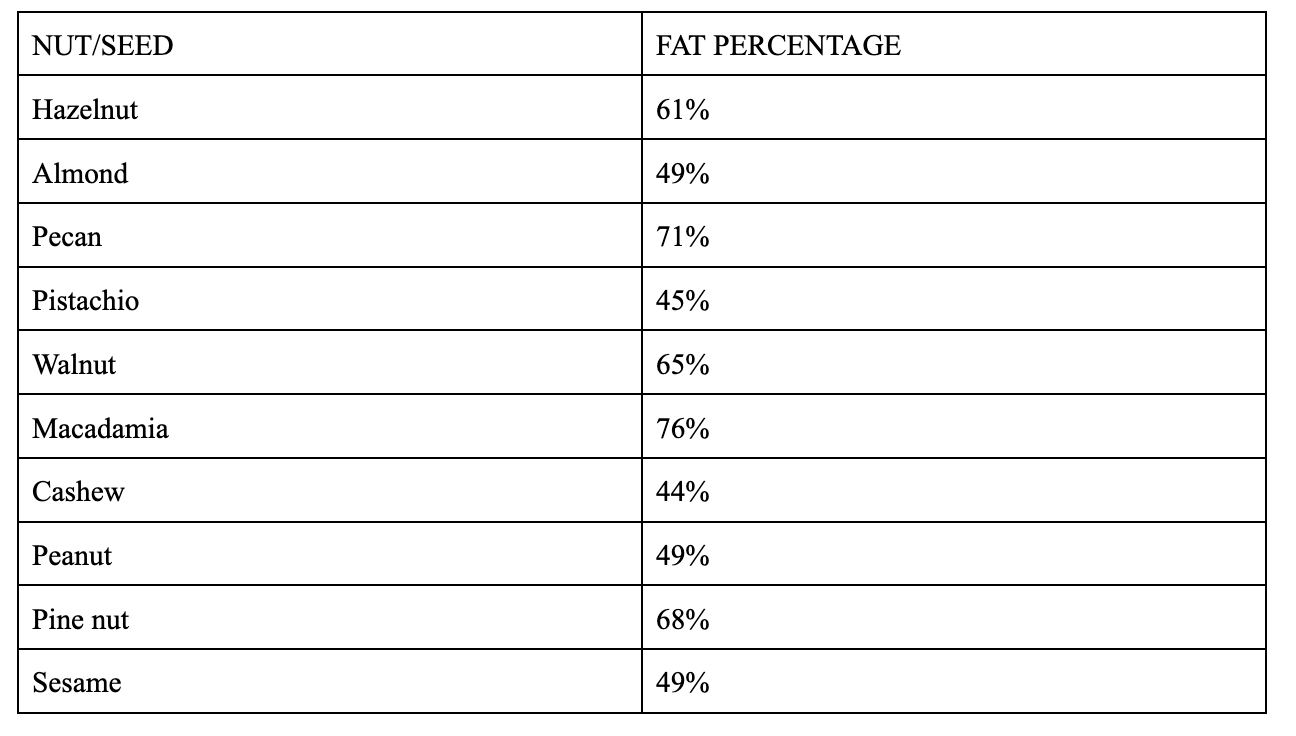
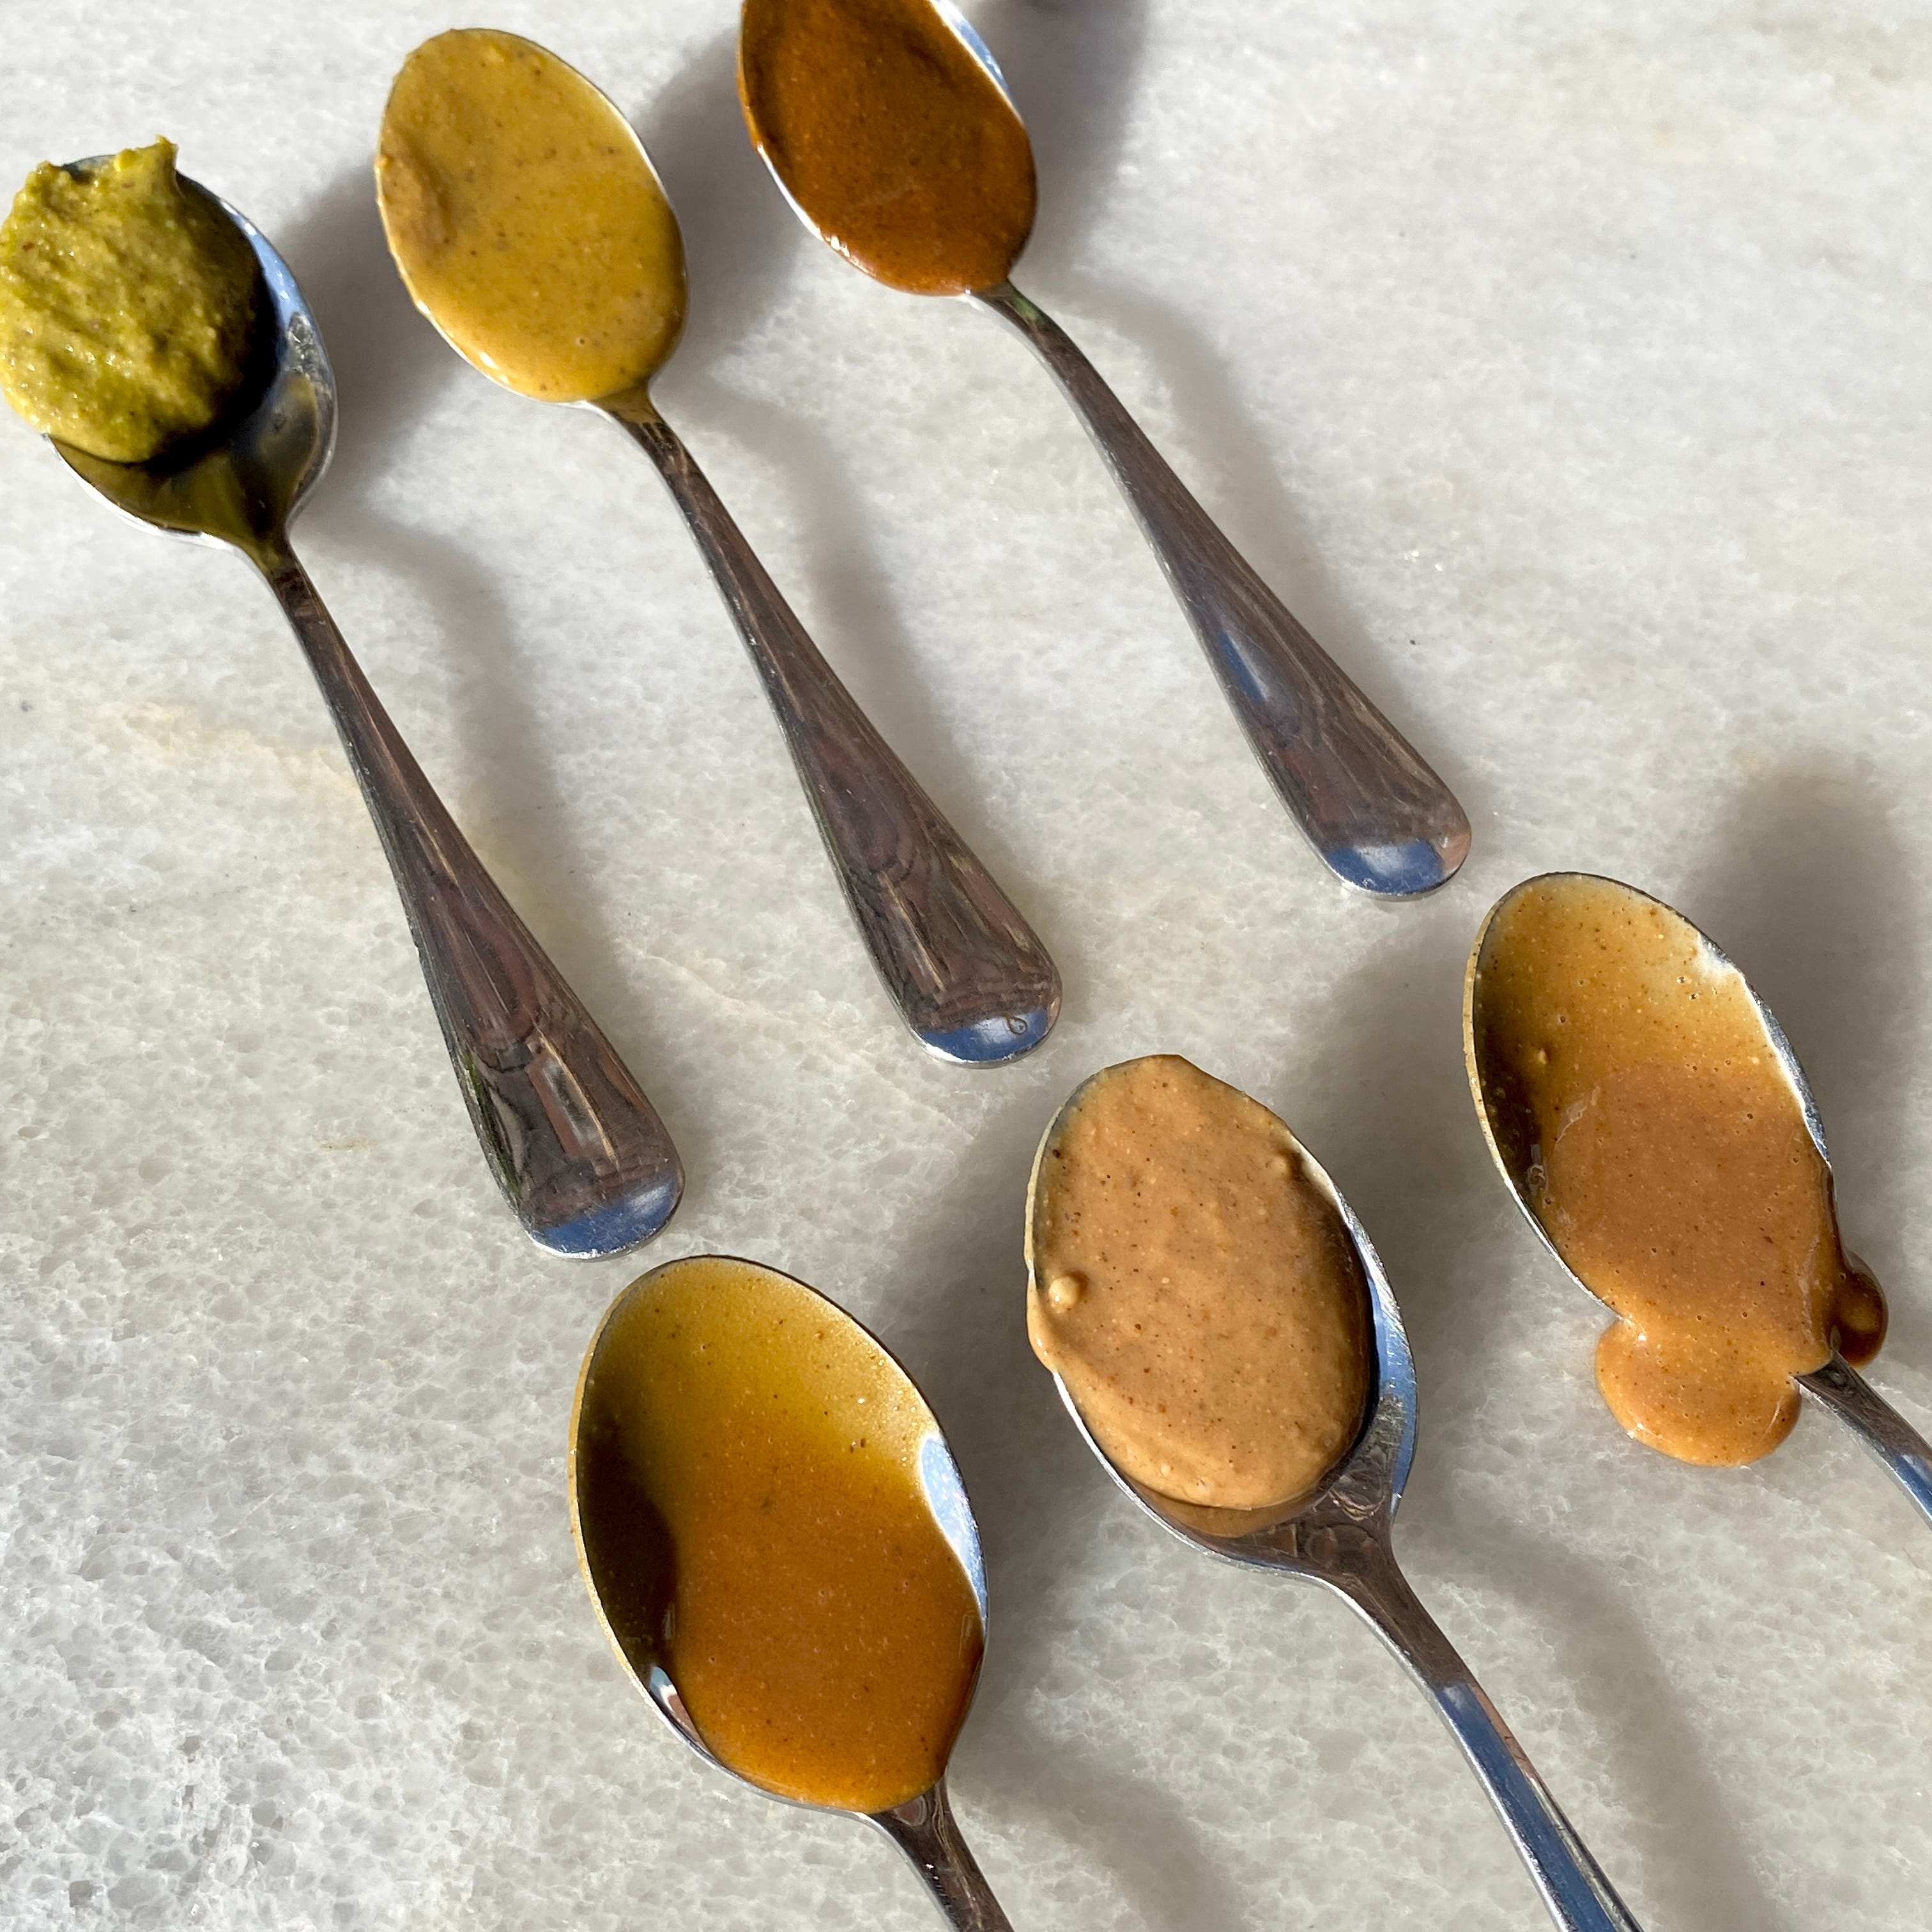
Praline paste can be made with just about any nut or seed, nuts contain such a high fat content that when blended the fat is released and a paste forms, this is exactly the same as nut butters, the only difference being that we’re adding sugar. The fat content of the nut will affect how liquid the finished praline paste is, a high fat percentage will result is a very runny praline whilst a low one will make a much thicker paste. I’ve compiled all of my most used nuts along with their fat percentages for reference. In general I find that nuts with around a 50% fat content or below can need a bit of help when it comes to forming a paste so you can add a small amount of oil to get things moving, anything higher than 55% shouldn’t need any additional oil, just patience.
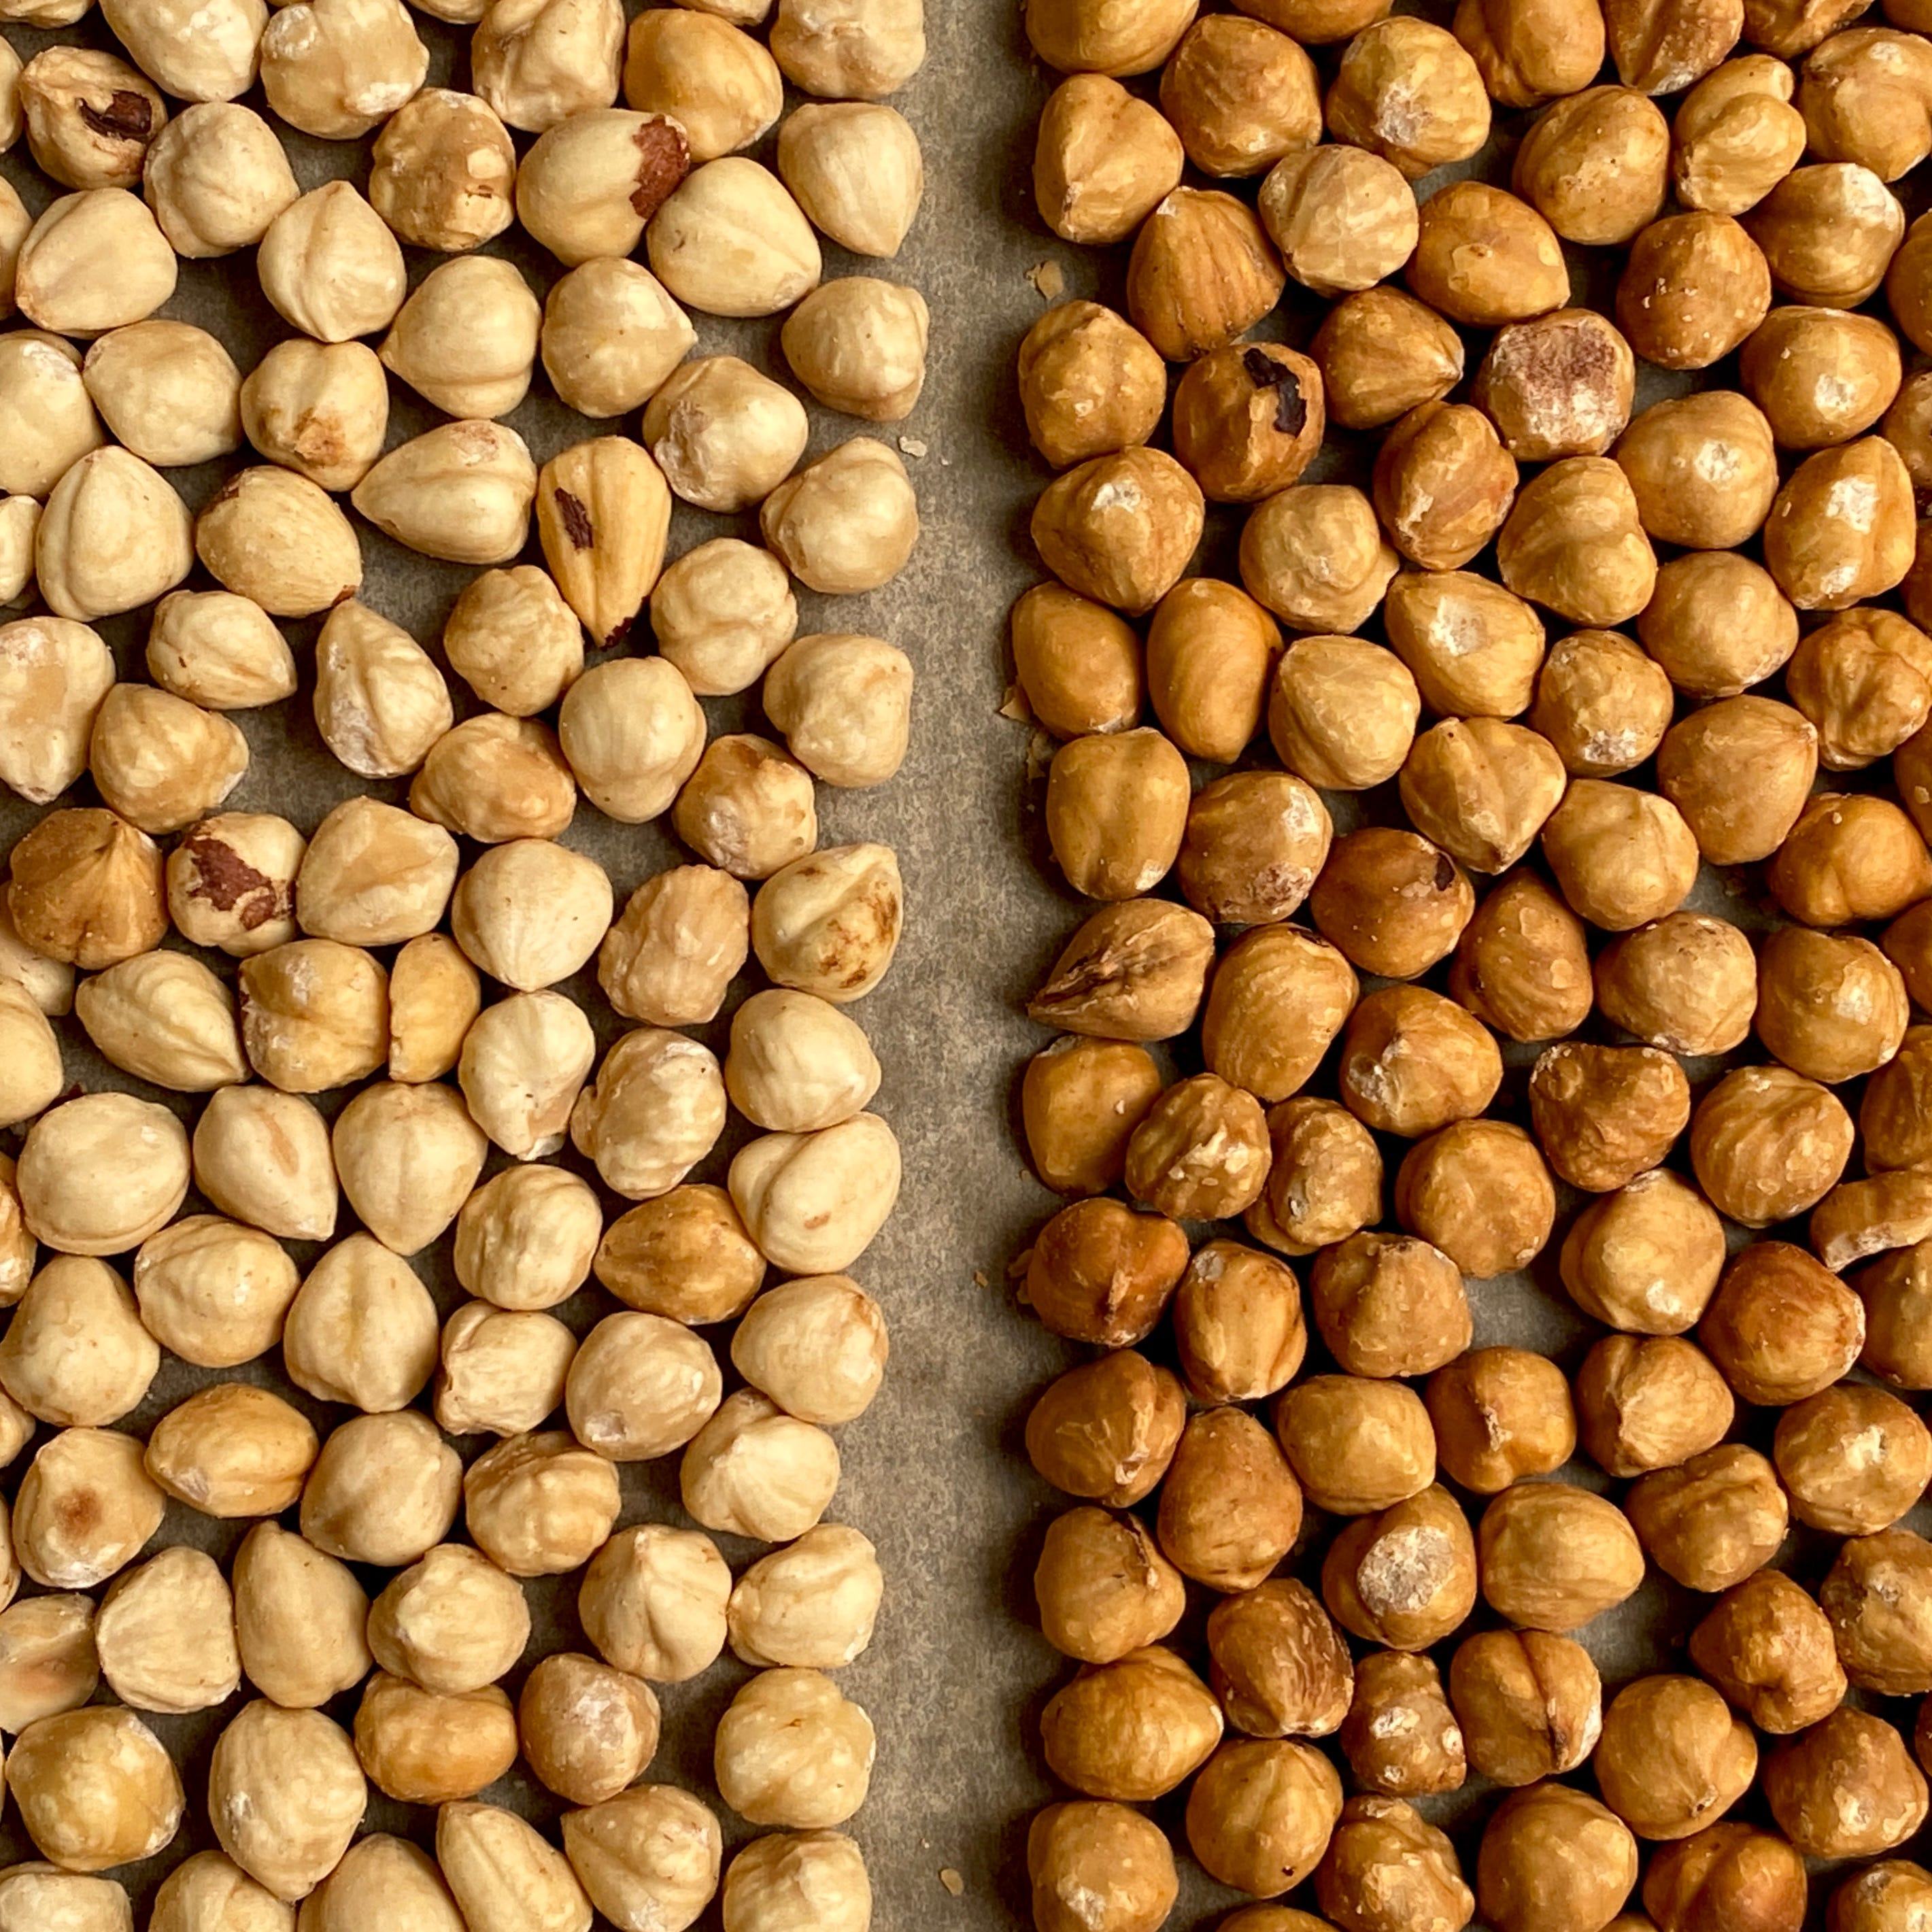
We can also speed up the release of fats by roasting our nuts, this decreases the amount of water content and boosts the flavour! I recommend roasting almost any nuts or seeds before using them for praline. Timings and temperatures will depend on the nut or seed but I usually roast at 180°C/320°F for 15-20 minutes.
It’s worth considering the final usage when roasting the nuts, if you’re just going to be eating sugar coated nuts then you might want a lighter roast but if they’re going to be competing with other flavours as a part of a layer cake or dessert then a stronger roast is usually a good idea so that they don’t end up lost in a sea of flavours.
The Sugar
As we learnt earlier, traditionally pralines are made with caramelised sugar but I’ve also seen them made by simply blending roasted nuts with icing sugar, this is a very quick and easy way of making a praline paste, it doesn’t offer as much depth of flavour as using caramel but it’s perfect if you want to preserve the colour of your nuts or just a quick fix.
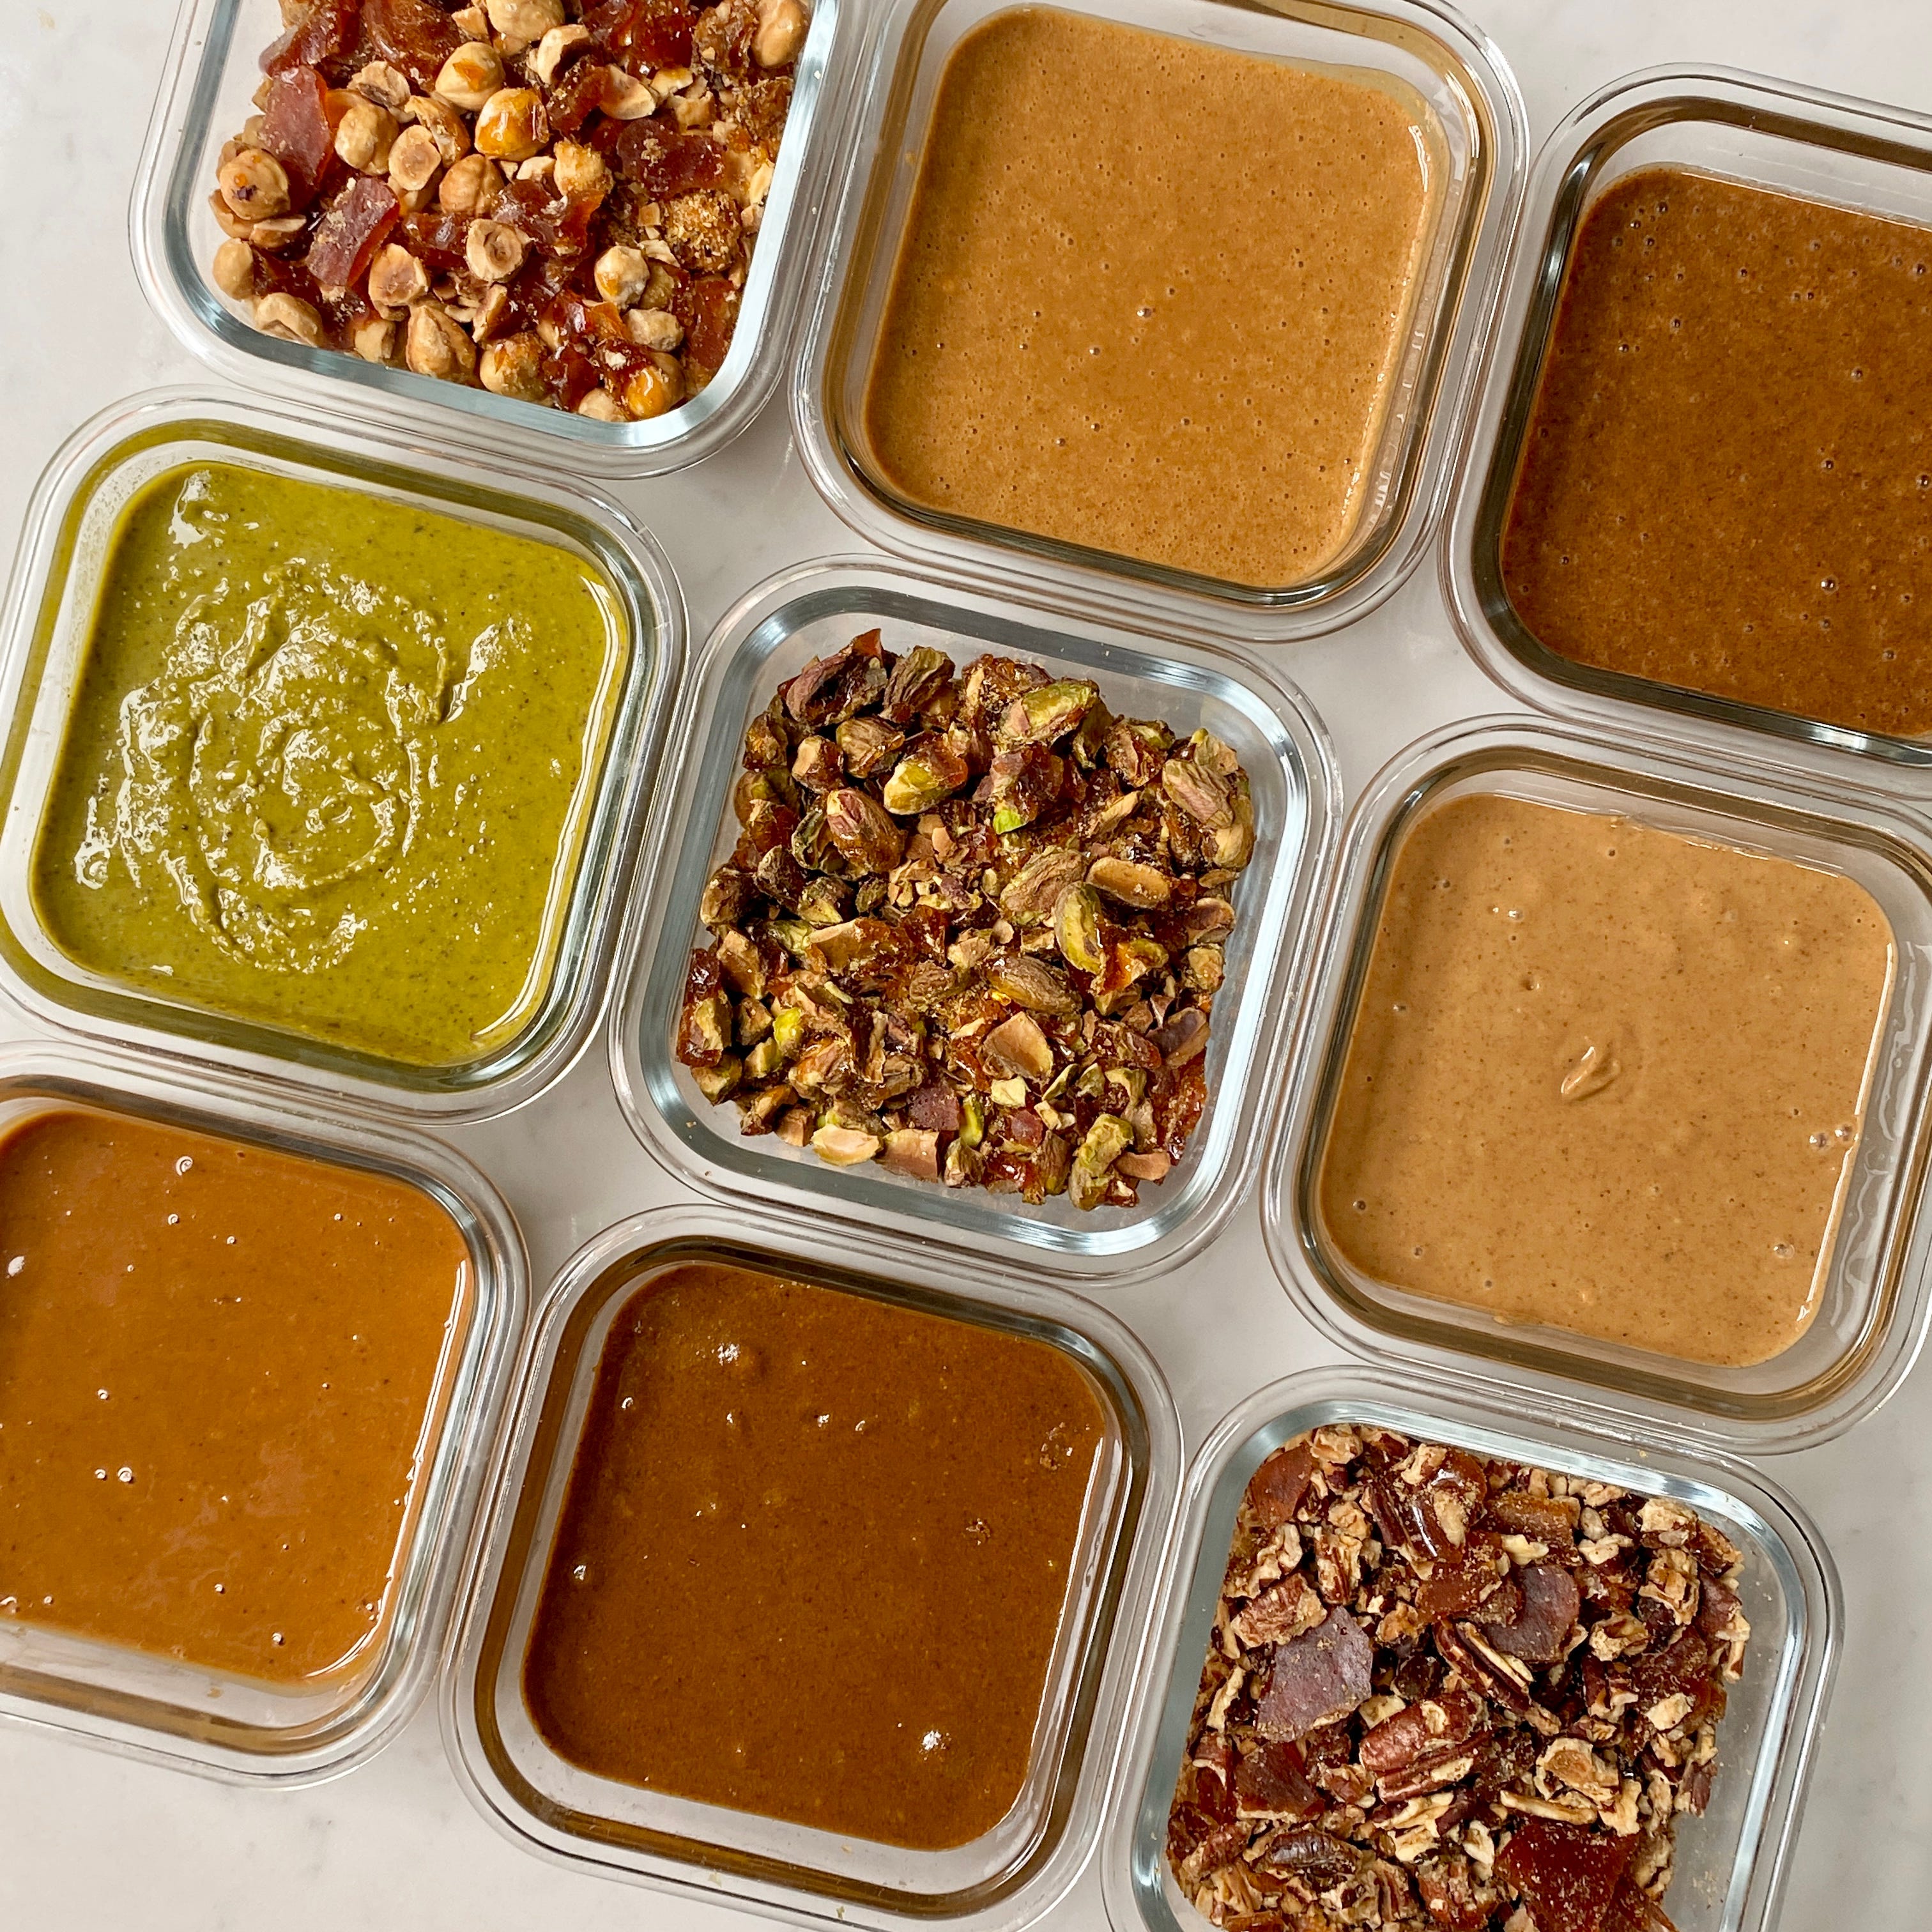
My preference is to use caramelised sugar when making praline pastes, the flavour of caramel works with pretty much every nut and praline pastes made with a caramelised sugar have a delicious crunch to them. The caramel can be as dark or as light as you like, it completely depends on your personal preference, I usually opt for a dark amber caramel when I’m using nuts with a strong flavour like hazelnuts or pecans and use a lighter honey coloured caramel for milder nuts like macadamias or cashews.
The quantity of sugar is really up to you, classic praline paste recipes usually operate on a 50:50 sugar to nuts ratio but you can add less if you want less sweetness, the only downside is that you’ll loose a bit of that caramel crunch. There’s also the option to use alternative sugars to really spice things up, I’ve made pralines with light brown sugar and caramelised honey before, there really are tonnes of possibilities if you fancy getting experimental.
The Blender
Mid week I had to run to the shop and buy myself a new blender, my old one just wasn’t up to blitzing 8 pralines in a row. This wasn’t really the blender’s fault but rather my fault for using the wrong type of blender.
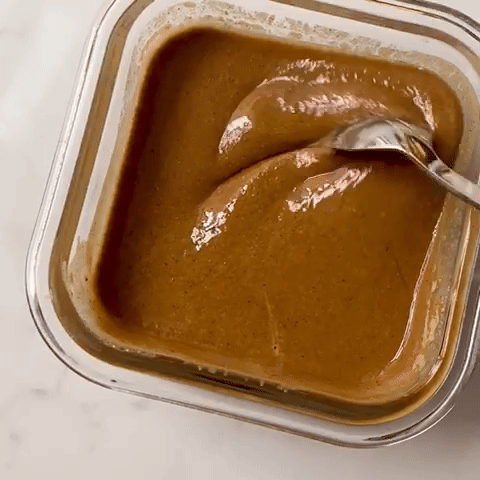
To make praline paste you really need to be using a food processor rather than a blender deigned for liquids. Food processors are designed to blitz solids which is perfect for praline, however they don’t make perfectly a smooth paste, generally this isn’t a problem for me as I like mine with a bit of crunch but if you’re aiming for a velvety paste then your best bet is to start off by blitzing the praline in a food processor until it becomes liquid, and then transferring it to a blender and blitzing until smooth. To achieve professional grade silky smooth pralines and nut pastes you’ll need a stone grinder but at around £700 a pop I don’t think they’re worth it unless you’re making a LOT of praline.
I bought a magimix food processor this week and it’s been working great so far (sadly not sponsored), I’ve used them in the past and found them to be pretty reliable but I think any food processor would work or if you’re feeling fancy thermomixes also work great!


A Note On Pistachios
Part of the beauty of pistachios is the wonderful bright green colour, this can make them a bit of an outlier when it comes to making pralines, you can absolutely treat them as you’d treat any other nut and roast them before blitzing with caramelised sugar but the result is a brown paste and I always feel a bit sad to lose that lovely green colour and I sometimes find that the flavour of caramel can overpower the more delicate taste of pistachios. In general when using pistachios I opt for a pistachio paste rather than a praline or a mixture of the two, praline for texture and paste to add to buttercream/crème pats for the colour.
When making pistachio paste roasting the nuts does help to bring out the flavour, however because I’m trying to maintain the colour, I only roast them very lightly. This light roast combined with the low fat percentage does mean that you end up having to add a bit of oil, I usually add about 10% of the total weight of my pistachios. You can buy pistachio oil which is my preference but if you don’t have any you can use any neutral oil.


When To Use Praline Pastes Vs Nut Pastes
I find that a lot of bakers strive to reduce sugar in their bakes and while I’m not overly concerned about sugar when it comes to health, I’m definitely conscious of not wanting to make my bakes too sweet, so why bother using praline paste at all rather than unsweetened nut pastes?
For me the main draws of praline are the lovely crunch and caramel flavour, I often use a layer of undiluted praline paste to add a nice nutty kick to something, it’s especially good in choux pastry when paired a with mousseline cream or if I’m pairing it with something bitter that I want to sweeten up a bit like a really dark chocolate. I’d use an unsweetened nut paste if I didn’t want to add any more sweetness, for example I often add pistachio paste to buttercream rather than a praline. Have a play with it and see what you prefer!
Base Praline Recipe
Ingredients - makes 400g
200g blanched hazelnuts or a nut of your choice
200g caster sugar
1/4tsp salt
A dried out empty vanilla pod if you have one, if not just leave it out (do not use vanilla extract or paste, we don’t want to add any water)
Method
Pre-heat the oven to 180°C(fan)/356°F.
Spread the nuts on a tray lined with baking paper and bake for 15 minutes until golden brown.
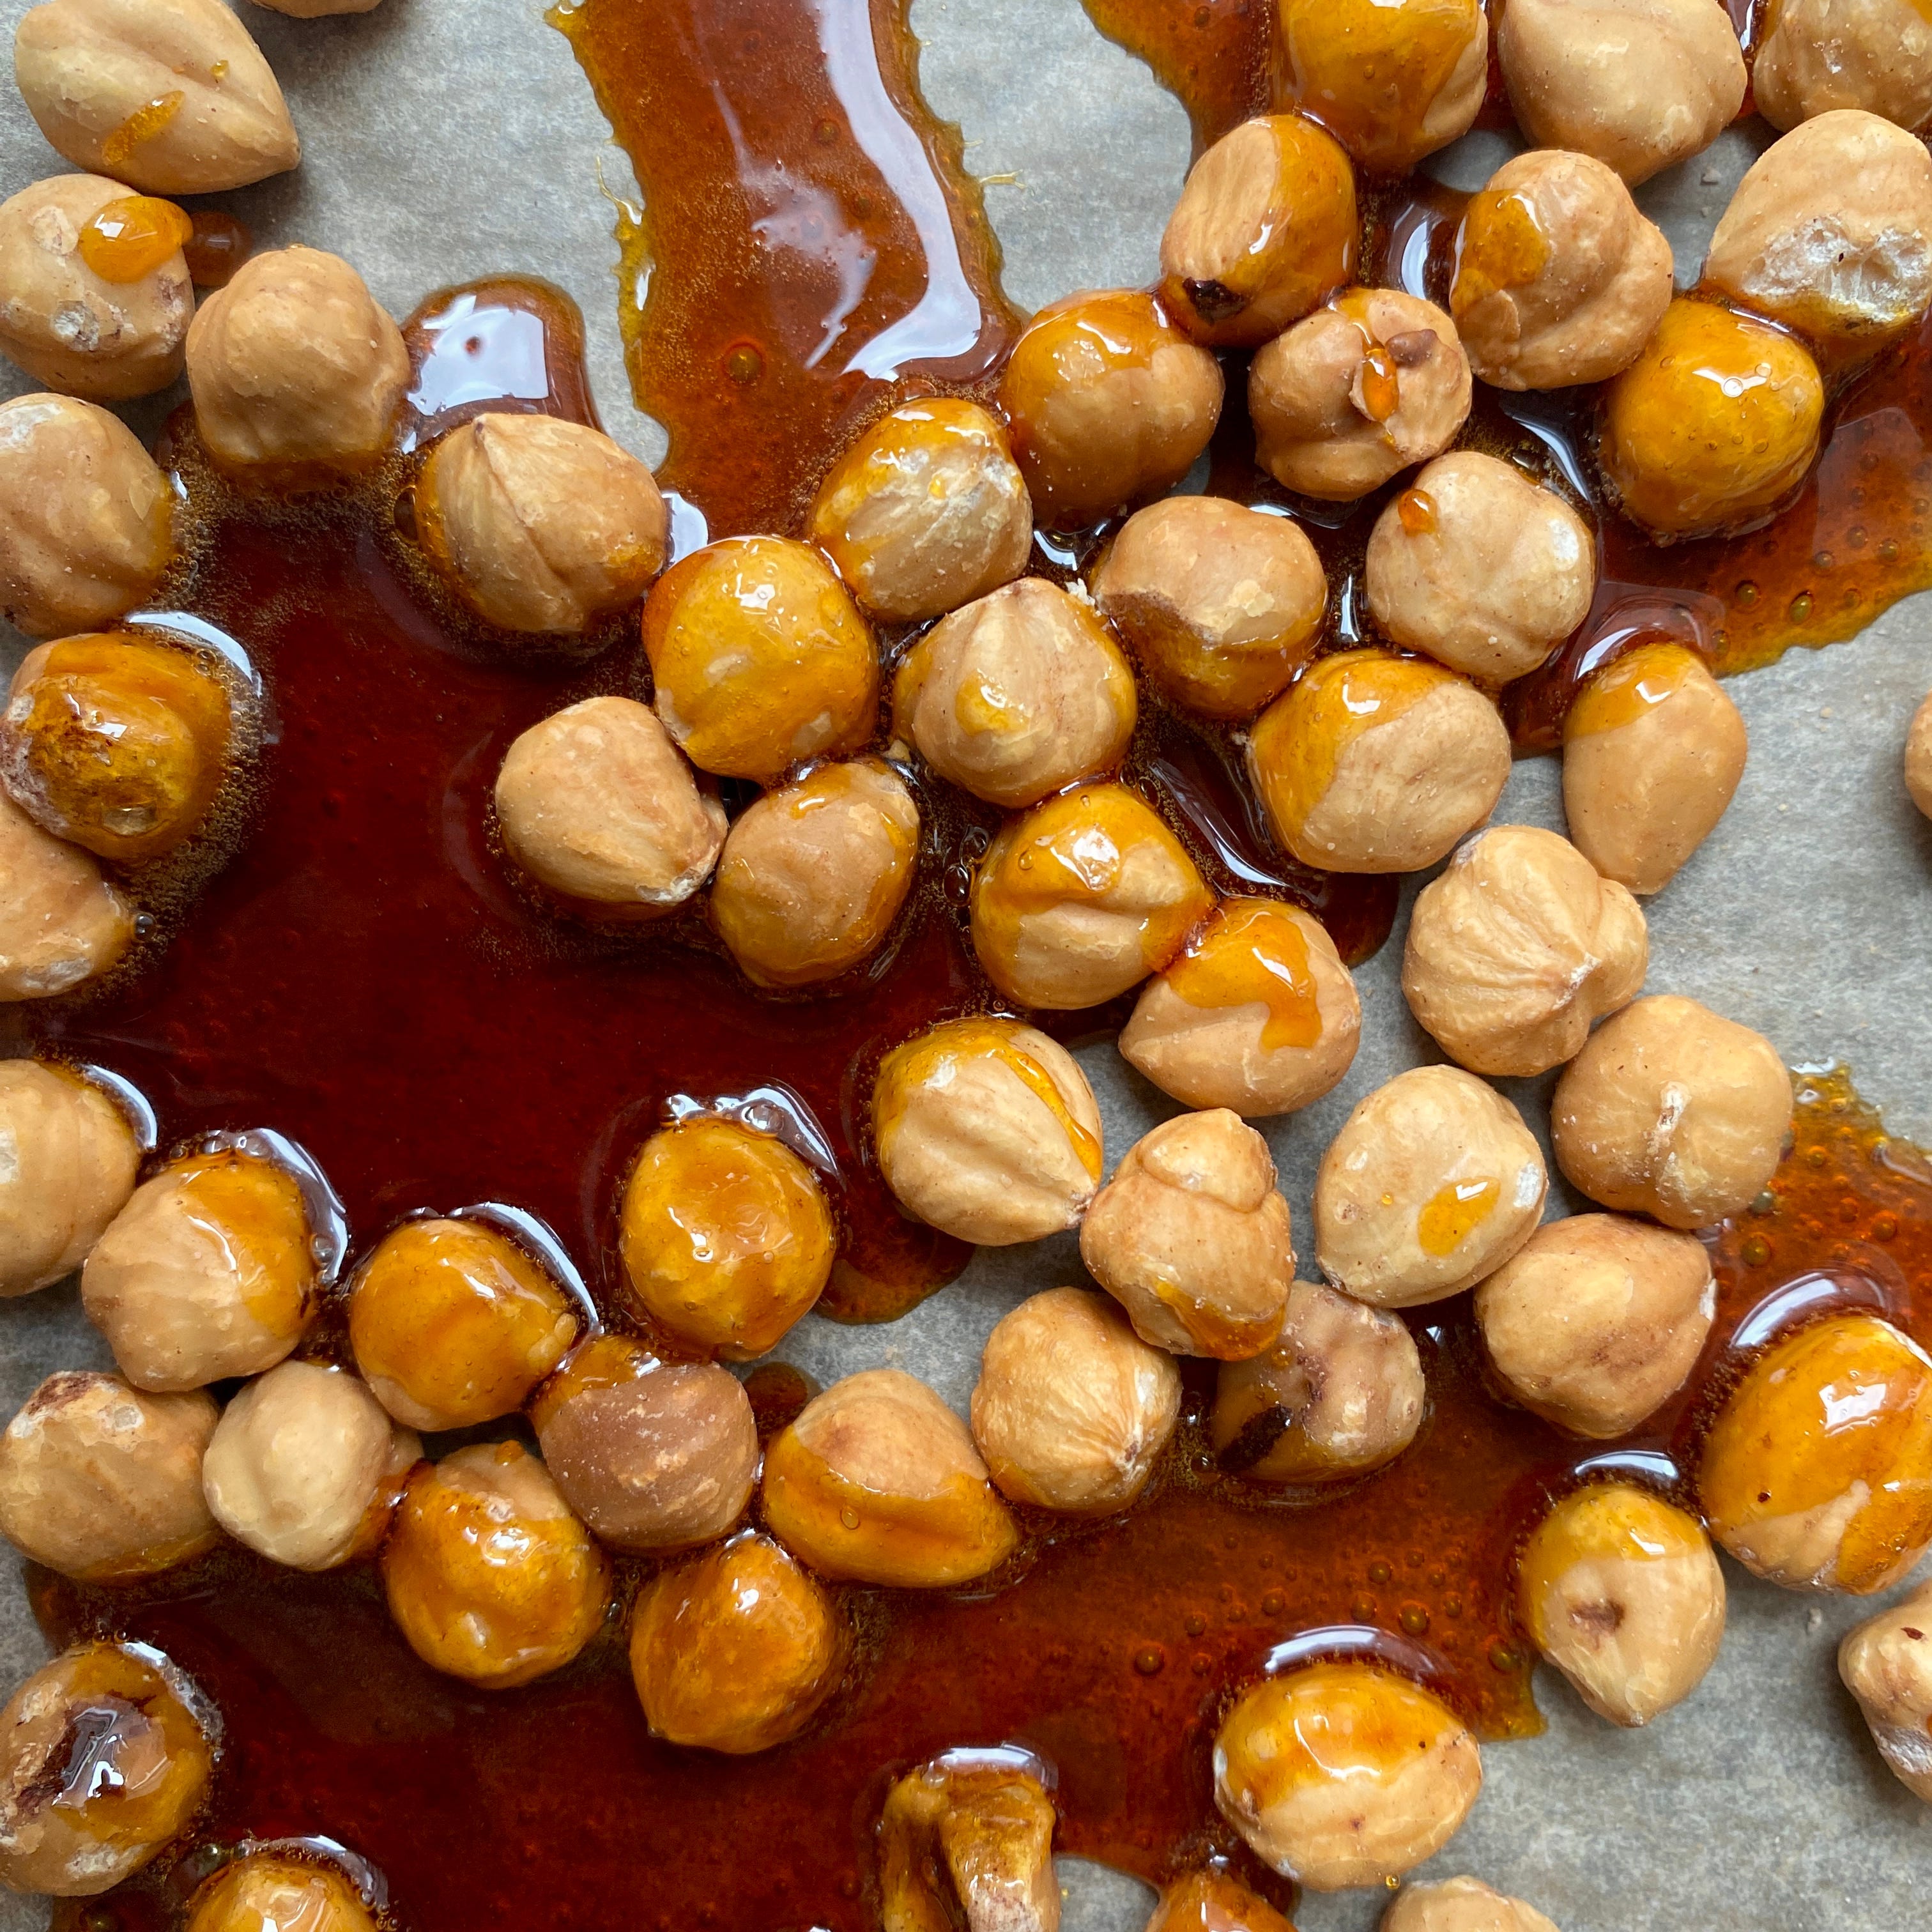
Once the nuts are out of the oven make a direct caramel by adding 1/3 of the sugar to a pan and heating until fully melted, you can stir occasionally to stop it catching, add the rest of the sugar 1/3 at a time and cook until it reaches a dark amber colour.
Remove from the heat and CAREFULLY pour over the roasted nuts as evenly as possible.
Leave to cool for at least 10 minutes.
Once fully cooled and set, smash it up with a rolling pin into chunks and transfer to a food processor.
Blitz with the salt and vanilla until a paste forms, this will require some patience but so long as the nut you’re using contains more than 55% fat a paste will form eventually. Scrape down the bowl occasionally to make sure there’s no big chunks.
Once it reaches your desired consistency transfer to an airtight container.
Use as required, this will keep in the cupboard for at least 2 months.
Super informative post Sophie. Thanks so much!
This is really insightful. Thank you for this. Realised why the almond praline I'm making needs oil, however some days it just splits as well. 🥲 Getting there.