


Classic Baked Cheesecake
Classic Baked Cheesecake
The hunt for my perfect cheesecake

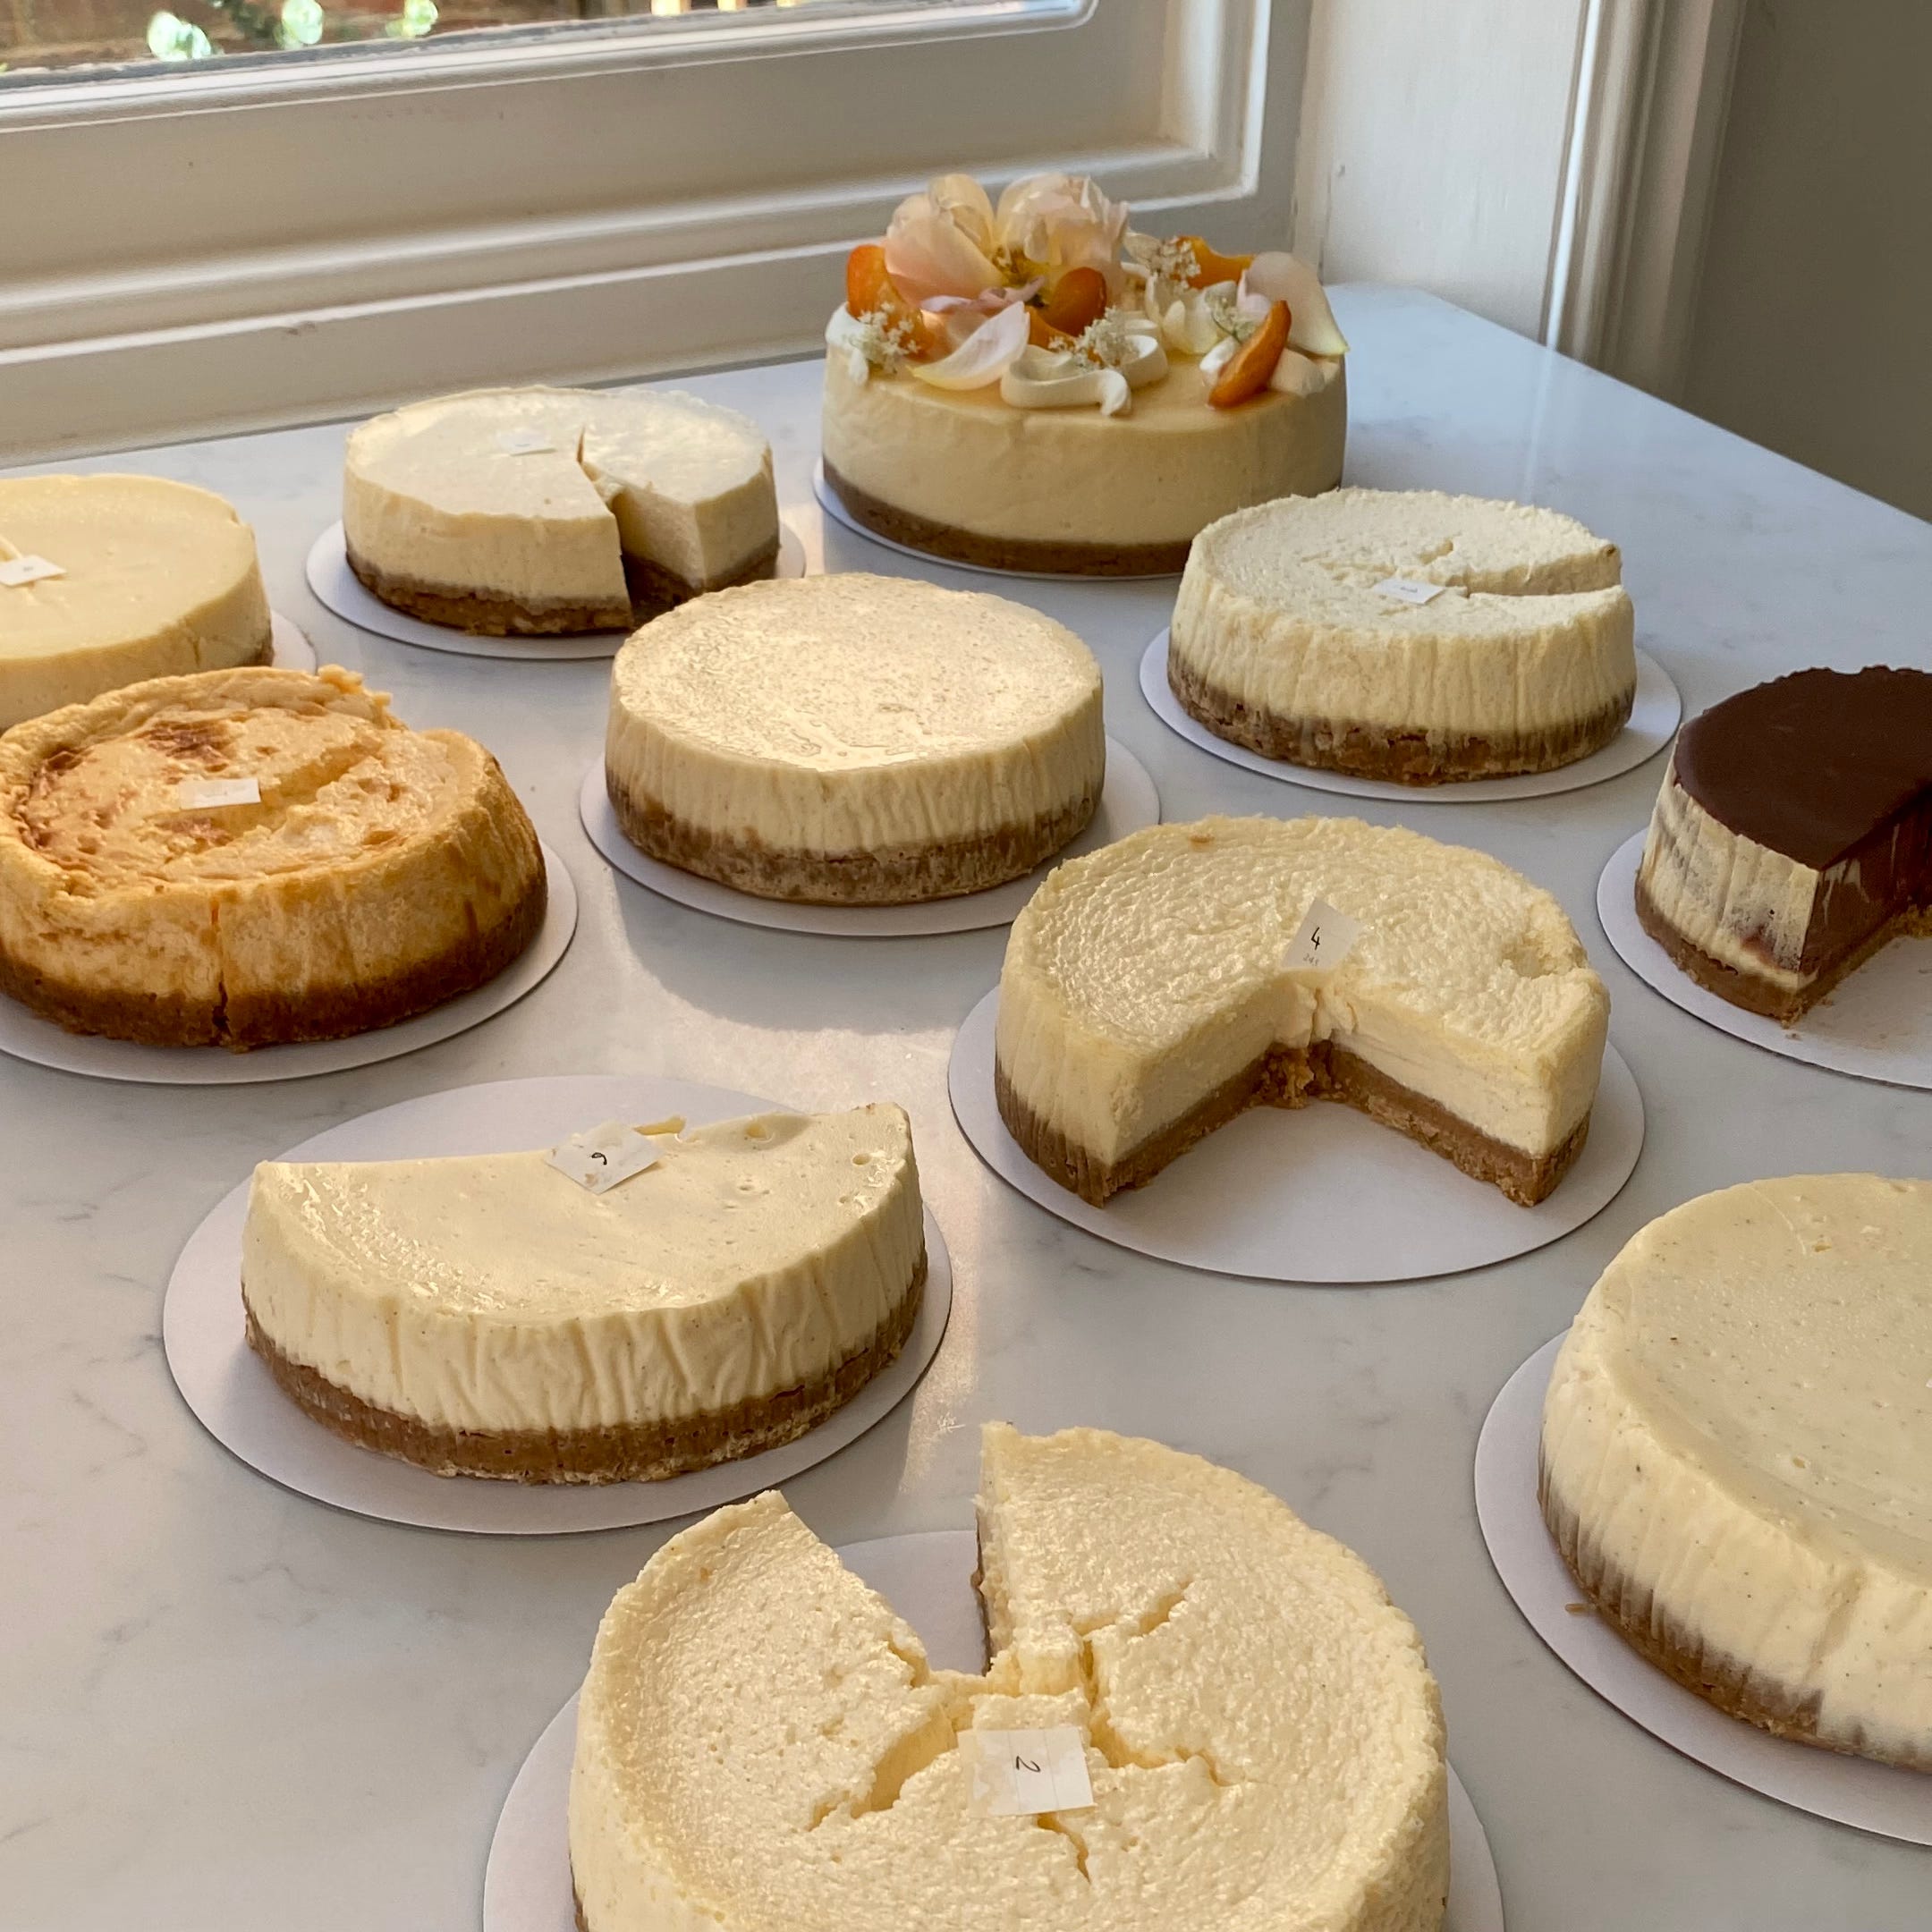
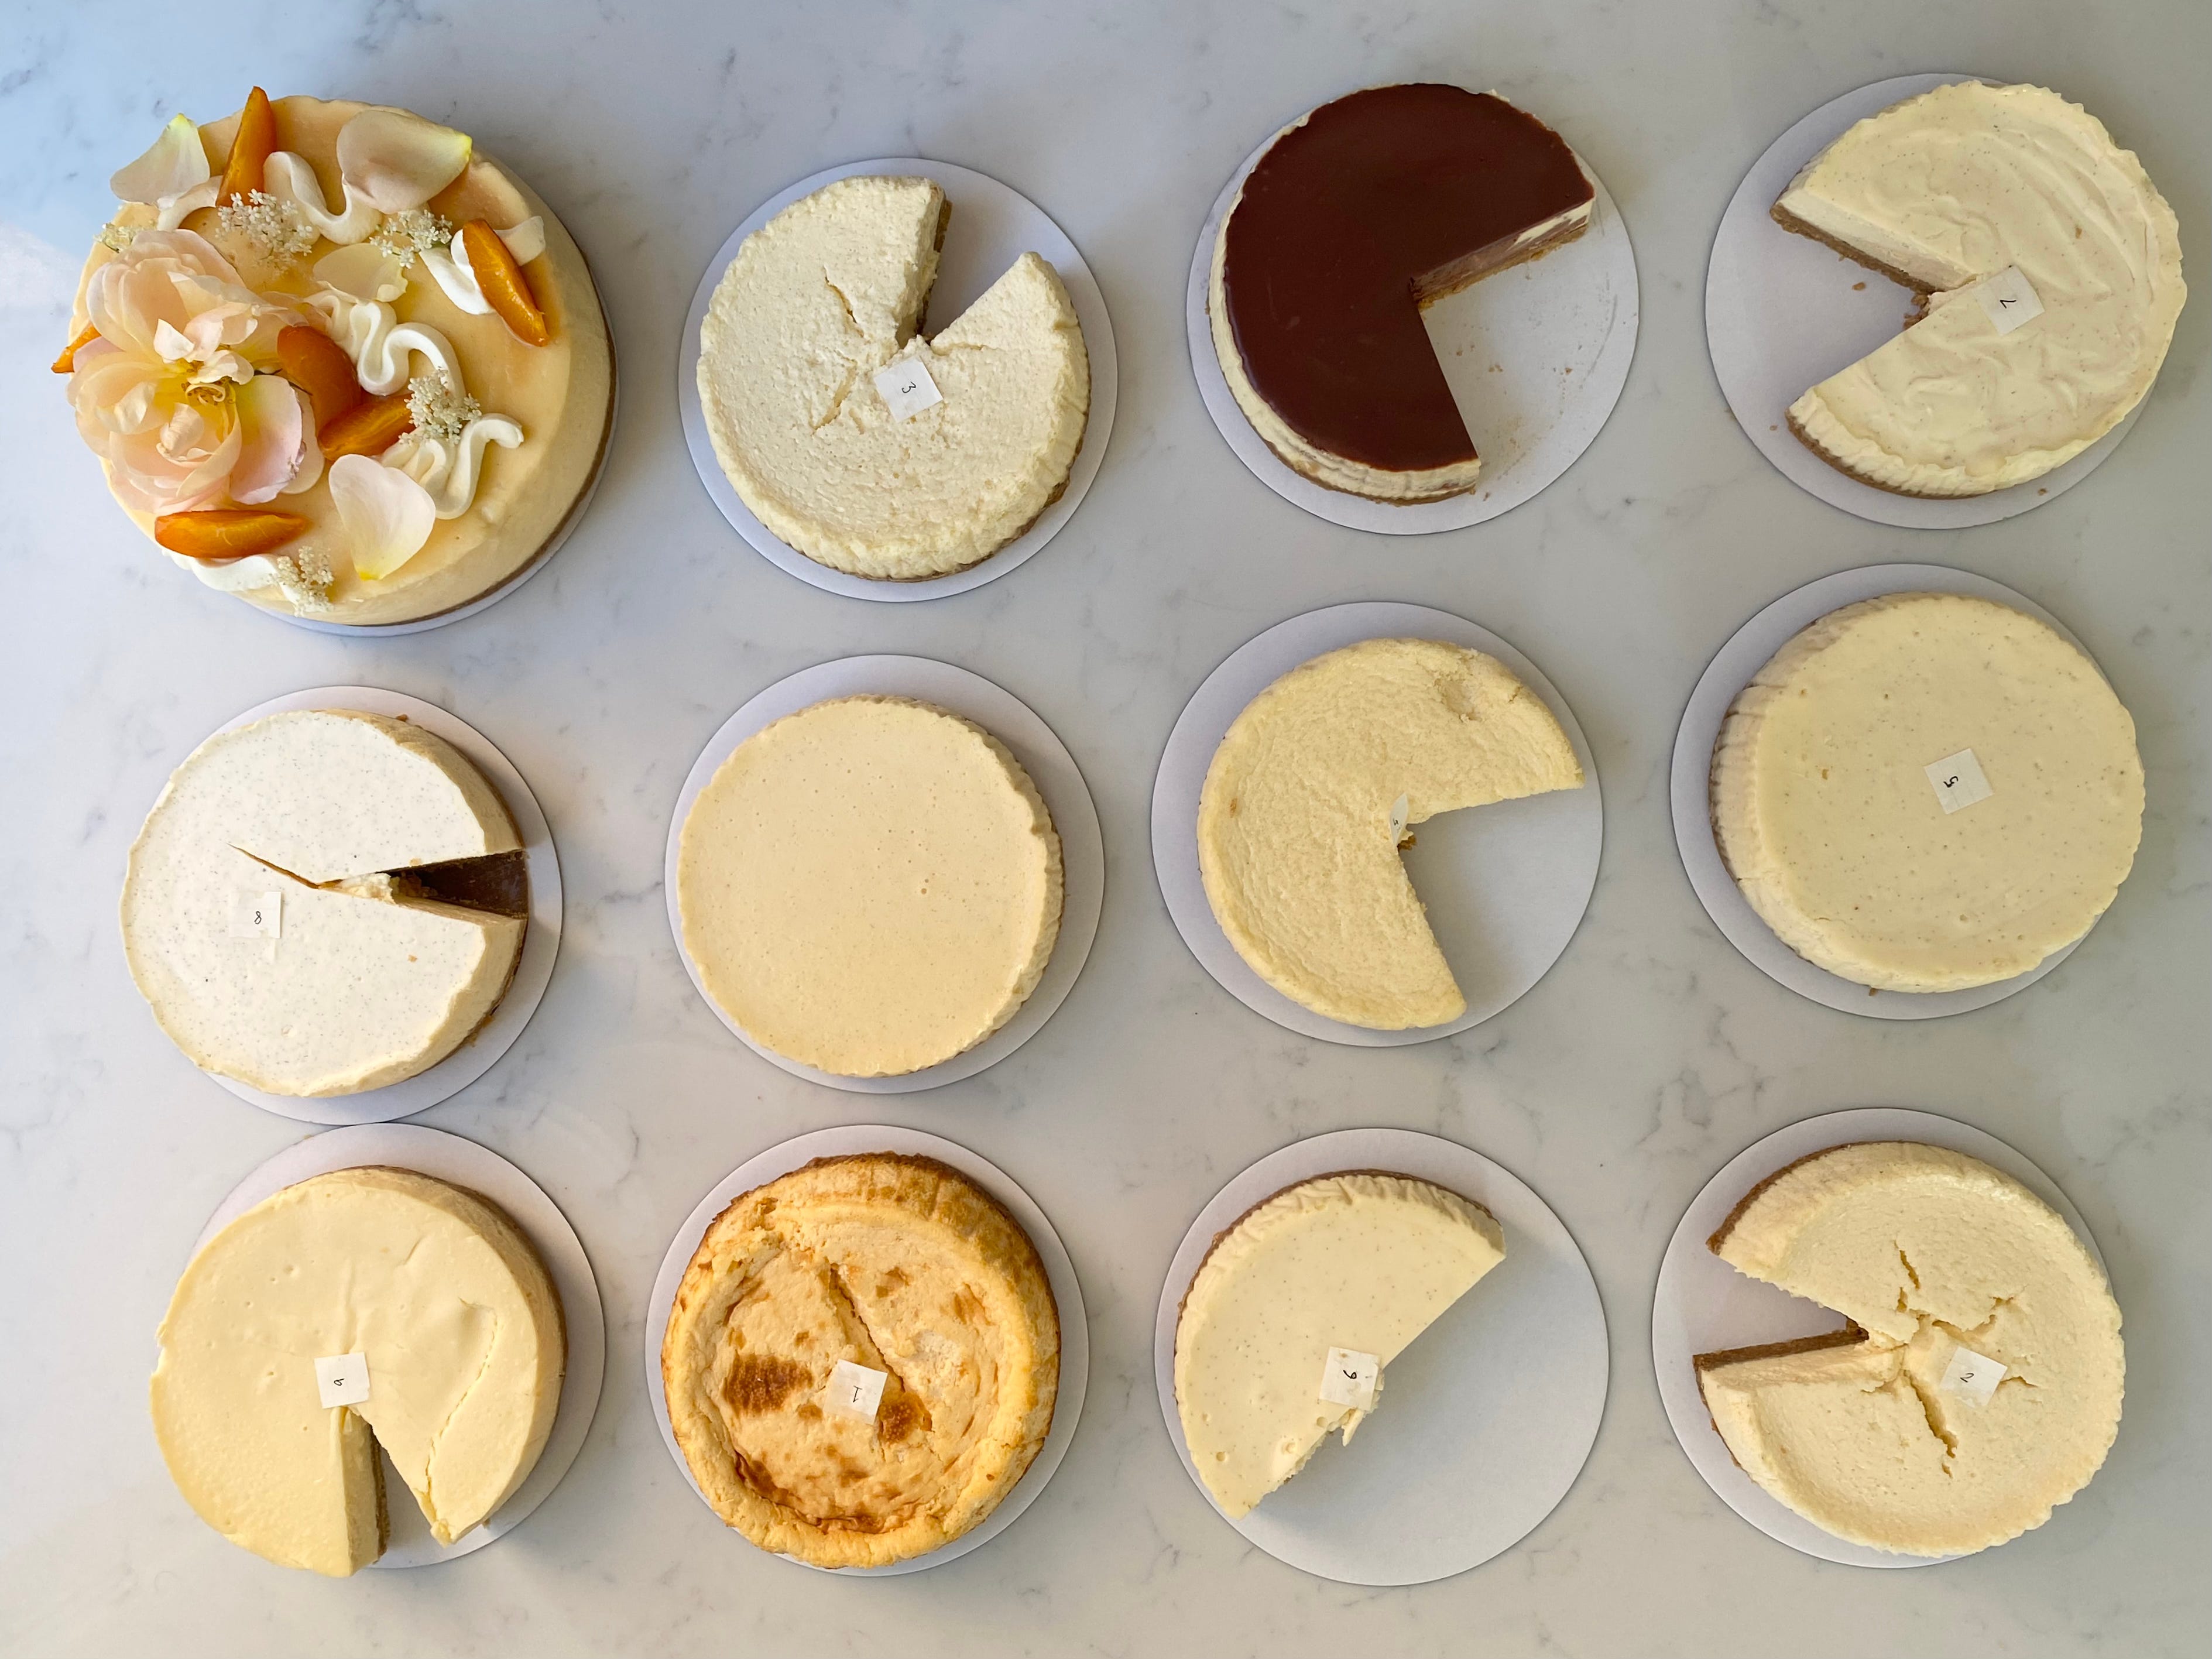
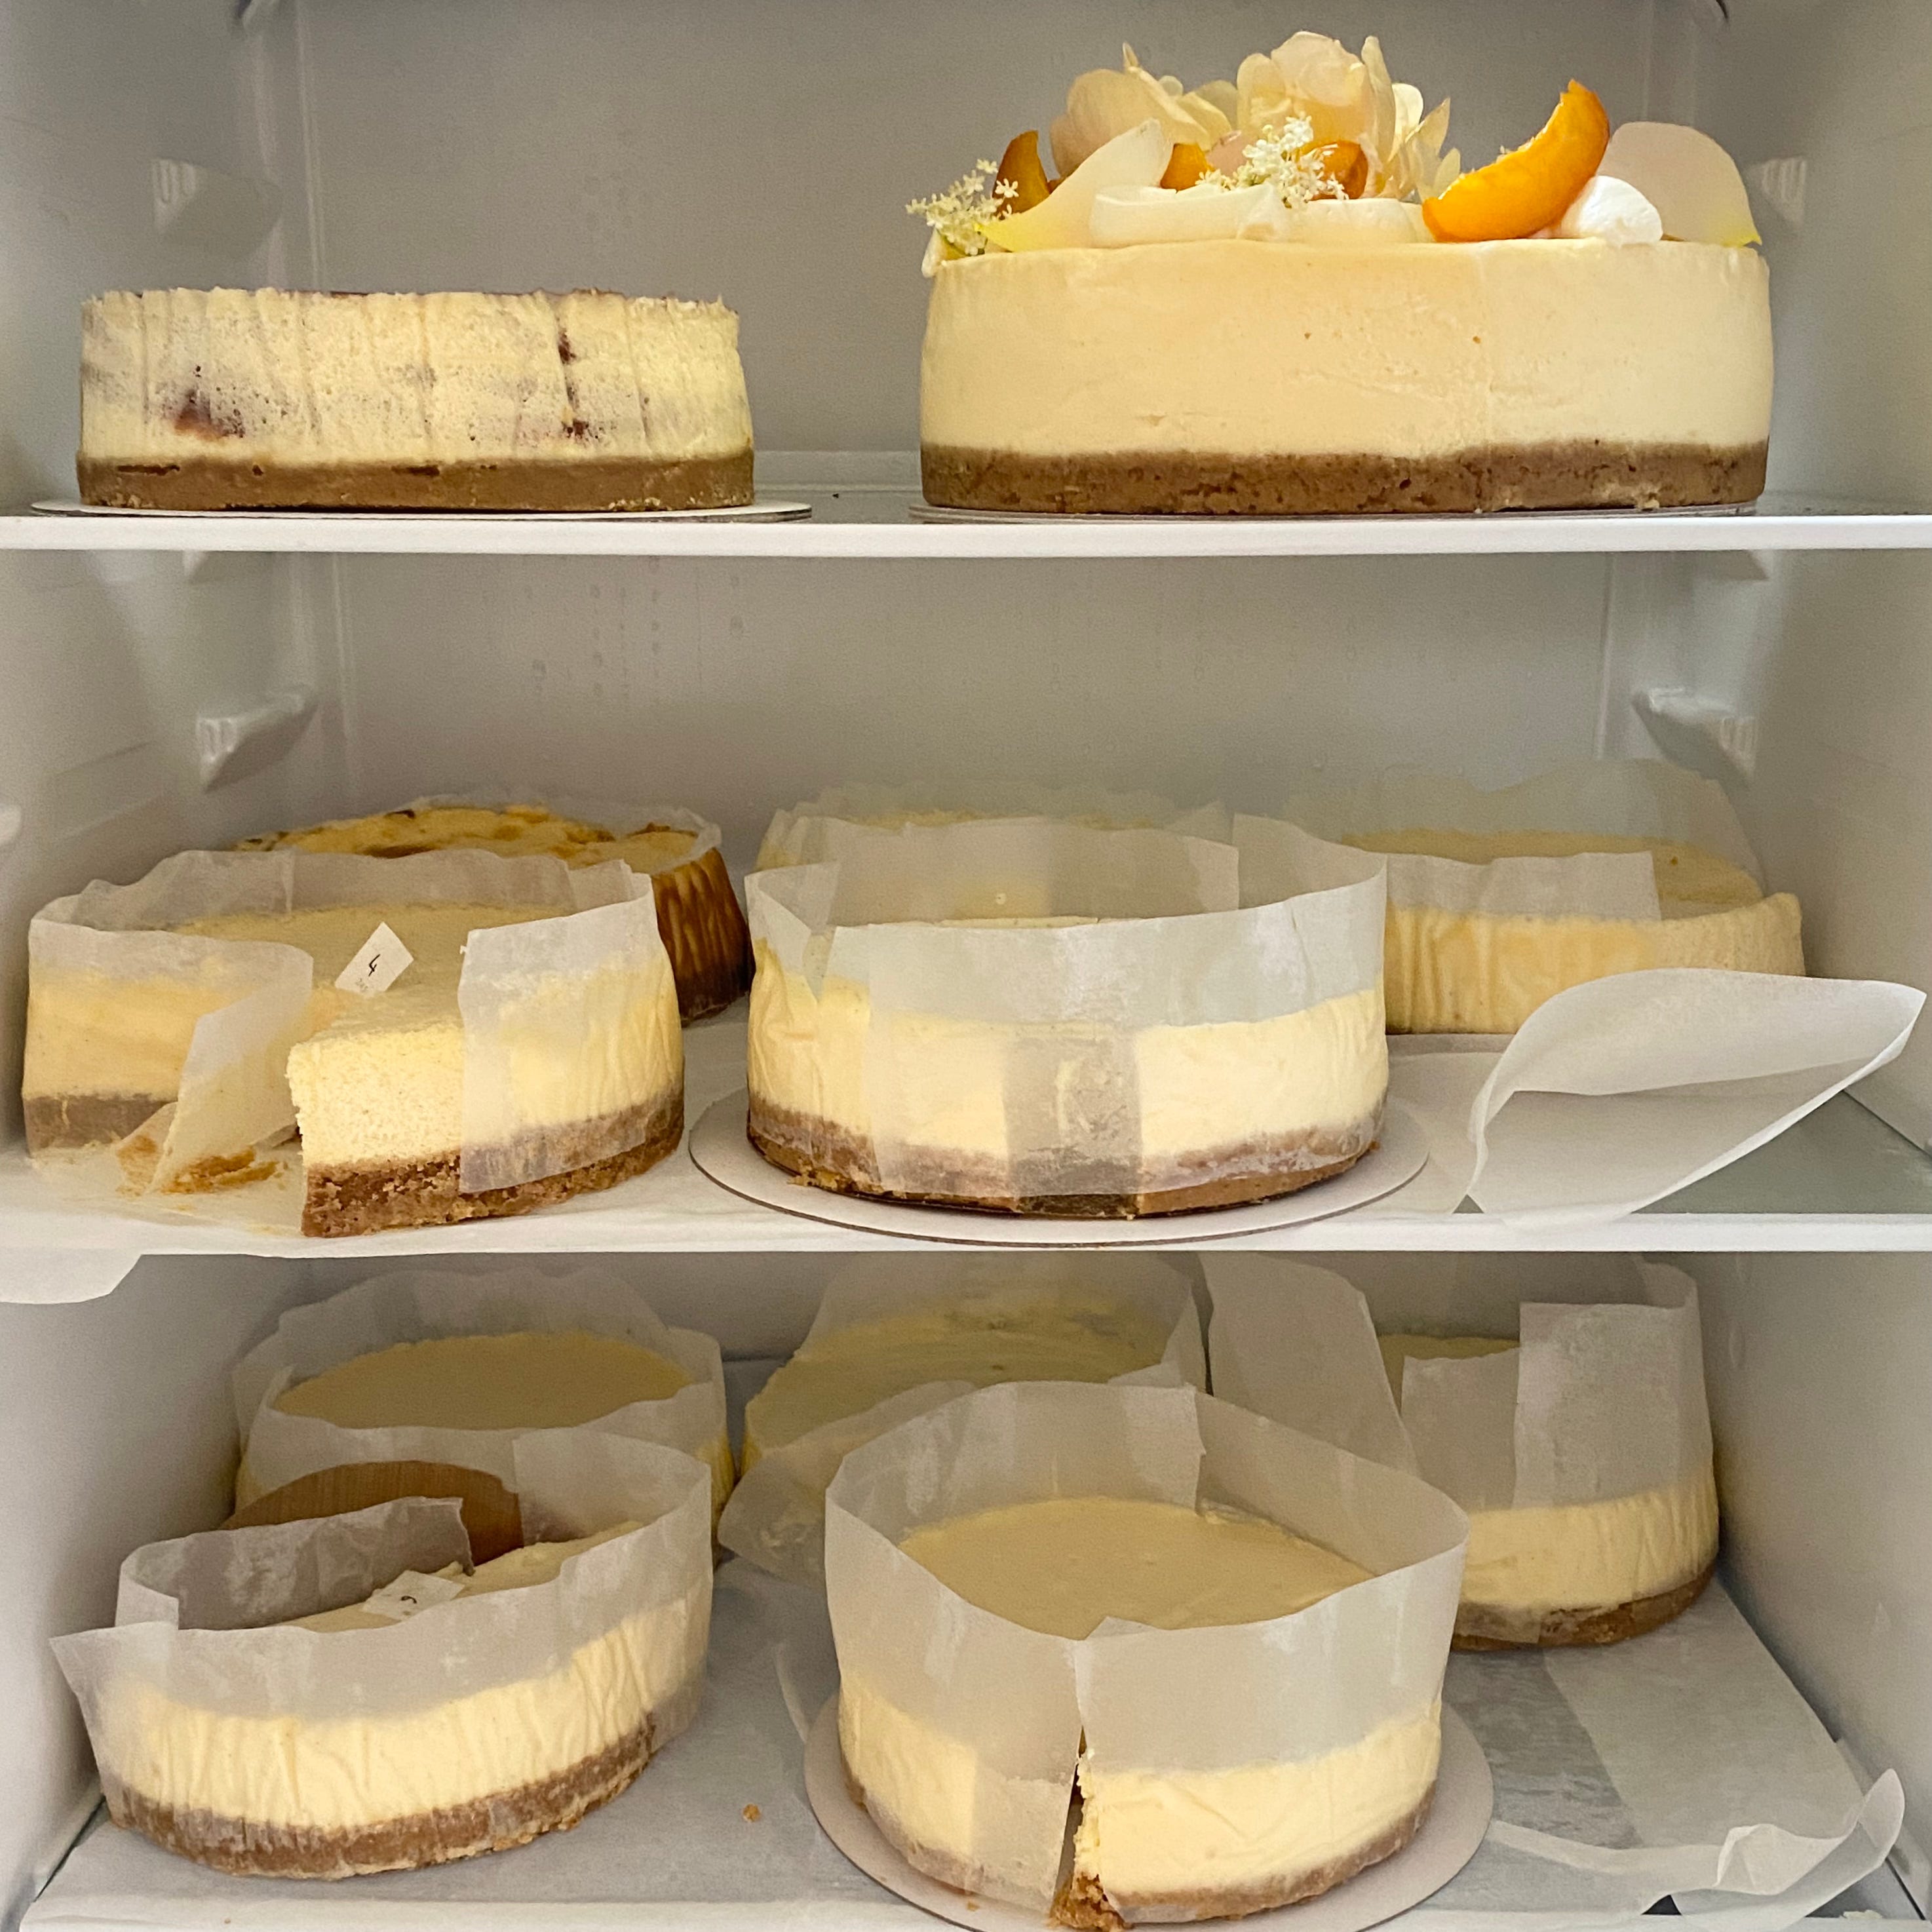
Hello and thank you for being here! Today I’m exploring classic baked cheesecake, I wanted to dive into what makes the perfect smooth, silky, tangy cheesecake. I played around with ratios, timings and baking techniques until I found my ideal cheesecake, I may have taken this process a bit far, I ended up making 12 cheesecakes in all but I can’t say I’m mad about it, there are worse things in life than having to eat a whole lotta cheesecake.
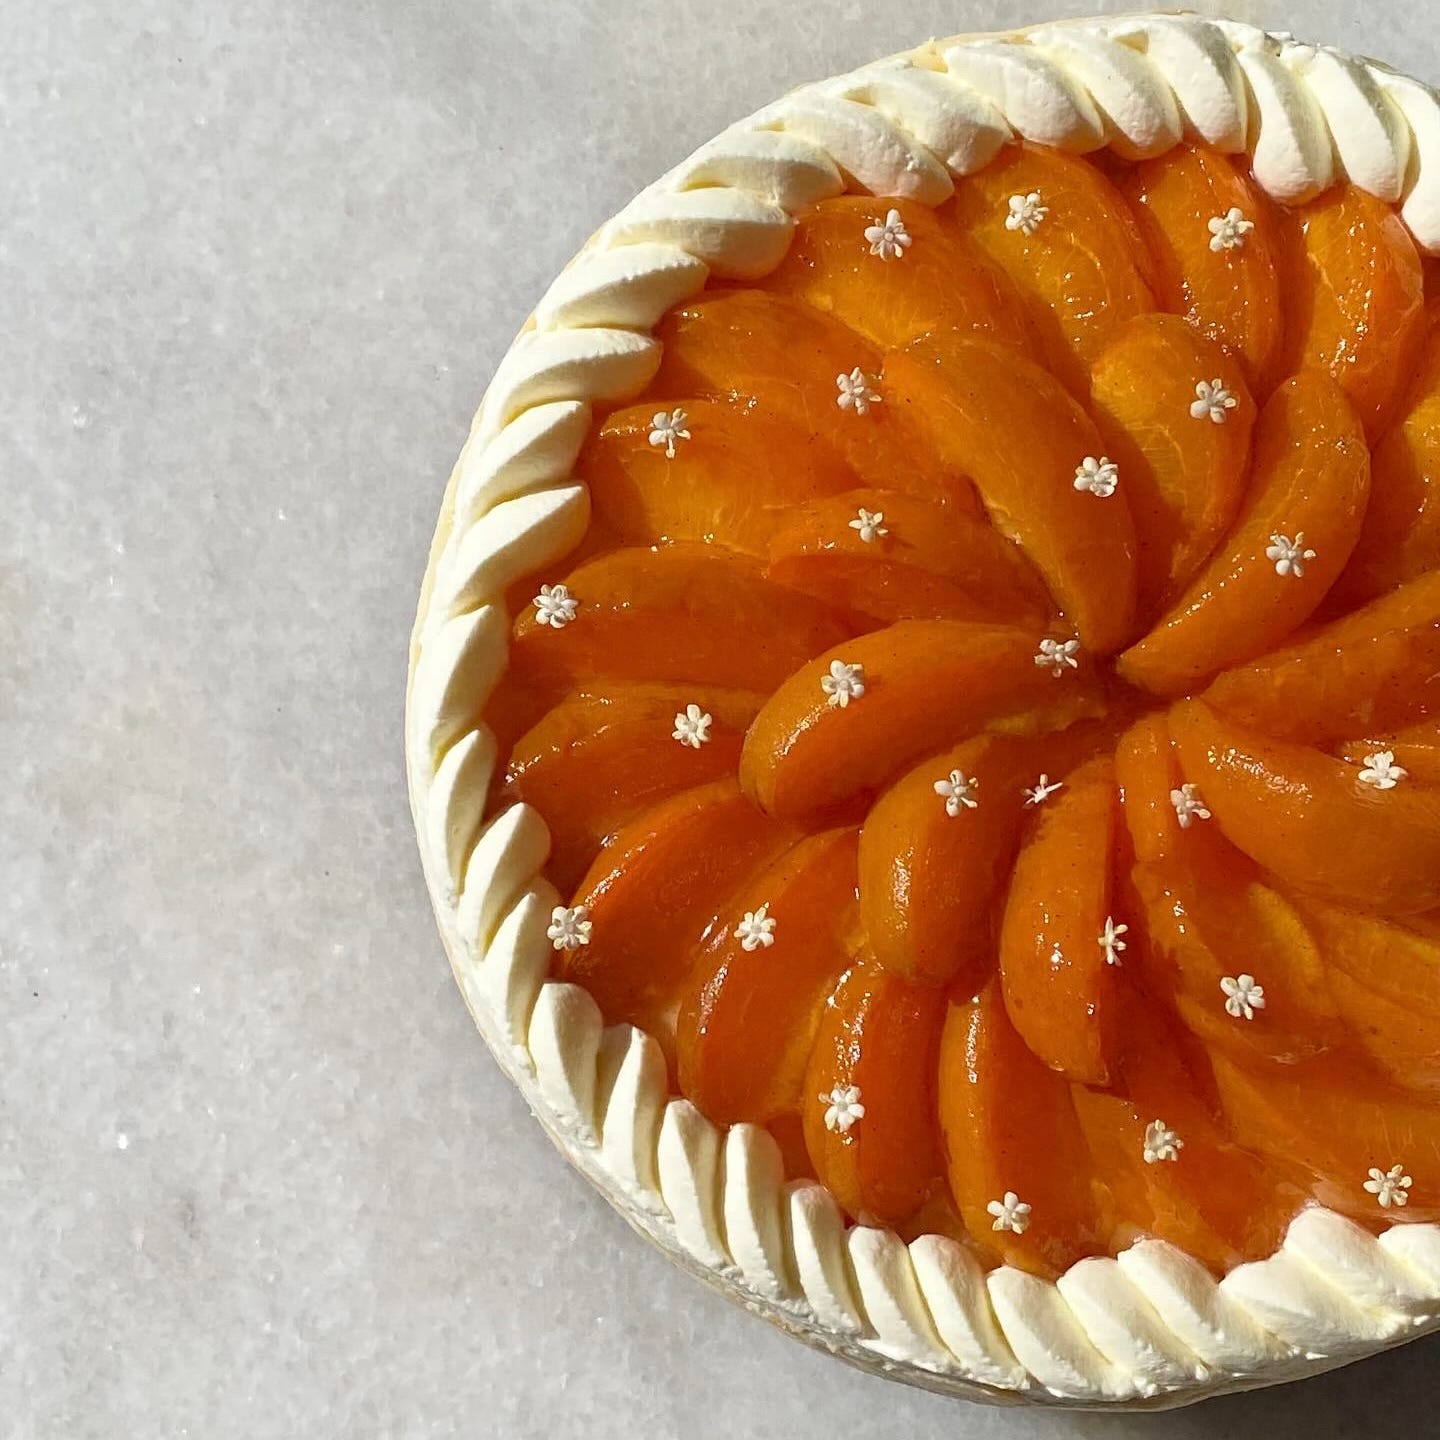
For paid subscribers I’m sharing a levelled up version of this cheesecake with elderflower & roasted apricots, you can access the recipe by upgrading your subscription, you’ll get access to the full archive of recipes plus new, exclusive recipes every week, just hit the button below!
The Dream Cheesecake
Before getting going I needed to identify exactly what I was looking for, to be honest I love all cheesecakes from baked to Basque to no bake to fluffy Japanese cotton cheesecake but my absolute number one is a New York style baked cheesecake.
But what is New York Cheesecake?
I couldn’t find a concrete answer to this question, opinions seems to vary on whether it was the addition of egg yolk, sour cream, double cream, I don’t think it’s down to one ingredient but rather the silky smooth texture and lack of any fancy toppings that makes it stand out. Sadly I’ve never been to New York to eat cheesecake so I don’t know how my cheesecake compares but it’s definitely smooth, rich and creamy and authentic or not it’s perfect to me.
The Cheesecake Mixture
The actual cheesecake mixture is the most important part so let’s have a look at the components:
Cheese; since we’re making cheesecake, cheese is a major element, to keep things consistent I conducted all of my initial tests with Philadelphia cream cheese whilst I perfected my base recipe before branching out and using other kinds of cheese.
Classic spreadable cream cheese has a really lovely tangy flavour, it’s on the denser side but not too heavy, I see no reason to mess with it.
Block cream cheese is difficult to get hold of in the UK but I really wanted to try it to see if there was a noticeable difference. Block cream cheese has a very high fat percentage, around 30% as opposed to around 20% in spreadable cream cheese. I thought that this would make the cheesecake richer and creamier and it was definitely richer but not in a good way, the result was a very dense and heavy cheesecake with a fatty mouth feel.
Mascarpone is another cheese with around 30% fat, however unlike the block cream cheese, it has a softer set. I found that cheesecakes with mascarpone had a really lovely creamy texture and a milder flavour. Whilst I did really like the texture, I felt like I missed the tang from the cream cheese, however this can be rectified by adding a good amount of sour cream, crème fraîche or a squeeze of lemon juice.
Goats cheese isn’t as common but I was curious and wanted to give it a go I used 70% cream cheese and 30% goats cheese in an attempt not to make it too overpowering. To cut a long story short I hated it, it felt like there was something wrong with my cheesecake, I just couldn’t wrap my head around it. I do think that this is purely down to personal preference, if you’re more experimental, you might enjoy this and perhaps I could be persuaded to try it again with the right accompaniments, maybe I’ll revisit the idea when figs are in season.
Ricotta has the lowest fat percentages of all of the cheeses I tested and the least smooth texture this resulted in a light cheesecake but I missed the dense creaminess and tangy taste that the other cheeses offered.
Sour cream/crème fraîche: these are most there to provide a helping hand when it comes to tang. As the name would suggest, sour cream is slightly more sour whilst crème fraîche is creamier, there was no discernible difference between these two in the finished cheesecake so I would say that they can be used interchangeably. Some recipes call for a very thin layer of sour cream to be baked on top of the cheesecake for the last 5 minutes, I really like this technique, it adds a nice extra bit of tanginess and it just makes the cheesecake look more “finished”, giving it a lovely smooth and even top. If you’re planning on adding fruit or some other topping, I wouldn’t bother with this step but it’s lovely for a plain vanilla cheesecake.
Double cream: not to state the obvious but cream is adding creaminess, cheesecakes with cream in the recipe tend to have a softer set and a smooth, creamy texture. However, since cream isn’t bringing much in terms of flavour, I’d rather use sour cream or crème fraîche to add a bit of tang.
Sugar: sugar is there to add sweetness but it also affects the texture, higher percentages of sugar result in a softer, squidgier cheesecake, you’ll find that Basque cheesecake recipes usually have a much higher proportion of sugar for this reason. But since we want a nice sliceable cheesecake I opted to keep the sugar fairly low, cheesecake isn’t a dessert that should be too sweet, you could drop it even more if you wanted an almost savoury cheesecake but for me 20% is about right.
Eggs: Eggs are probably the component that I changed up the most, I experimented with loads of eggs, very few eggs, just yolks and a combination of yolks and whole eggs. So what’s the point of them? Eggs help to set the cheesecake, more egg makes for a fluffier texture whilst less egg gives a silkier texture, my preference is for less egg and some extra yolk which helps to set it without changing the texture too much and adding some extra richness.
Stabilisers: I’m not talking about any weird additives here, just things that some recipes add to help absorb a bit of moisture and achieve a nice set. There are a few options for this, the main being flour or cornflour, these absorb any extra liquid and give the cheesecake a slightly firmer set, opening up the opportunity to use more wet ingredients like sour or double cream. My preference is for cornflour, I found that I couldn’t taste it quite as much as flour. Other recipes use white chocolate I’ve used Helen Goh’s white chocolate cheesecake recipe loads and I love it, the addition of white chocolate gives it a nice firm set and and is an incredibly reliable recipe but for my perfect cheesecake I wanted to strip it back to basics, not to mention that chocolate prices are going absolutely crazy at the minute!
Add ins: These are all the fun bits! I wanted to keep it really simple so my only flavouring was a tonne of really good quality vanilla. Of course you can add whatever you like, for paid subscribers I’m sharing the recipe for the most delicious elderflower cheesecake with roasted apricots.
The Base
The base of a cheesecake is arguably one of the best bits! I love a thick, salty, crunchy base. In my research I came across loads of variations but the one that I ended up sticking with was a very traditional and simple base, after all sometimes simple is best!
Biscuits; I used digestives for the majority of my tests, I think this is the closest thing that the UK has to a graham cracker, so if you’re in the US just swap them out. I did also experiment with some malted milk biscuits but I found that digestives gave the best flavour for a classic vanilla cheesecake. I didn’t bother making my own, you have to draw a line somewhere and I simply couldn’t be bothered.
Butter; Butter is what’s holding our biscuit crumbs together, I like to use a relatively high percentage of butter to ensure the base stays together and slices nicely. Aside from sticking the base together butter is there to keep the biscuit crispy, forming a fat barrier that repels any water, to help with this I use brown butter, by browning our butter we’re not only adding a lovely toasty flavour but we’re also getting rid of any water content in our butter meaning that it can do an even better job of repelling any sogginess, some of my cheesecakes have been in my fridge for 5+ days and the base is still perfectly crunchy!
Sugar; I was surprised to find a few recipes that added sugar to the biscuit base, demerara sugar does add a nice crunch but I don’t think the cheesecake needs any additional sweetness.
Add ins; SALT! You can add various things but salt is the most important, it balances everything and who doesn’t love a sweet and salty combo? Spices and citrus zest are also nice here if you’re getting fancy but today we’re sticking with just salt.
Baking; I’m slightly confused by the purpose of baking a biscuit crumb base, I’ve never done it and never found it to be necessary, perhaps it’s to cook off any water from the butter, since we’re browning our butter this isn’t a problem for us.
The Baking
Since I’m making a baked cheesecake I had to tackle the baking which opened a whole can of worms. The general consensus is that a water bath is necessary, I find water baths slightly irritating to work with and tried several cheesecakes at various temperatures without a water bath in hopes that I could perfect a recipe without one but eventually I had to admit defeat, the results or baking in a water bath are superior, there’s less cracking and a more even bake.
The reason that water baths are so effective is that they help to regulate the temperature, the water doesn’t reach over around 95°C/200°F, this stops the outside from overcooking, keeping it nice and creamy. I don’t like working with them when it comes to cheesecake because they are almost always made in a loose bottom tin, a lot of recipes call for foil to be wrapped around the base of the tin to add some protection but I’ve encountered too many instances where the barrier has been breached and water has ended up in the tin, ruining the lovely crunchy base. I have 2 solutions:
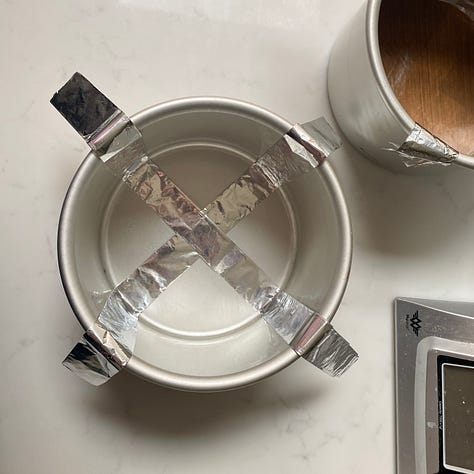
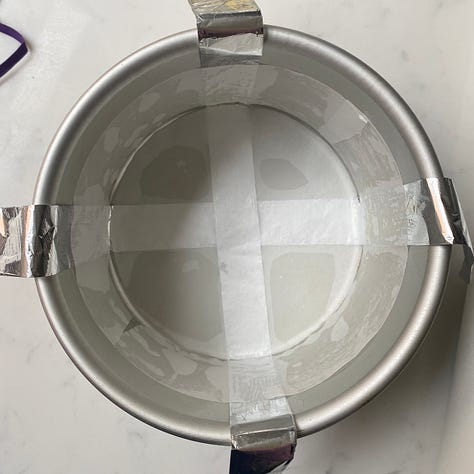
Do not use a loose bottom tin, I used my regular cake tins, there’s no gaps at all for any water to get in but getting the cheesecake out can be a problem to help with this I line my tin with 2-3 strips of heavy duty foil (or just foil folded over itself several times) before lining it with baking paper as usual. Once the cheesecake is baked and cooled you can then use the strips of foil as handles to pull the cheesecake out of the tin.
Rather than a water bath you can wrap the sides of the tin in a wet tea towel or even bake strip, this has a similar effect to the water bath without the risk of making everything soggy. This works best on smaller cheesecakes as larger cheesecakes take so long to bake that all of the water evaporates by about half way through.
If you want to use a water bath but only have a loose bottom tin, make sure you wrap the tin in foil, I like to use several layers so that I know no water is getting in there!


The Mixing
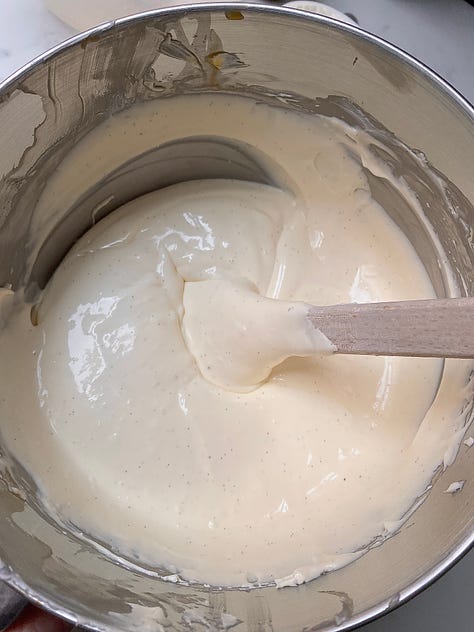
The mixing of the cheesecake is more important than you might expect, we really don’t want to incorporate any air into the mix as when it bakes all the air bubbles rise to the top, resulting in a weird lumpy looking cheesecake and increasing the chances of cracking. The best way to avoid incorporating any air is to mix it either by hand with a spatula (not a whisk!) or on a slow speed in a stand mixer with the paddle attachment.
You also want to avoid any lumps, by scraping the mixer down often and only adding a small amount of wet ingredients at once.
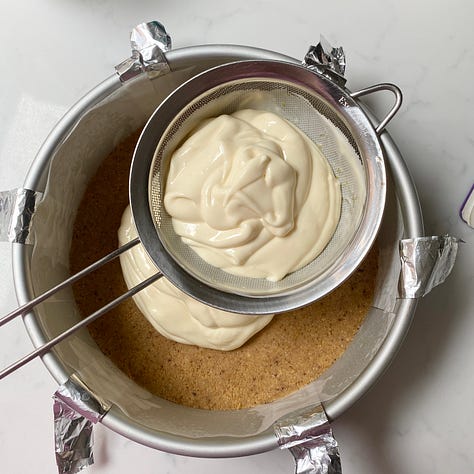
My final tip is to sieve it, I sieve almost everything, it was drilled into me working in professional kitchens and I really do think it makes a difference, it only takes a minute and you can be 100% secure in the knowledge that your cheesecake had absolutely no lumps! So without further ado let’s get onto the recipe!


Vanilla Baked Cheesecake
Equipment - Blender or food processor, 8” cake tin, preferably not loose bottomed, larger tin/baking tray for the water bath, foil, baking paper, sieve.
Ingredients - Makes one 8” cheesecake
Base
200g digestive biscuits/graham crackers
100g butter
1/2tsp salt
Cheesecake
170g sugar
30g cornflour
1/4tsp salt
600g cream cheese (full fat)
200g mascarpone
seeds from 1/2 a vanilla pod or 1tsp vanilla paste
3 eggs (150g)
3 egg yolks (50g)
150g sour cream
Topping
150g sour cream
10g caster sugar
Seeds from 1/4 of a vanilla pod or 1tsp of vanilla paste.
Method
Start off by browning your butter, I like a lightly browned butter, I want the milk solids to be golden brown rather than a dark amber.
While the butter is browning blitz the biscuits until they’re finely ground and transfer to a bowl with the salt.
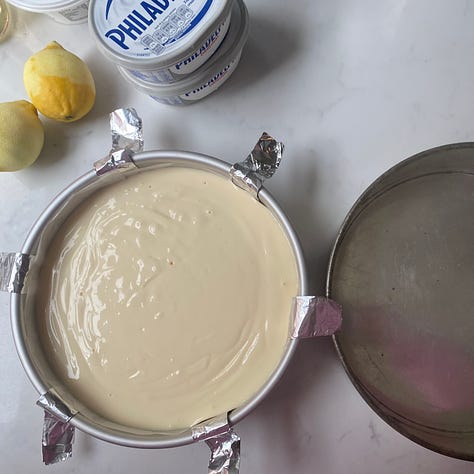
Line your tin with foil strips and then baking paper.
Mix the biscuits with the brown butter then transfer to the tin, level out with a spoon or a pallet knife.
Chill in the fridge for at least half an hour.
Pre-heat the oven to 140°C/280°F and boil the kettle/boil about 500ml of water.
Mix the sugar, cornflour and salt together.
Add the cream cheese and vanilla and mix until there are no lumps.
Add the mascarpone and mix.
Add the egg and yolks a little at a time, mixing between each addition.
Add the sour cream and mix.
Sieve the mixture into the tin.
Prepare your water bath by placing your cheesecake tin into a slightly larger tin or baking tray and filling with boiling water, the water should come up to the top of the cheesecake mix.
Transfer to the oven and bake for 1 hour at 140°C/280°F.
After 1 hour, reduce the temperature to 120°C/250°F and bake for a further 15-20 minutes.
While it bakes prepare the topping by mixing all of the ingredients together.
It’s done when it’s jiggly but not wet in the centre, if you’re not sure you can test the temperature of the centre with a probe thermometer, it should read around 70°C/158°F.
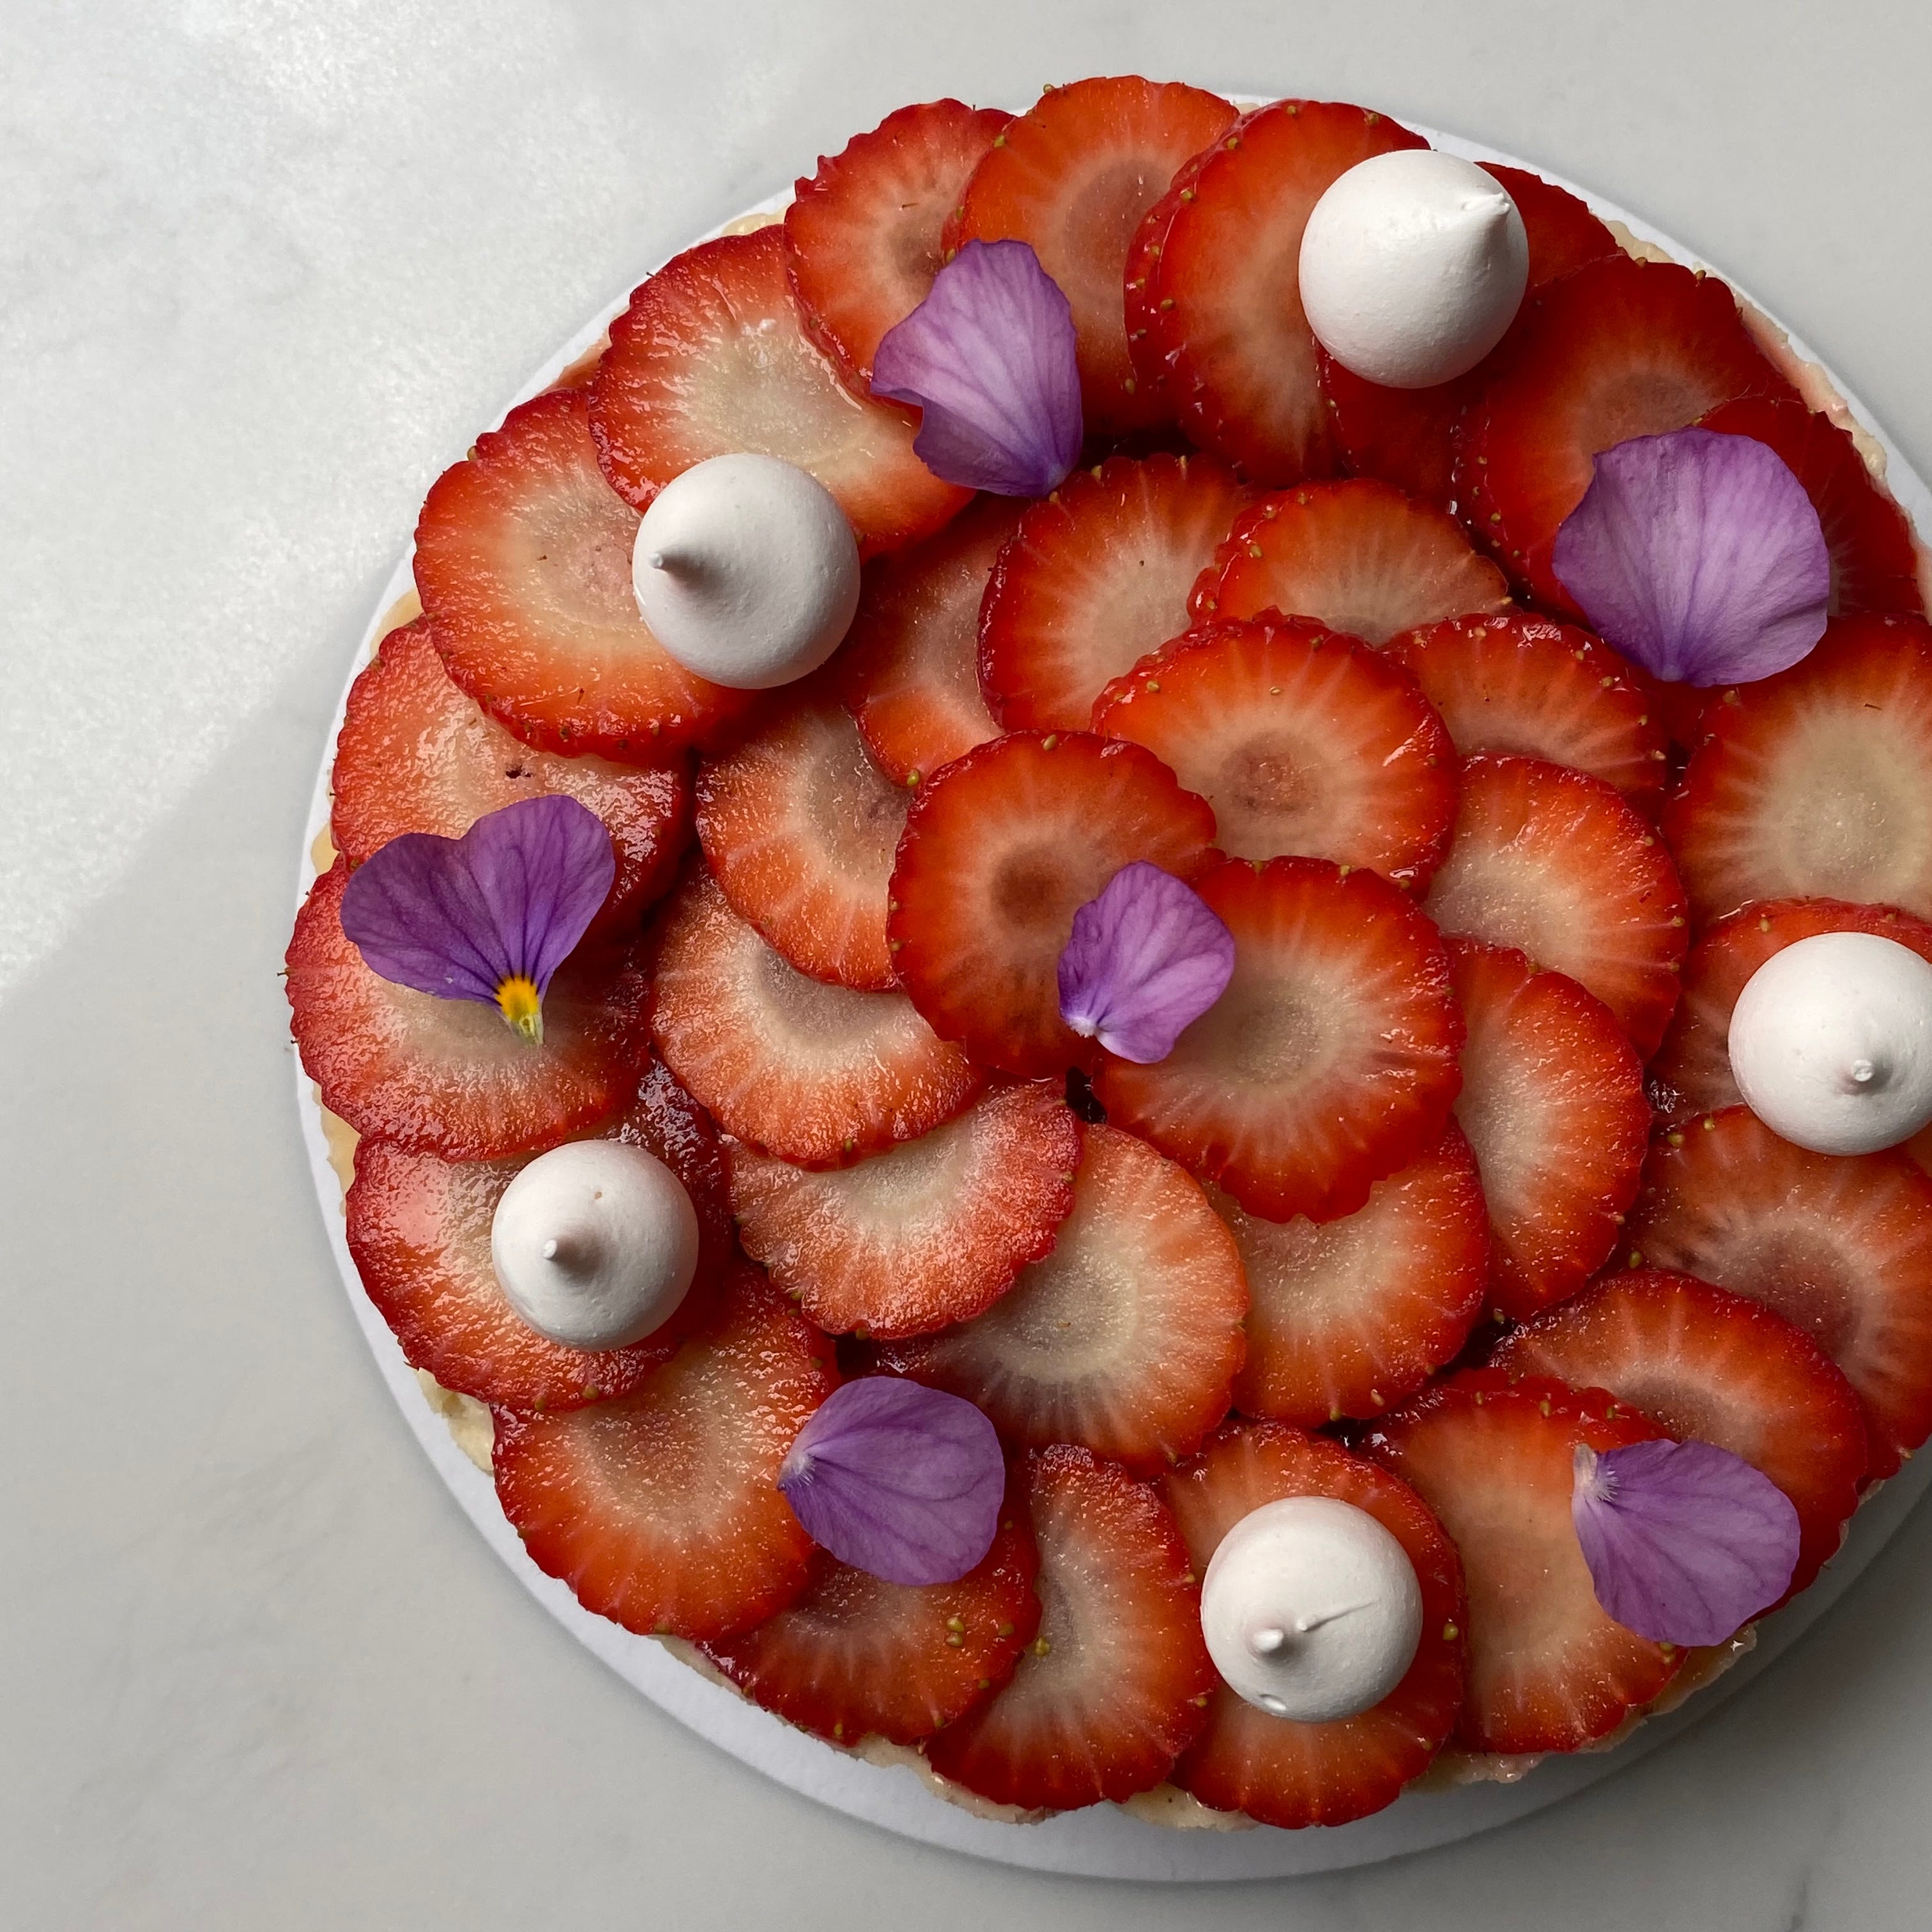
Remove from the oven, spread the topping on and bake for a further 5 minutes.
Once baked leave to cool in the water bath before transferring to the fridge.
Chill for at least 3 hours.
Once chilled, remove from the tin by lightly pulling on the foil strips, at this point the cheesecake should be quite sturdy so don’t worry too much when getting it out. If necessary get a friend to hold the tin down while you life the cheesecake out.
And voila, there you have it, the smoothes, silkiest cheesecake you ever did eat!


Thank you so much for reading! Leave me a comment if you have any questions or to request what you’d like to see next.
Definitely my project for this weekend- Thank you so much for such detailed instructions and information Sophie. So delicious.
Do I need to press the base down with a glass (or similar)? Or is smoothing with spatula enough?
Great inspirational writeup and great explanation of the technological role of the different ingredients. Just one question, when you leave the cheesecake to cool in the water bath after baking, do you still keep it in the oven?
Thanks again, we love your work.