

Everything Dough
Plus an iced bun recipe

Hello, hello! Today I wanted to share my current favourite dough recipe. My favourite way of working is to develop a really solid base recipe and then use variations of this for future recipes, that way you know that you have a super reliable jumping off point and all you really have to do is play around with flavour variations so I would encourage you to make this dough and get experimental with it! It’s soft, fluffy and the addition of a yudane means that it stays soft for a few days. As with all of my base recipes, I’ll probably never consider this recipe “finished”, I’ll come back and tweak it if I have any breakthroughs but for now I’m pretty happy with it!

This dough works perfectly for both sweet and savoury bakes, today we’re making classic fruity iced buns which are endlessly customisable but if you’re in the mood for something savoury, I’m also sharing a recipe for Caramelised Onion & Gruyère Buns for paid subscribers, this is a recipe that I’ve been playing around with for a few months and I’m so happy with the final product, they’re stuffed with gruyère cheese sauce and jammy caramelised onions and topped with a mountain of grated cheese. If that sounds like something you fancy, please consider upgrading your subscription. You’ll receive an exclusive recipe every week, plus access to the full archive of over 150 thoroughly tested cake and dessert recipes. And you'll be helping support me so I can continue creating and sharing recipes! 🩷
It’s just £6 a month or £60 for a whole year. To subscribe or upgrade, just hit the button below and join me for more cakey fun.


If you want more other savoury bun-fun, my most popular recipe of all time uses a variation of this dough. If you haven’t made my cheesy gochujang & spring onion swirls yet, you must (and it’s free)!
What am I looking for in a base dough?
Before we get into the recipe, I want to chat a little bit about what I’m looking for in an “everything dough” recipe.
Taste – For my “everything dough,” I wanted something not too sweet and not too salty, the perfect vehicle for other flavours, both sweet and savoury. I didn’t want it to be especially buttery, so it’s more of a milk bread than a brioche, it’s slightly more enriched than a regular milk bread, but nowhere near as buttery as brioche. One of the reasons I like milk bread is that it gives you the opportunity to infuse the milk with different flavours. I’ve played around with infusing the milk with various herbs and spices, and it always works really well without affecting the dough down as much as adding ground herbs and spices can.
Texture – I wanted this dough to be really light, fluffy, and moist. I played around with the hydration a lot (don’t get me started on baker’s percentages, I always get confused) until I landed on a dough that bakes up the way I wanted without being impossible to work with. Using a yudane (explained further below) really helps here: I use glutinous rice flour in my for my yudane which is a tip I picked up from
. The glutinous rice flour helps with moisture retention, meaning the bread stays soft for longer once baked. Don’t worry if you don’t have any, strong/bread flour also works. The only downside to this dough is that, unless you’re really confident shaping something sticky, it needs an overnight chill. This gives the fats time to firm up a bit, making shaping much easier.Batch Size – I almost always portion my dough into 60g pieces if I’m making individual buns, so I wanted to make sure the batch size was sensible. This recipe divides perfectly into 12 buns, which feels just right. A baker’s dozen of 13 might have been more fitting, but you can’t win ‘em all.
Ease – You all know I don’t mind a bit of faffing around, but I also like to make things easier for myself where possible. I originally used a tangzhong in this recipe, which involves cooking the rice flour and water in a pan until thickened, then setting it aside to gelatinise for several hours. This keeps the dough lovely and moist, but it creates extra washing up which I hate, I already spend 80% of my life washing up - I don’t need any more. So I experimented with a yudane instead.
A yudane follows the same principles but is made by pouring boiling water directly over the glutinous rice flour, whisking, and leaving it to gelatinise. This can be done directly in the mixing bowl thus saving both dishes and time. I found the difference in the final product was negligible, so yudane it is! I also discovered that neither an autolyse nor adding the fat later made much of a difference (bakers, don’t shout at me), and since I’m impatient, I skipped them.
Let’s get on with the recipes…
Everything Dough
Ingredients - Makes 12 x 60g buns
Yudane
30g glutinous rice flour OR strong/bread flour
90g freshly boiled water
Dough
Yudane
20g light olive oil
50g egg (1 medium egg)
100g whole milk
50g butter
370g white strong/bread flour
30g caster sugar
5g salt
5g dried yeast (I use Alison’s)
Method
Weigh the rice flour directly into the bowl of your mixer and boil the kettle. Pour 90g of freshly boiled water over the top, whisk briefly to get rid of any lumps, then cover with clingfilm, pressing it directly onto the surface. Leave to cool for at least an hour, or overnight.
When the yudane is cool, add the wet ingredients and butter to the bowl, followed by the salt and sugar, then the flour and yeast, making sure the yeast isn’t in direct contact with the salt or sugar.
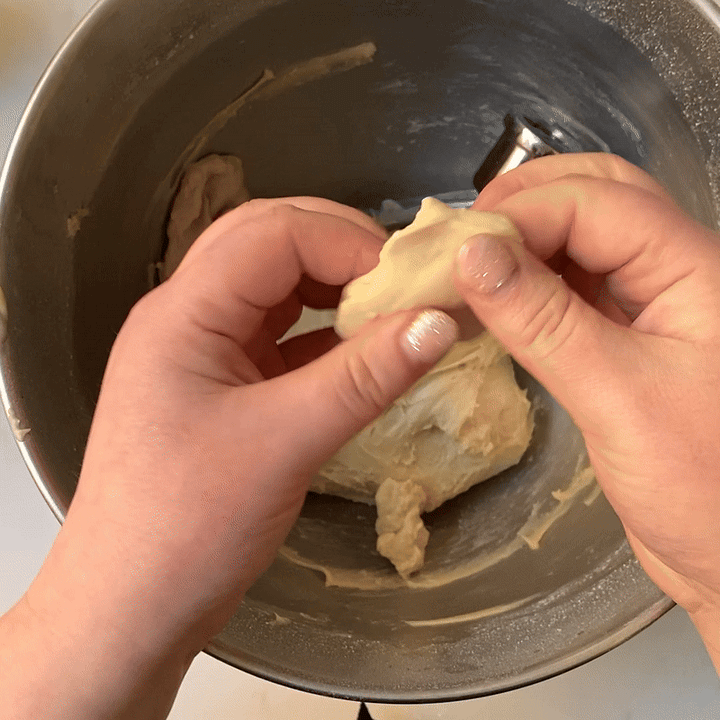
Mix with the dough hook attachment on low until everything is combined, then turn the speed up to medium/high and mix for 7–12 minutes, until the dough starts to get nice and stretchy. It should be smooth, elastic, and able to pass the windowpane test.
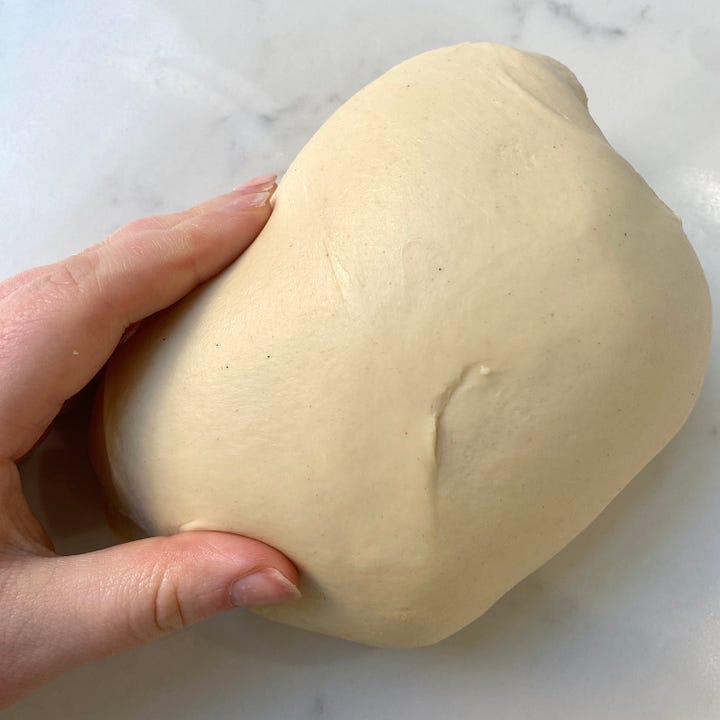
Transfer the dough to a large, lightly greased container (a rectangular one will make it easier to roll out later), cover with clingfilm, and leave to proof until doubled in size. I don’t like to give a set time here as it can vary so much. This week there’s been a heatwave in the UK so it took less than an hour, but in winter it can take much longer. Use your judgement.
Once doubled, gently deflate the dough by pressing it down and refrigerate overnight, making sure it’s well covered so no crusty bits form.
The next day, deflate, shape as needed, prove and bake. Timings and instructions will differ depending on what you’re making but for 60g buns I tend to bake at 170°C fan (340°F) - 180°C fan (355°F) for 12-18 minutes.


Iced Finger Buns
Ingredients - Makes 12
1 batch of everything dough as above, after the first prove and chilled overnight
Glaze
400g icing sugar
30-40g fruit puree, I used raspberry
Pinch of citric acid
To Fill (optional)
250g jam
To Decorate
Sprinkles
Edible dried petals
Method
Remove the dough from the fridge and turn out onto a lightly dusted surface. Try to keep the shape as rectangular as possible, this will help with the shaping.
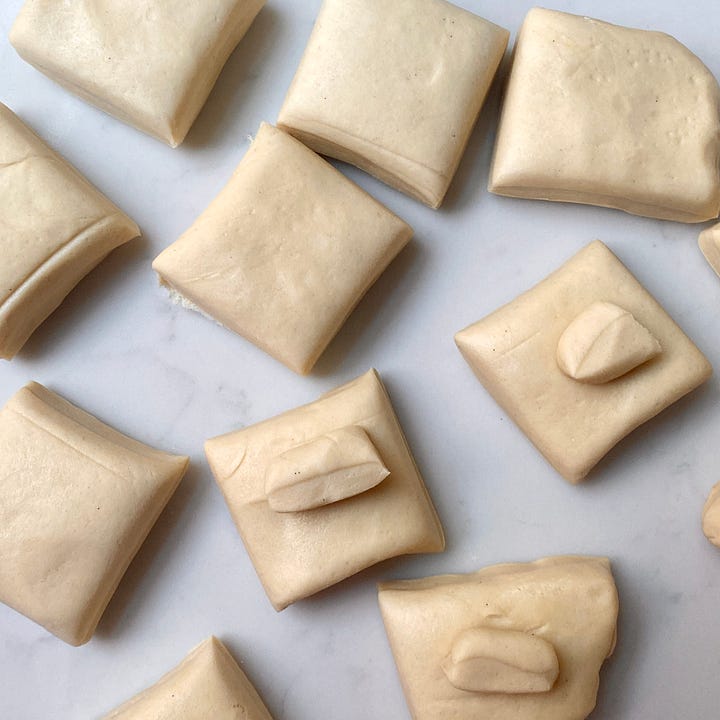
Portion the dough into 60g blocks, again trying to keep them as square as possible, but don’t worry if you have a few dodgy shapes!
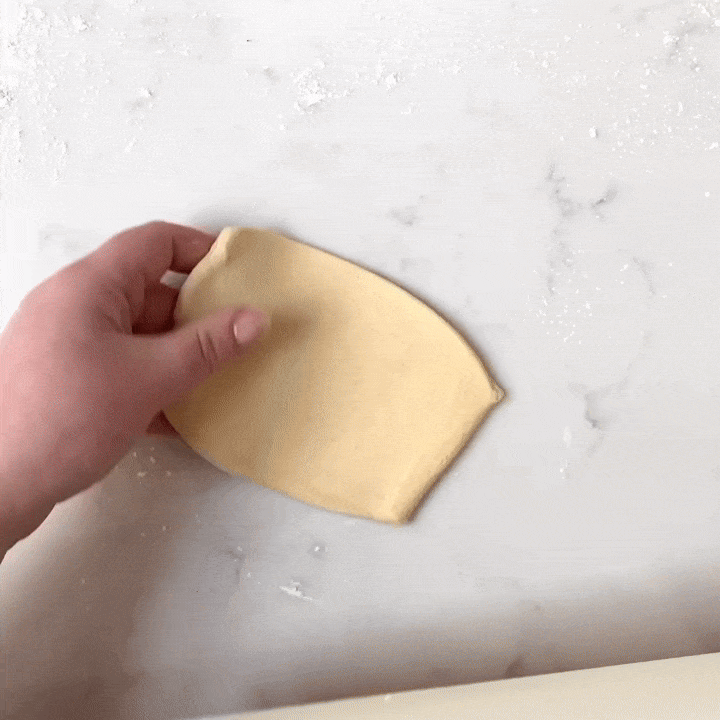
Dust your surface with flour and then roll out each portion of dough into a roughly 10 x 10cm square, don’t worry if it’s not super neat, but do pay attention to the size, they can easily get a bit too long!
Roll up your square, tucking the ends in as you go and squashing the end so that it sticks together.
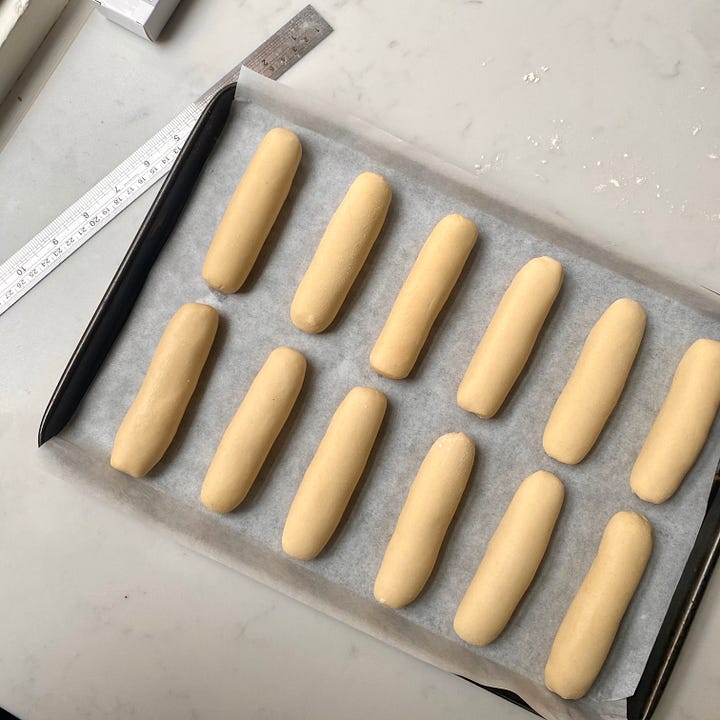
Roll your sausage a few times to make sure it’s even and then place on a lined baking tray seam side down. I like to put all 12 onto one tray so that they’re touching once baked but if you prefer them more spread out, do that.
This sausage was a little too long! Remember not to roll the dough out too much Leave to prove for about an hour, in an oven (turned off) with a bowl of freshly boiled water in the bottom. Again, the timing can vary massively here, keep an eye on them and use your judgement!
Once they’re looking fully proved and are nice and bouncy when you poke them preheat the oven to 170°C fan (340°F).
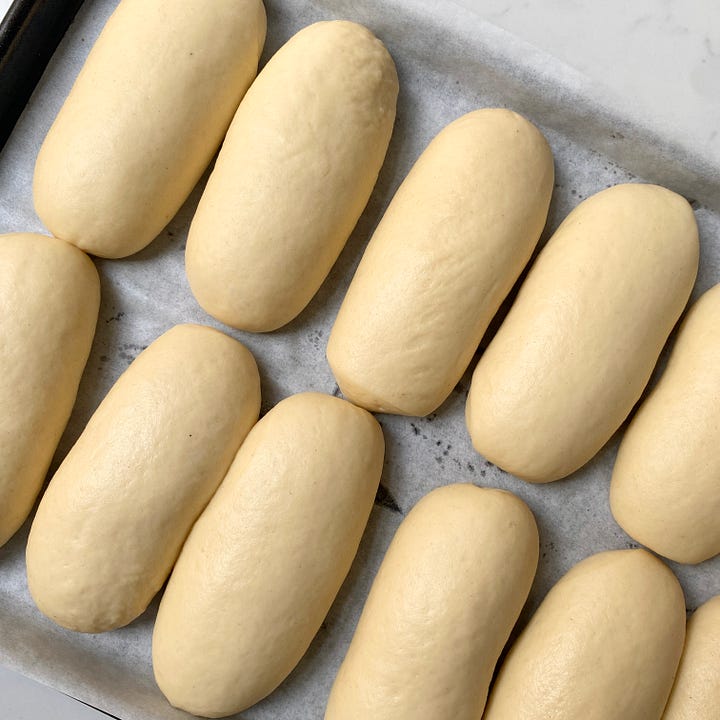
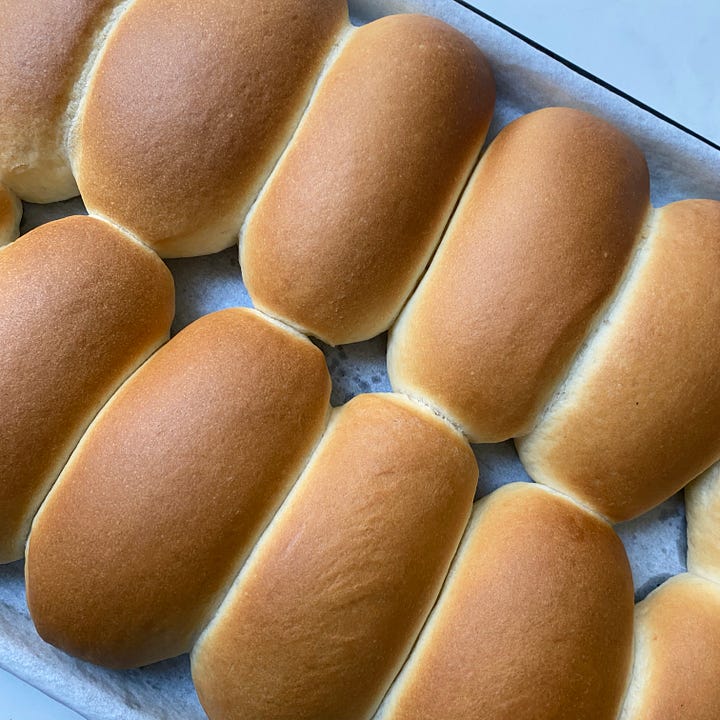
pre-prove & post-prove, mine were verging on over-proved but were ok in the end Bake for 15-18 minutes until they’re golden brown and bounce back when pressed.
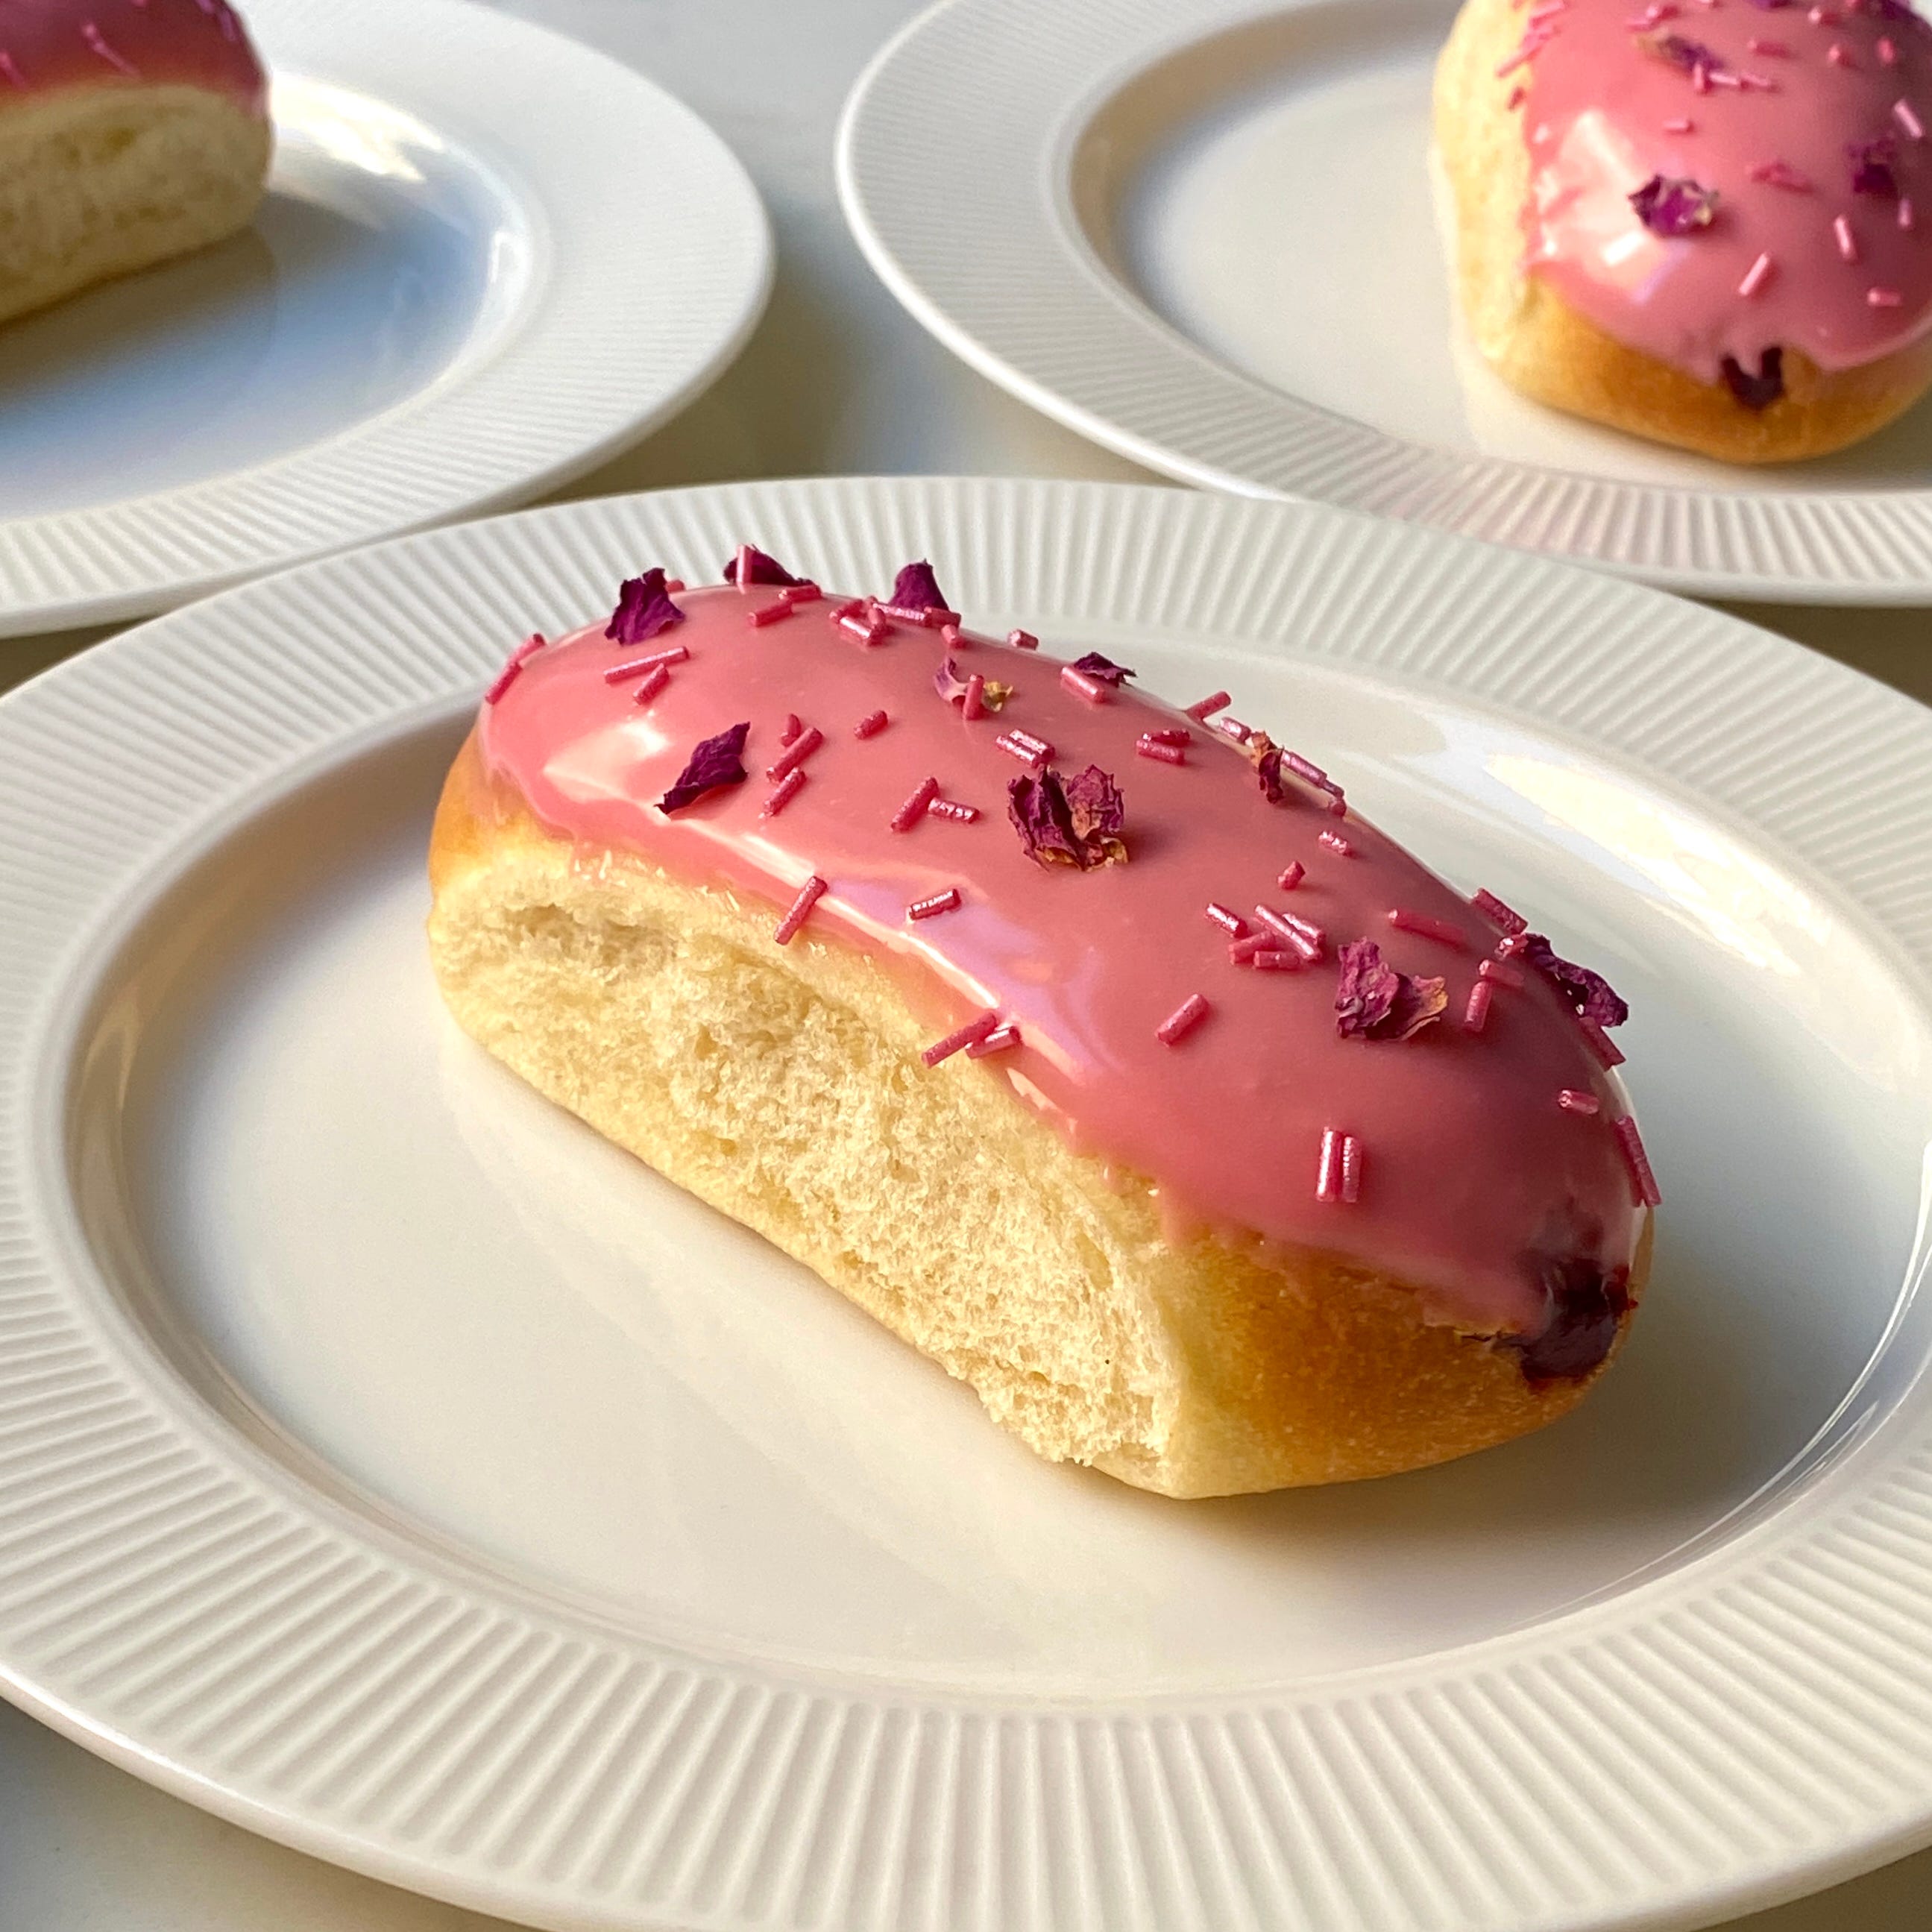
When the buns are cool, use a doughnut nozzle to pipe 15-20 g of jam into each bun, you don’t always find jam in iced buns but if you can have it, why wouldn’t you want it!?
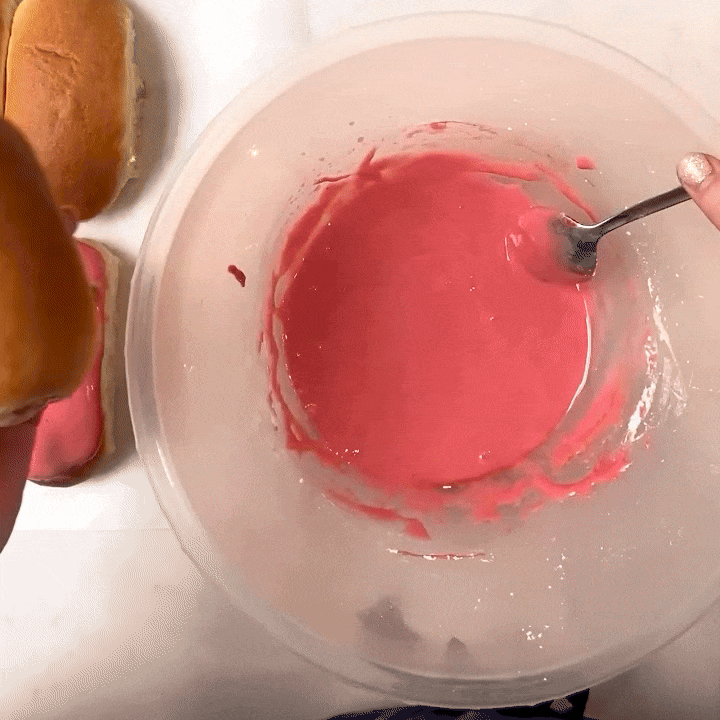
Make the glaze by dissolving the citric acid in the puree and then combining two thirds of the puree with the icing sugar, add more as needed, the glaze should be thick but still runny enough to fall off a spoon.
Dip one bun at a time into the glaze, scrape off any excess with a spoon or your finger.
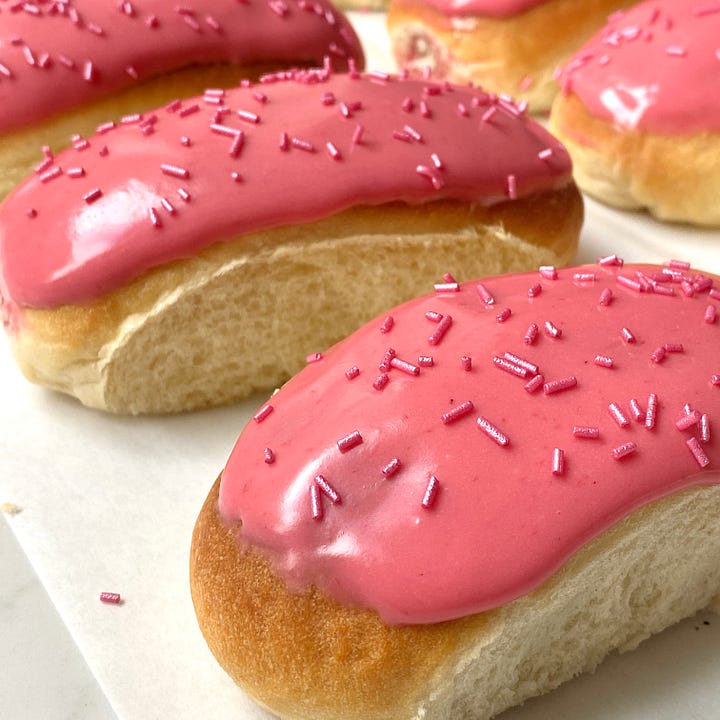
Sprinkle the toppings on while the icing is still wet and enjoy!
These are best eaten on the day but thanks to the yudane they’re still tasty up to two days after making!


If you enjoyed this post or found it useful and want to support me please like, comment or share! It really helps my newsletter to grow so that I can continue to create and share free content without relying on paid ads. Thank you so much! 🩷
God these all look glorious! Salivating.
Thanks