


Hotel-Style Scones
(No Spoilers!) GBBO 2024 Bake Along, Week 10 - The Finals!

Hello and thank you for being here! If you like what I do please consider becoming a paid subscriber. You’ll receive an exclusive recipe every week and you’ll get access to the full archive which includes a tonne of thoroughly tested cake and dessert recipes and you’ll be helping to support me so that I can continue to create and share recipes🩷. It’s just £5 a month or £50 for a whole year. To become a subscriber or upgrade your subscription hit the button below and join me for more cakey fun!
First of all, happy Thanksgiving to my pals in the USA, I hope you all had a wonderful day and ate shedloads of delicious food. Onto our Bake Off chat, there aren’t any spoilers in this post so don’t stress if you haven’t watched it yet!
Well it's a wrap! I can’t believe we’ve made it to the final, I’ve thoroughly enjoyed this year’s Bake Off, I thought all of the contestants were lovely, talented and did a great job. I can’t believe we’ve finished the bake along, only to jump right into the recipe advent calendar, if you’re a free subscriber now is a really good time to upgrade you’re subscription, starting on Sunday (the 1st of December) I’ll be posting recipes for paid subscribers every single day. Even if you only upgrade for December and then cancel at a later date, you’ll get over 24 recipes for just £5/$7 a month as well as access to the full archive, I’d love to have you!
Ok, let’s get into it…
Signature
Let’s get started with the signature! The bakers were tasked with making 12 sweet and 12 savoury scones. I found this to be a bit of a boring challenge, especially for the finals! I didn’t expect any of the bakers to struggle with this, but it seems Prue was right when she said that scones are harder than they seem.
To be honest, I didn’t love the look of any of the scones. Perhaps it’s because I’m a purist when it comes to scones – I firmly believe the only acceptable accompaniment is lashings of clotted cream and jam (and perhaps curd at a push) for sweet scones and a huge knob of salted butter for savoury.
Technical
I thought the technical challenge was tough! Three hours to make a full afternoon tea – yikes! The bakers had to prepare plaited egg and cress rolls, strawberry tarts, and lemon sandwich cakes. That’s a lot to make in just three hours, and I was so impressed with what they managed to accomplish in the time frame. That said, I did feel it was a bit of a shame that this task wasn’t saved for the showstopper. I would have loved to see the bakers create a full, elaborate afternoon tea spread for the final challenge! I’ve linked some of my favourite afternoon tea recipes below.


Rhubarb & Pistachio Tarts (paid) Guinness & Malt Cake (paid)
Showstopper
Ok, first off, what the heck is a hanging cake!? I was bamboozled and befuddled by this task. Couldn’t they have just made the challenge a three-tier cake? The whole concept seemed slightly silly to me, but the bakers did really well, and all of the cakes sounded delicious.
As a liquorice lover, I’m especially keen to try Christiaan’s raspberry & liquorice jam. One of my favourite bakes of all time is my raspberry & tarragon Battenberg, which I would describe as liquorice-adjacent. And if you’re in the mood for a bit of Earl Grey, inspired by Dylan, I also have a recipe for an Earl Grey cake from last year’s bake along – both of which I’ve linked below.


Raspberry & Tarragon Battenberg (paid) Blackcurrant & Earl Grey Stripe Cake (free)
Ok, let’s get onto this week’s recipe.
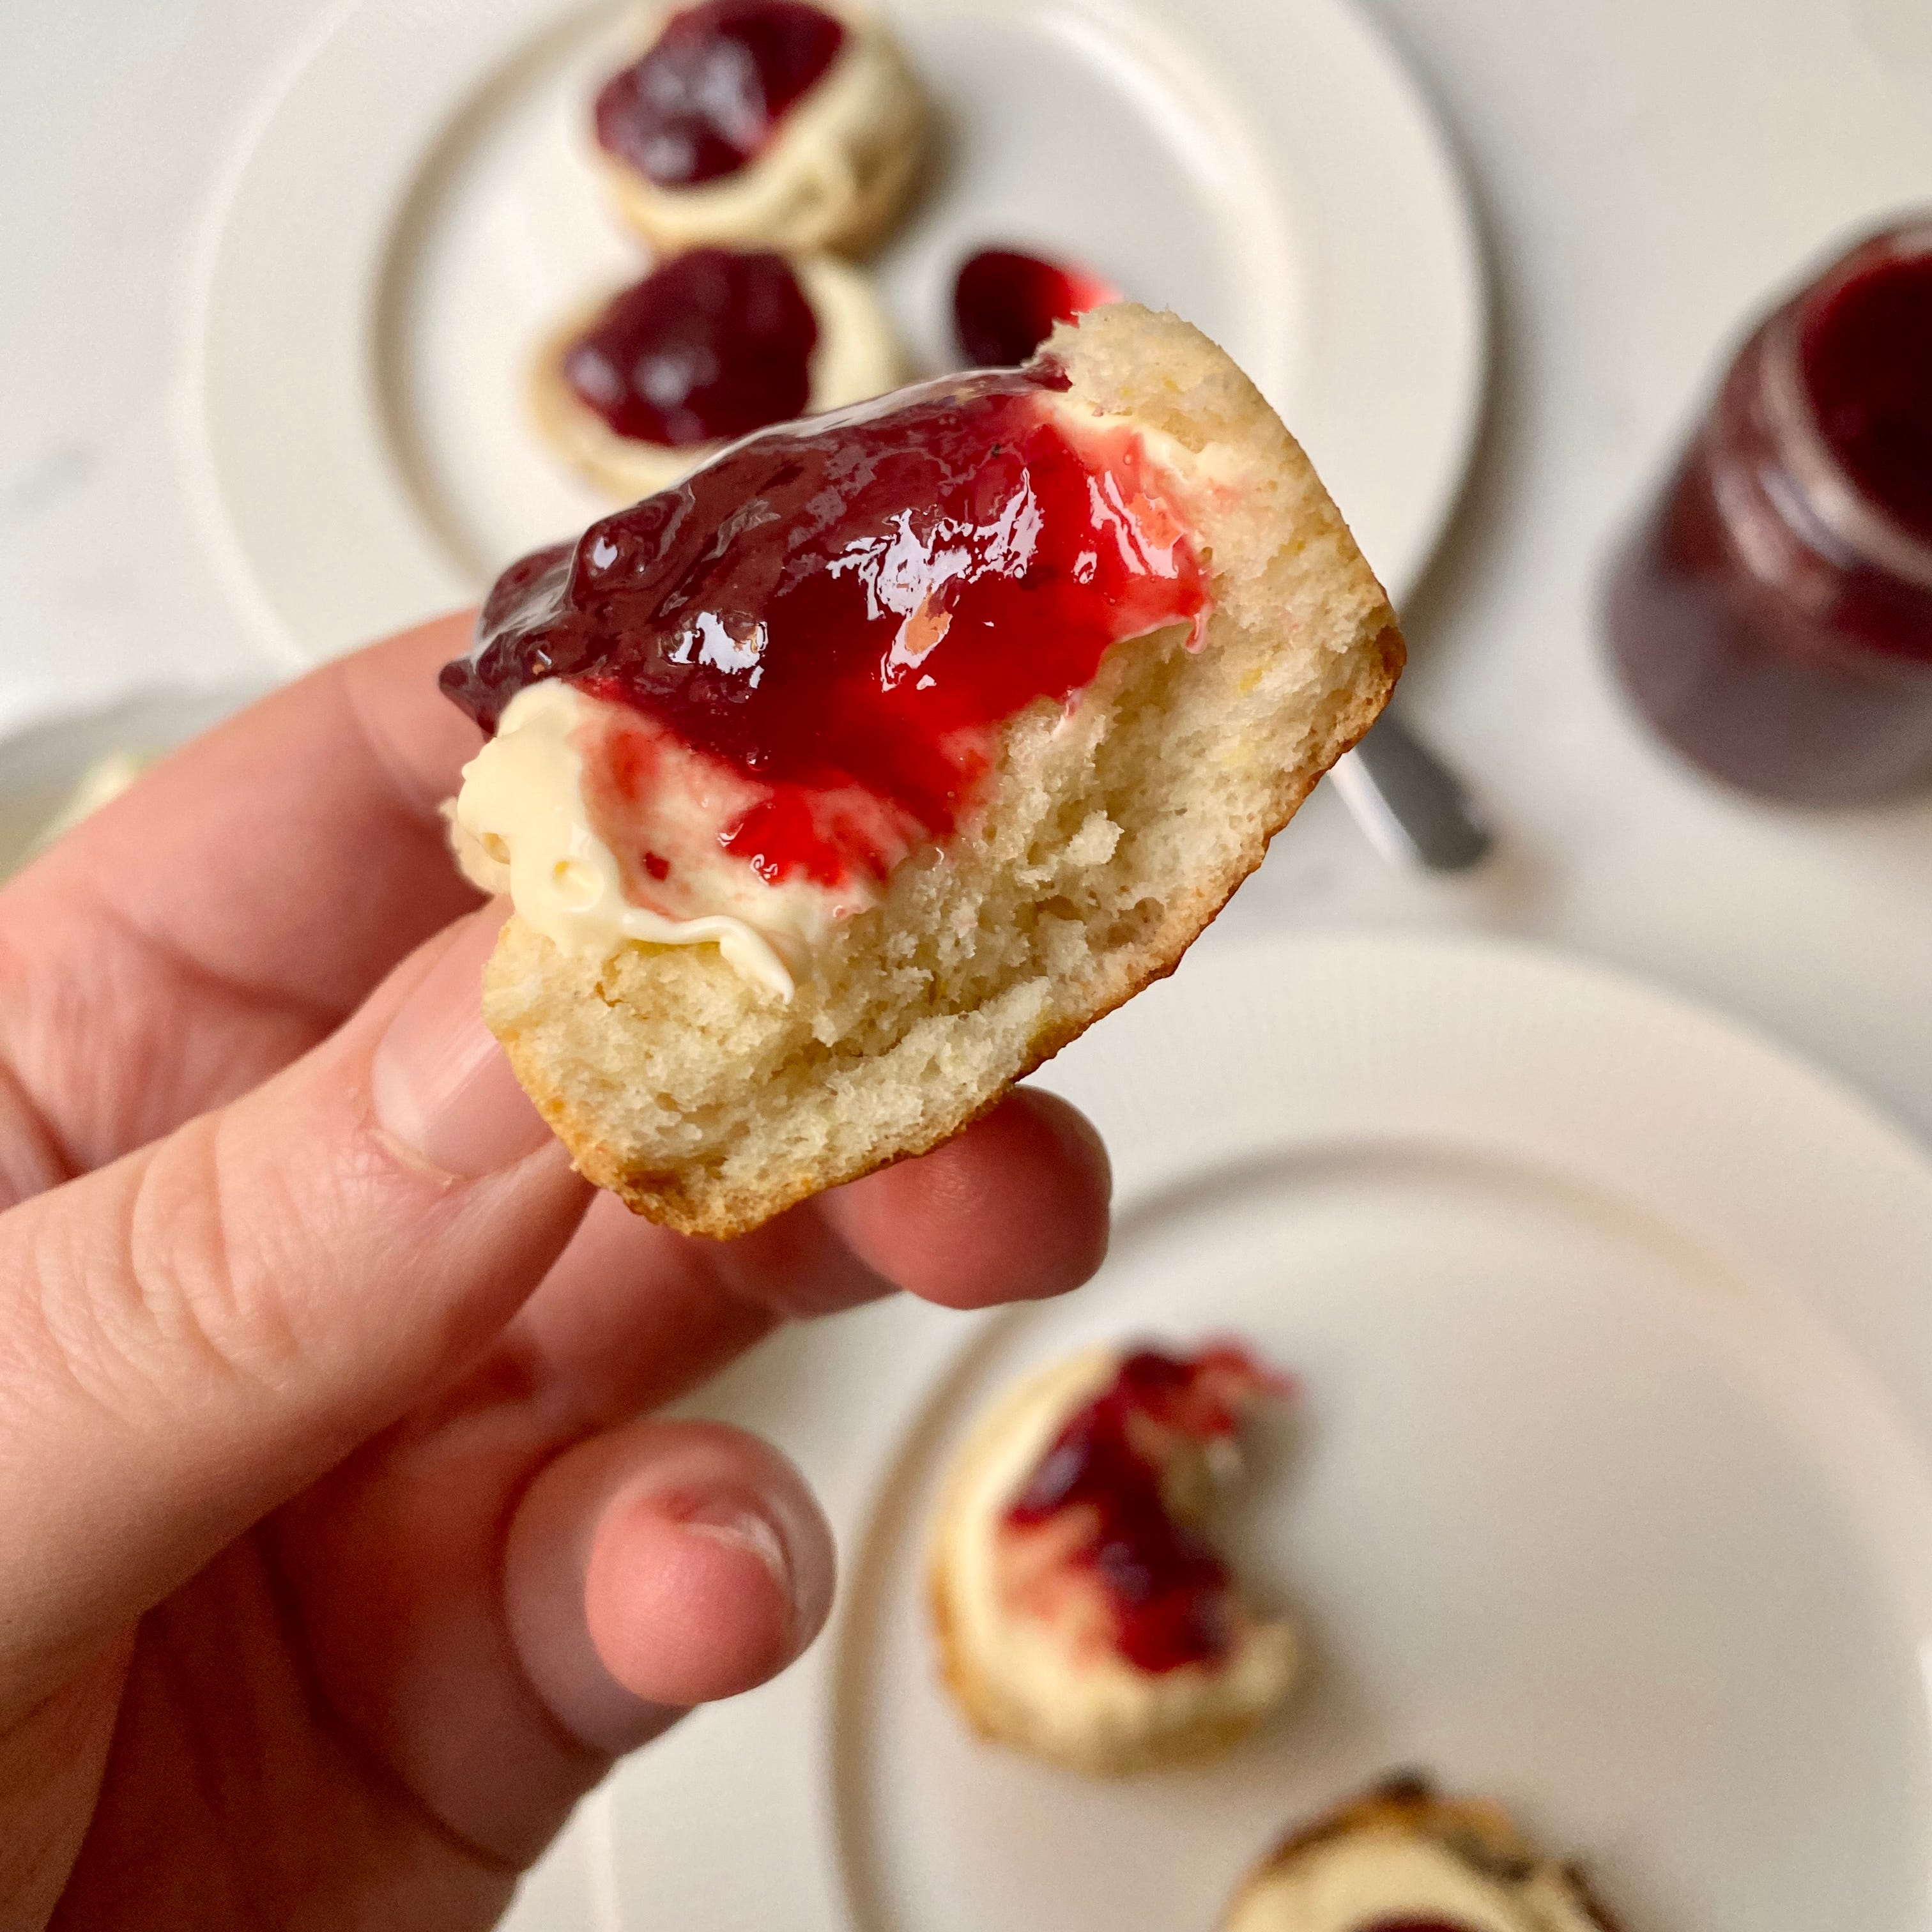
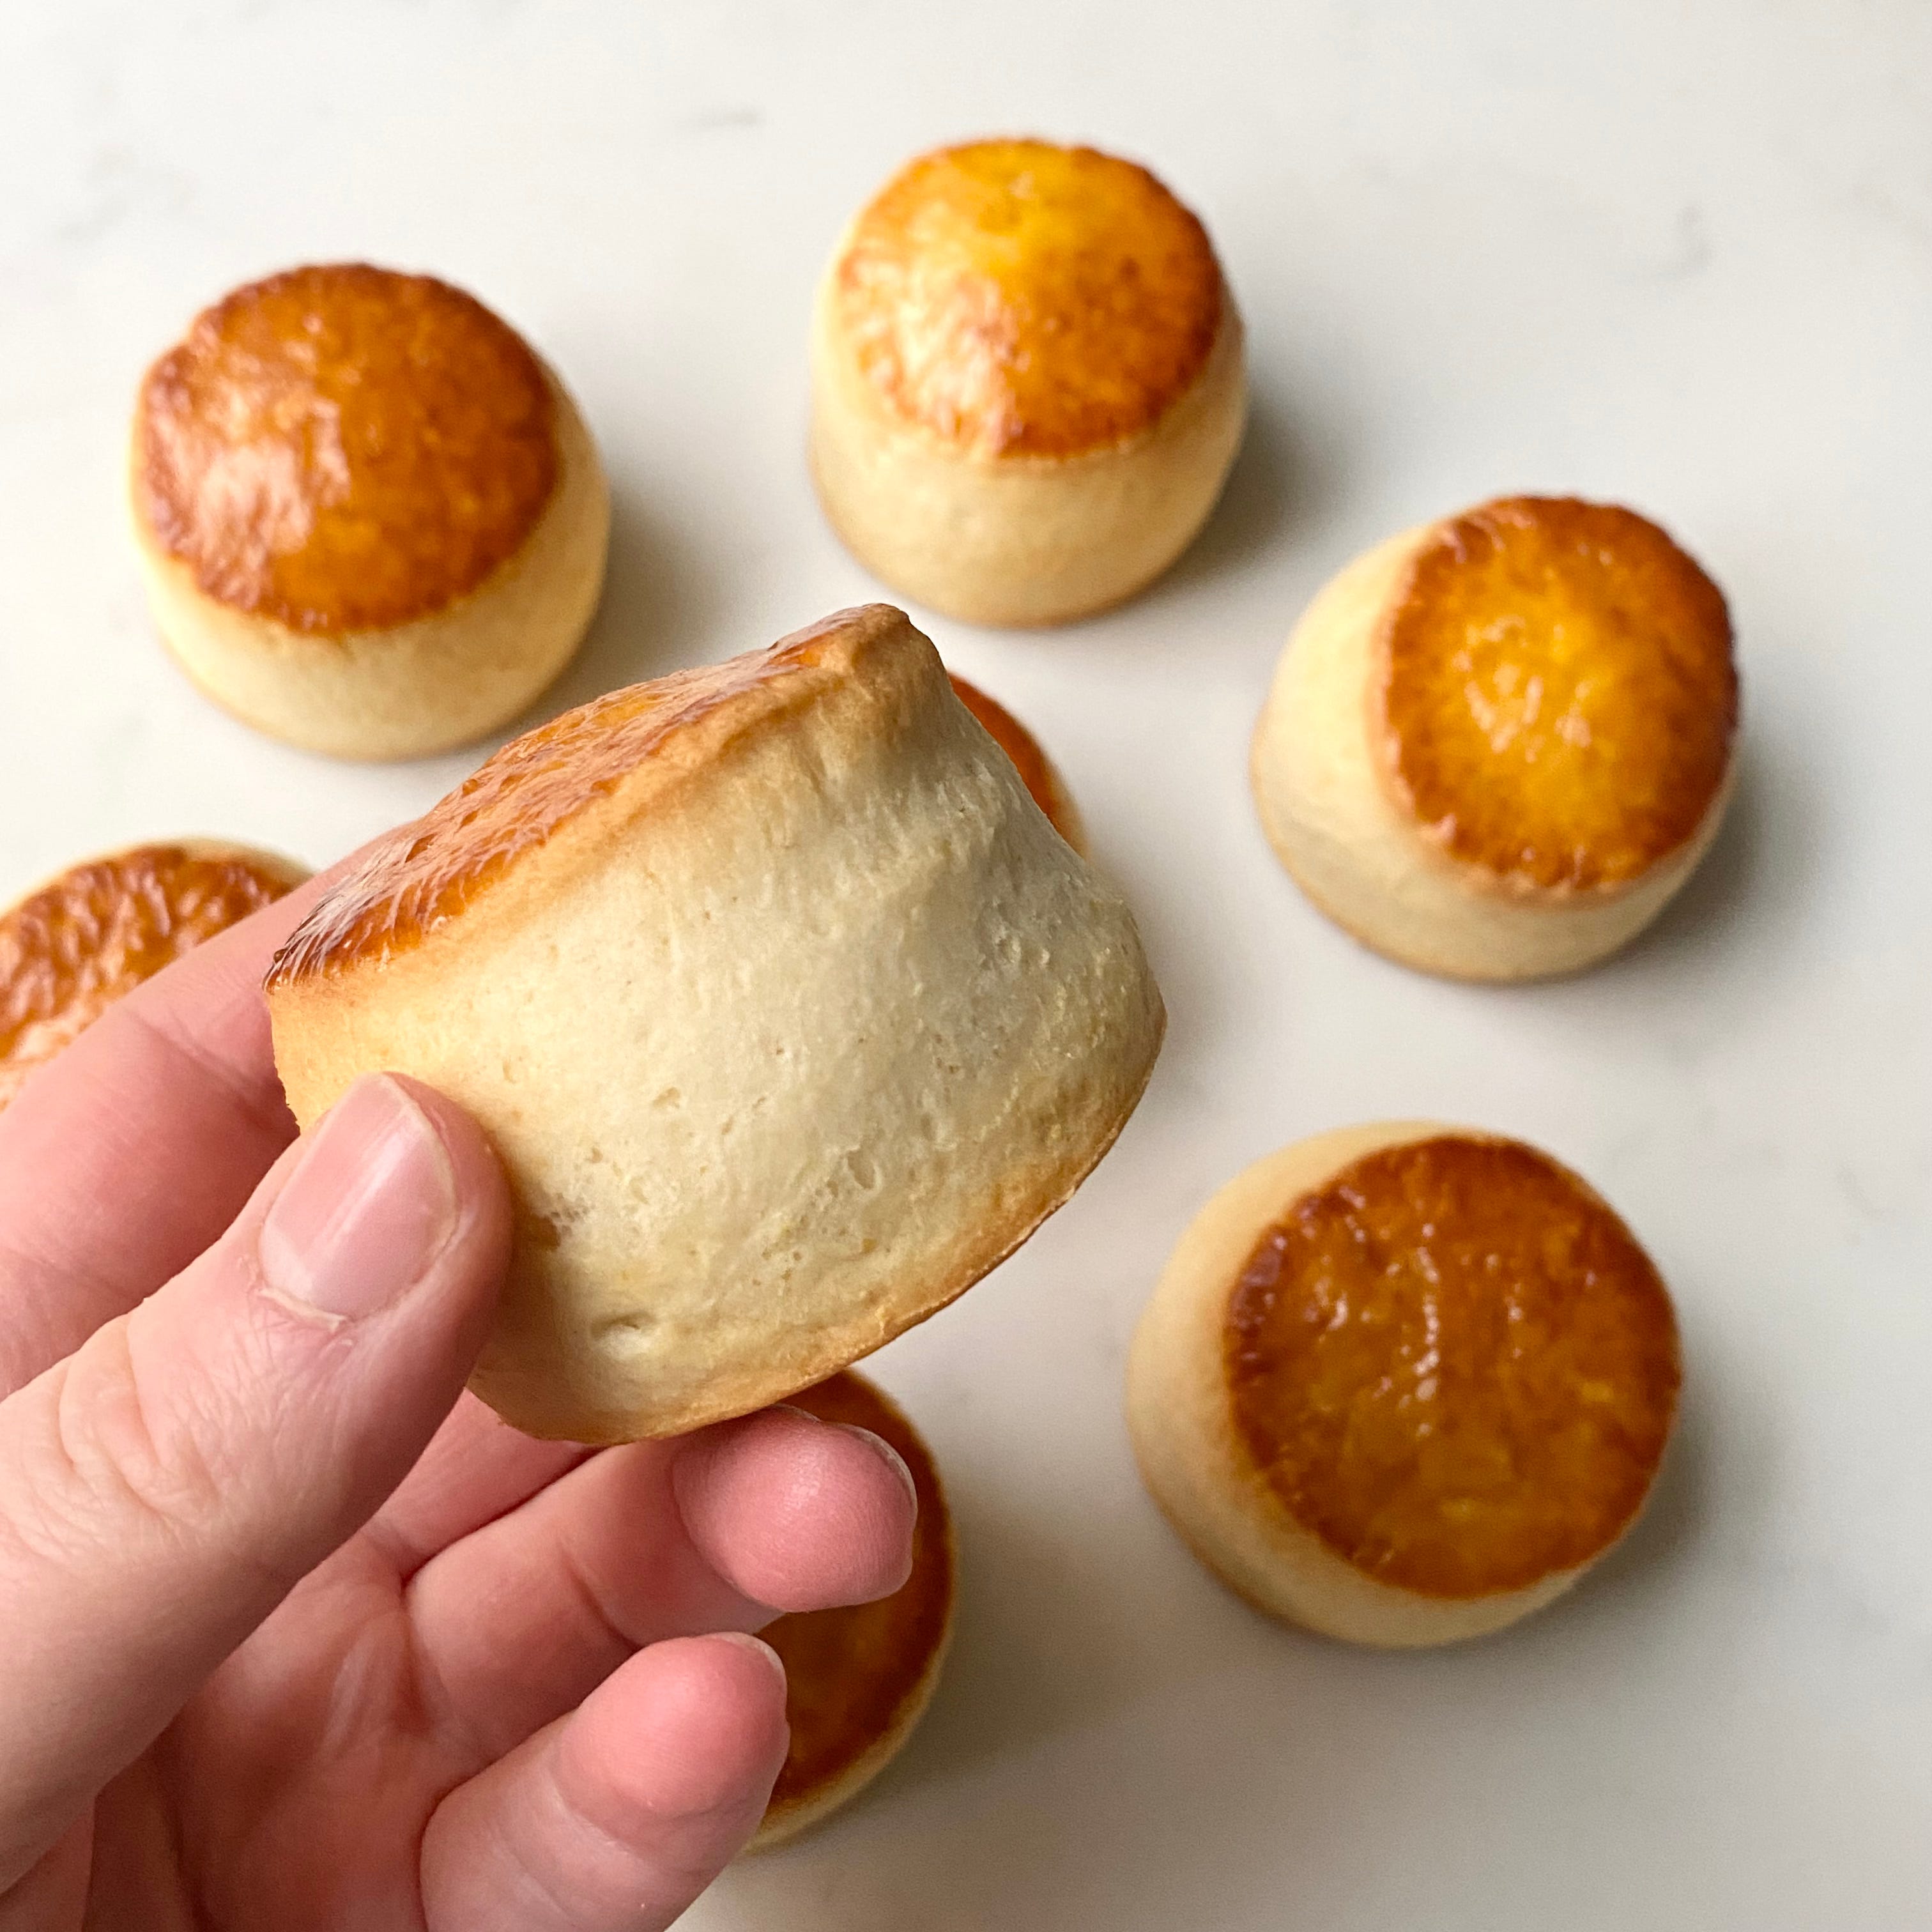
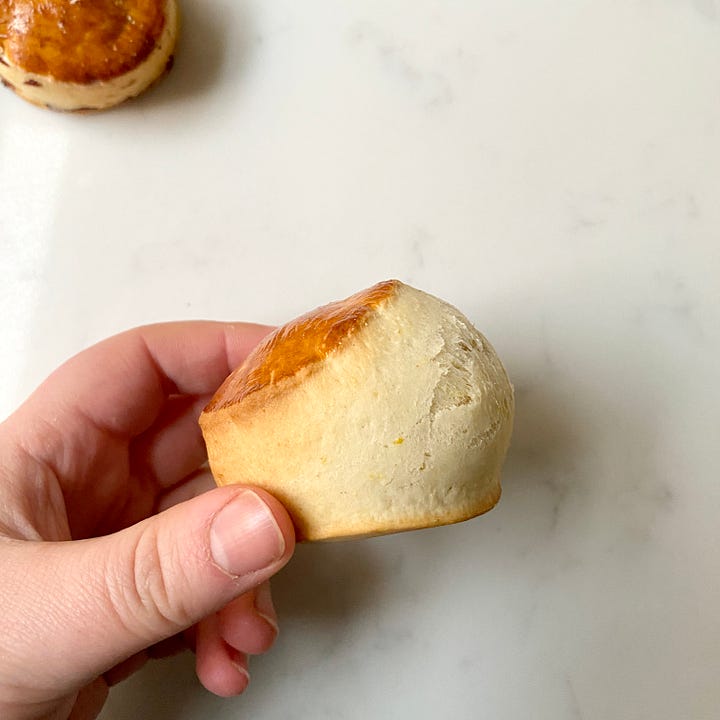
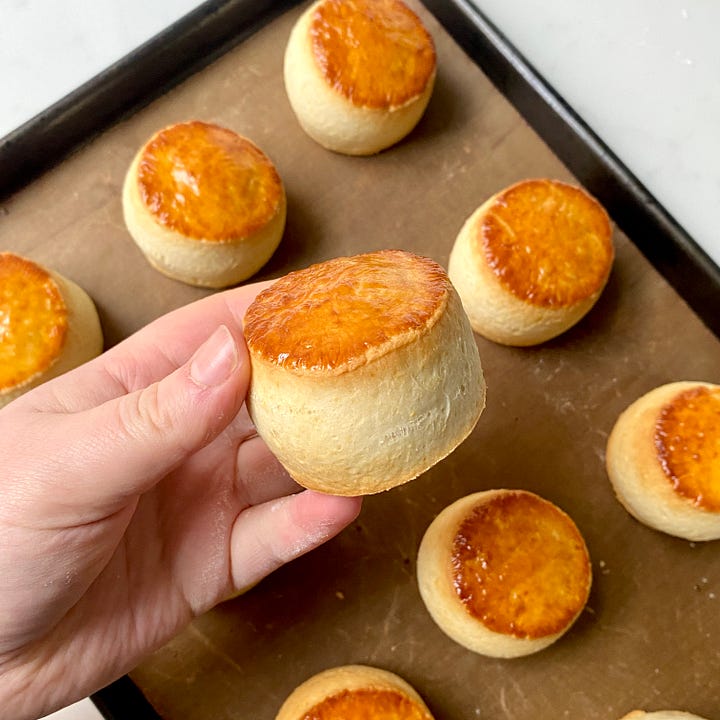
We’re making scones, but not any kind of scones. We’re making the perfectly light, fluffy scones that you’re presented with in a little napkin parcel when eating afternoon tea at a fancy five-star hotel. We’re not looking for craggy bakery-style scones (no hate to those scones, but they’re a project for another time). We want perfectly straight edges, cloud-like interiors and super shiny tops. These scones are so light that you can just eat and eat and eat them, I must have eaten a minimum of 6 a day since Wednesday when I first started messing around with the recipe and I’ve got through an entire tub of clotted cream all by myself.
This scone recipe is unlike any other I’ve used. It’s adapted from a recipe from the Ritz Hotel. I have no idea how this recipe came into my possession – like many of my recipes, it was scribbled on a scrap of paper and jammed into the back of one of my many notebooks. However it came to be, I’m grateful for it because it’s an absolute banger of a recipe.
I’ve made some adjustments to suit my preferences, but the method is what really sets it apart. Almost every scone recipe I’ve encountered has vehemently advised against kneading the dough, claiming that overworking will lead to tough, hard scones. This recipe takes the exact opposite approach. It uses strong flour, which is kneaded like bread dough to develop the gluten. The dough then undergoes a series of folds (similar to the technique used in making puff pastry). These folds help the scones rise nice and straight. It’s a bit of a faff, so you can skip this step if you’d prefer – but be warned, they won’t be anywhere near as neat!
We’re keeping this recipe really simple and not adding anything at all, but you can add anything you like, just beware that adding chunks like raisins does mean that they don’t rise quite as evenly. For paid subscribers I have a cranberry & orange scone recipe served with cherry plum jam.
Hotel-Style Scones
Ingredients - Makes 15 scones
400g strong flour
65g caster sugar
22g baking powder (I know it’s a lot!)
1/4tsp salt
Zest of 1 lemon
65g unsalted butter
240g whole milk
Egg Wash
2 egg yolks
2tsp whole milk
To Serve
Clotted cream (Americans, I know it’s hard for you to get, you can make your own, or just serve with butter)
Jam
Method
Combine all of the dry ingredients with the butter and lemon zest and mix until the butter has completely broken down and the mixture looks like breadcrumbs.
Switch to the dough hook attachment (or you can knead by hand).
Add the milk and mix on a low/medium speed (I used my Kitchenaid at speed 3) for 5 minutes. The dough should be slightly smoother and stretchier but it won’t look as smooth as a bread dough.
Form the dough into a rectangle and perform a single fold (see GIF below, the GIF dough contains cranberries, just ignore them!).
Roll out again and perform another single fold.
Roll the dough out to between 1cm-1.5cm, this will seem quite thin for scones but the dough rises a lot and if it’s any thicker the scones start to fall over.
Chill the rolled dough in the freezer for 30 minutes, freezing the dough helps the scones to retain their shape so that they stay nice and round.


View GIF in app or browser. Pre-heat the oven to 200°C(fan)/390°F and line a baking tray with greaseproof paper/re-usable baking mat.
Using a 5.5cm round cutter cut out the semi-frozen dough and place the scones onto your pre-prepared sheet. These also work great as little squares if you fancy a different shape.
With the leftover dough, form it into a ball and perform one singe fold, roll to 1cm-1.5cm and freeze again. After that just roll the dough as normal, the last few scones won’t be as neat but those can be chef snacks!
Mix together the egg wash ingredients and brush a thin layer of egg wash on top of each scone, making sure not to get any on the sides.
Leave the scones to sit at room temperature for 10 minutes before baking. This step is important! If you skip this step the scones will bake up all pointy and look like they’re wearing little hats.
Bake at 200°C(fan)/390°F for 5 minutes, turn the tray around and bake for a further 5-7 minutes until they’re golden brown on top and bounce back when given a light squeeze. It’s really important to turn the tray to get an even rise as you can see from the pictures below!
Scone bakes without turning the tray halfway vs with turning the tray Serve with jam and clotted cream.
Scones are best eaten fresh out of the oven but you can store them in an airtight container for up to 5 days and re-heat before serving, I give mine 15 seconds in the microwave or you can re-heat them for 4 minutes in the oven at 180°C(fan)/355°F.


I really hope you enjoyed the bake along! It’s been a challenge but I’ve had loads of fun doing it. I’ll be back very soon for the first day of our recipe advent calendar!
If you enjoyed this post and want to support my work please like, comment or share! It really helps my newsletter to grow so that I can continue to create and share free content without relying on paid ads. Thank you so much!🩷
hi! thank you for the recipe, you've become my go-to when looking for a specific bake! i wanted to ask, have you ever tried adding fruit to these?
Love this recipe! Thank you! ❤️